String of Turtles Care

My String of Turtles

Welcome to the world of String of Turtles – a houseplant that adds beauty to any indoor space. Are you considering growing this beautiful and unusual succulent? If so, you’ve come to the right place! In this blog post, we will explore the basics of caring for a String of Turtles in your home. We’ll go over soil types, potting methods, light needs, and how it can be very easy to propagate from one plant into many more with minimal effort. Pest treatment is also discussed here because proper care not only ensures that your Turtle Strands stay healthy. It also helps protect them against potential attacks from common pests. By taking time to understand what they need before getting started on this exotic journey – you’re sure to have a green thumb success story in no time!

Pot Types for String of Turtles

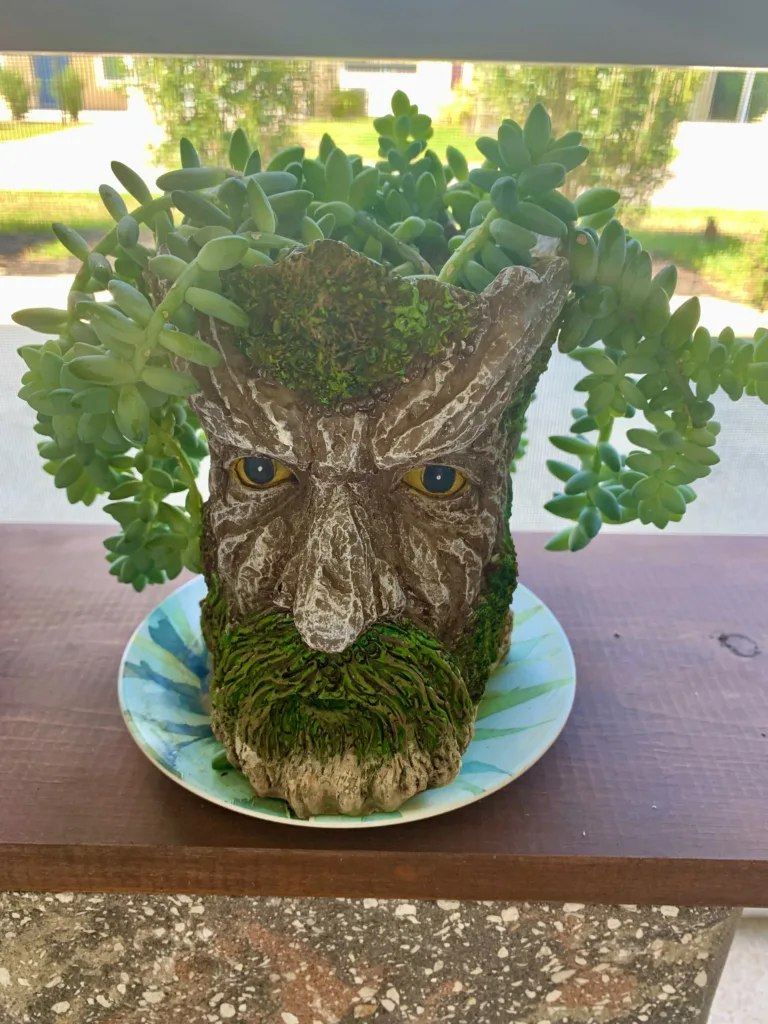
When caring for your string of turtles, it’s important to choose the right pot. A shallow planter with drainage is the best option. This allows enough root space while keeping the soil aerated and helping to prevent rot. Pots made of terra cotta, resin or plastic are the best choice, as they allow water to evaporate more easily and keep soil airier. If you use a plastic pot, ensure it is well-drained and able to handle the humidity levels of your environment. If possible, choose a larger planter than necessary to give the plant more room to grow. A hanging pot is a great option for a string of turtles, as it allows air to circulate and excess water to drip away easily. I love these pot head planters for my smaller hanging succulents.
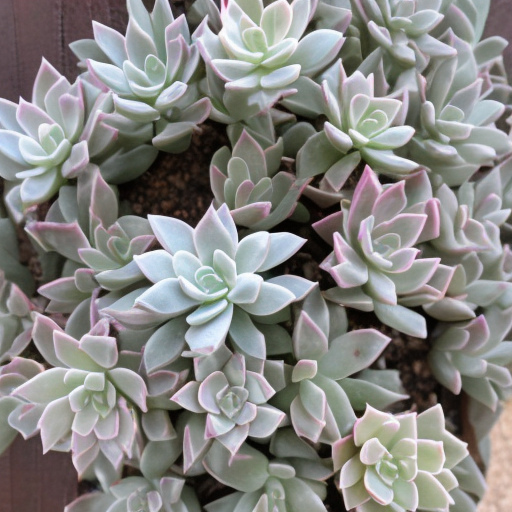
Soil

Use a succulent mix or similar soil formulated for succulents that drain well. It should contain perlite, pumice, and/or coarse sand to help air movement in the soil. The addition of some organic matter will provide nutrition for your string of turtles as it grows. Whatever you choose, make sure the soil is light and airy to promote good drainage.

Light Requirements

As with any other houseplant, it is important to provide the right amount of light when caring for a String of Turtles. It prefers bright, indirect light and little direct sun. If the light is too harsh, their growth will be slower, leaves will turn yellow or brown due to sunburns, and flowers won’t appear as often. Avoid full shade as this can cause leggy growth. When positioning the plant in your home or office space, give it 6-10 hours of filtered sunlight each day. From autumn to spring position closer to the window to get more indirect light from outside. But from mid-Spring to mid-Autumn move away from direct sunlight to avoid burning.

Grow lights are an ideal supplementary light source when natural daylight is limited. LEDs work best, and you can use a timer to ensure your String of Turtles get the right amount of light each day – 8-10 hours is a good rule of thumb. Make sure to position the lights at least 18 inches away from the plant – any closer and you risk burning it.

Water Requirements

Caring for string of turtles is a labor of love. These unique succulents thrive in bright light but require the proper water balance throughout their growth periods to stay healthy and happy. Water your string of turtles every few weeks, saturating the soil completely – be sure to check its moisture level with your fingers to ensure it isn’t too dry or too wet. Let the soil dry out between watering sessions. This will help prevent root rot and any other potential diseases. Remember: when it comes to water, moderation is key! Keep your string of turtles hydrated but not soggy by providing just enough water for optimal health.

Pest Prevention and Control

The string of turtles is an interesting succulent. While typically easy to care for, one area of attention is pest prevention and control. To prevent pests, start by keeping the pot and soil clean. The preferred pot type for a string of turtles is clay due to its ability to dry out quickly between waterings.

Furthermore, be sure to use quality soil when repotting and look closely for any signs of pest infestation such as webbing or small bugs during this process. For improving air circulation, it is best not to overcrowd plants inside pots or on shelves so that light requirements can be evenly met. Finally, if pests are spotted, take action swiftly with a mixture of insecticidal soap and neem oil to get the bug problem under control. With proper pest prevention and management techniques in place, successful propagation and maintenance of your string of turtles plant will have a long healthy life!

String of Turtles Propagation

Propagating String of Turtles is a simple process using its leaves and stems, or sections of its trailing stems. To propagate this succulent, cut a healthy section of stem at least 2-3 inches long and remove the leaves near the bottom to create a smoother surface. Then, submerge the stem in a propagation station filled with room-temperature water and place it in an area that receives bright but indirect sunlight. After 1-2 weeks, calluses roots should develop from the bottom nodes on the stem and you can transplant it into a small pot filled with well-draining soil. Allow soil to dry out completely between thorough waterings and provide plenty of bright, indirect light to your plants for optimal health!

String of Turtles Plant

Taking care of a string of turtles isn’t difficult, but it does require paying attention to their needs. They, in turn, will reward you with lush foliage, air-purifying qualities, calming vibes, and great interest from your friends. To ensure success, make sure your pick the right pot type and soil for optimal growth. Provide adequate light exposure to spark growth and life into the plant, as well as regular watering and pest prevention techniques. And don’t forget that propagation is also easy with simple approaches! With the right care, your String of Turtles will be around for many years to come. Why not give this quirky plant a try today?

Please be sure to check out my Gardening Blog Post Page for more tips on all types of gardening. Including Seed Starting, Orchids, Water Gardening, Coldframe Gardening, Indoor Bulb Gardening, Hydroponics, Container Gardening, Mums, Herbs, African Violets, planting Bulbs, Flower Gardening, Vegetable and Fruit Gardening, Indoor Houseplants of all kinds, Cactus, Succulents, Hanging plants, Deer resistant plants and even Bird, Bee, Butterfly and Hummingbird Gardens!

Ghost Plant Succulent Care

Ghost Plant Succulent

The Ghost plant – are you looking for an easy-to-care-for succulent that is low maintenance and adds a beautiful, unique flair to your garden? Look no further than Graptopetalum paraguayense, also known as the “Ghost Plant“. This eye-catching stone crop features translucent leaves with potential pinkish tones radiating from its rim. It requires minimal care and maintenance but can bring big beauty dividends in any garden or container plant arrangement. In this blog post, we’ll take a closer look at Ghost Plant Succulent care. To understand how it grows in nature and what special care needs it has when grown as an ornamental houseplant.

Graptopetalum Paraguayense Ghost Plant

Beautiful, straightforward, and easy to care for, Graptopetalum paraguayense, more commonly known as the Ghost Plant, is a succulent that stands out with its unique characteristics. Native to northeastern and central Mexico and parts of South America. The plant grows best in hot and arid regions. Its foliage consists of chubby grey-green leaves with pink tips which branch out at different angles creating an eye-catching decorative pattern. The Ghost Plant can survive for a long time without water or fertilizer. Also it is usually propagated by offsets from new plants growing from the main growth. This fascinating succulent is perfect for improving indoor air quality and adding a piece of nature to your home.

Soil Requirements

Ghost Plant, a popular succulent with beautiful grey rosettes, requires well-draining succulent soil for proper growth. These succulents should be planted in light, sandy soils that will drain quickly to prevent root rot and other bacterial diseases that can harm the plant. To ensure proper drainage and fertilization, you may want to mix in some perlite, pumice or course sand. Remember to water only when necessary, allowing the soil to dry out completely between waterings. Otherwise, your Graptopetalum paraguayense could get root rot from overly wet conditions. With just a little extra effort, you can keep your Ghost plant happy and healthy!

Watering

Graptopetalum paraguayense, is beautiful and easy-to-care-for succulent. When it comes to watering needs, this plant is considered quite forgiving. Although you should always err on the side of caution when caring for any new plant. Generally speaking, the Ghost Plant should be watered sparingly and only when the soil has become mostly dry. Aim to give your succulent about an inch of water every 1-2 weeks during spring and summer. And then cut back for winter, with just occasional misting as enough moisture. As with most plants, getting to know your individual Graptopetalum paraguayense will help you decide how much (or little!) water it needs to thrive.

Light Requirements

The gorgeous Ghost Plant, is a unique succulent that requires just the right amount of sunlight to keep it healthy. It thrives in bright light but cannot tolerate blazing rays from the noonday sun or direct heat from an indoor heater. This succulent needs some radiating heat for a few hours each day. Preferably in the early morning or late afternoon when temperatures are mild. When the Ghost Plant is given sufficient bright light and daily watering and proper fertilization during its active season, it will create beautiful colors and growth patterns with stunning rosettes lined with soft pointed leaves that can range in color from soft grey to greenish-pink hues.

Grow lights are a great way to ensure that your Ghost Plant receives the light it needs for healthy growth. The best type of grow light for Graptopetalum paraguayense is fluorescent because it is less intense than other types of lighting and won’t damage delicate leaves. Aim to have the lights on between 8-10 hours a day, depending on the intensity of the light and the time of year. During spring and summer, you may need to increase this slightly to ensure your plant receives enough light. Make sure to adjust the timer accordingly to avoid “burning” the leaves over time.

Containers for Graptopetalum paraguayense

A pot with drainage holes is an absolute must, otherwise, the roots can become waterlogged and rot; plastic containers are light and less likely to tip over than their terracotta counterparts but should be used with caution because they may retain too much heat in warmer months. When it comes time to choose a decorative pot for your Ghost Plant, there are plenty of attractive options that won’t overwhelm the sparsely leafed beauty of this succulent – terracotta pots in natural colors work very well, as do sleek modern styles made from materials such as ceramic and metal.

Hanging pots are another great option for displaying Graptopetalum paraguayense. Smaller plant varieties can be placed in a hanging glass terrarium or else hung from the ceiling with a macramé plant hanger. Larger, more mature plants may benefit from being placed in baskets lined with moss or peat to ensure good drainage. Whichever type of container you choose, make sure it has plenty of drainage holes to allow excess water to drain out completely between waterings; otherwise, your Ghost Plant could get root rot from overly wet conditions. With just a little extra effort, you can keep your Graptopetalum paraguayense happy and healthy!

Fertilizing Ghost Plant Succulent

Although it isn’t necessary to fertilize your Ghost Plant, giving it a small dose of liquid fertilizer during the growing season can help encourage lush growth. A balanced liquid cactus fertilizer diluted by half should be applied every two weeks from spring to late summer. In winter, you can reduce this to once per month or even skip fertilization altogether. As always, keep an eye on your plant. Adjust the frequency of fertilization as needed to maintain healthy growth.

Your Ghost Plant will thank you for taking the time to provide it with just the right amount of sun, water, and fertilizer. A little extra effort can go a long way toward keeping this beautiful succulent healthy and happy!

How to Propagate Graptopetalum paraguayense Ghost Plant

Are you looking for an easy-to-care-for perennial succulent to show off in your garden. Look no further than the Ghost Plant, also known as Graptopetalum paraguayense. This attractive plant is simple to propagate and can thrive in areas that have well-drained soil. For the best results, cut a piece of the plant’s stem so that it has a few leaves remaining. Allow it to dry out for a day before planting it in well-draining soil. Then place it in partial shade or direct sunlight for optimal growth. With these steps, you can be sure your Graptopetalum paraguayense will thrive!

Happy Gardening!

In conclusion, the Graptopetalum paraguayense, or Ghost Plant, is a stunning succulent. It grows in a rosette form and its leaves are characterized by vibrant green and pink or purple hues. While the plant can take varying levels of sunlight. It’s important to water it appropriately and use well-draining soil. When potting this succulent, be sure to use containers with proper drainage holes to prevent root rot. Propagating this type of succulent is easy as well – simply remove some leaves and place them in sandy soil. Overall, with just minimal effort and care, you can get a beautiful display of pinkish-purple and green foliage indoors or outdoors with the Ghost Plant. So if you’re looking for an easy-to-care-for succulent that’ll still add quite the flair of color to your garden or home, the Ghost Plant is worth considering! Get on yours today!

Please be sure to check out my Gardening Blog Post Page for more tips on all types of gardening. Including Seed Starting, Orchids, Water Gardening, Coldframe Gardening, Indoor Bulb Gardening, Hydroponics, Container Gardening, Mums, Herbs, African Violets, planting Bulbs, Flower Gardening, Vegetable and Fruit Gardening, Indoor Houseplants of all kinds, Cactus, Succulents, Hanging plants, Deer resistant plants and even Bird, Bee, Butterfly and Hummingbird Gardens!

Echeveria Black Prince

Echeveria, Black Prince or Hens and Chickens. As a gardener, you know that adding unique plants to your space can be an exciting and rewarding experience. And if you’re looking for something extra special, Black Prince also known as Hens and Chickens may be just what you’re looking for. This stunning plant is a surefire way to add instant drama with its bold hues of deep red and purple coloring. But the beauty isn’t where it ends when it comes to this variety. Its strong tolerance for differing conditions makes this an ideal specimen for both beginner gardeners and seasoned pros alike! Learn more about how best to care for Echeveria Black Prince in this blog post. Including tips on light, water, pot type, soil type, fertilizer, pest control, propagation, and more. Get ready to dive into discovering all the characteristics of this beautiful succulent today!

Black Prince Succulent

Introducing Black Prince, a unique and beautiful succulent that is sure to brighten up any space. The deep burgundy color of its foliage and contrasting green highlights make it stand out from the crowd. With minimal care, you can enjoy this stunning member of the Crassulaceae family for years to come. Its low water requirements, dense rosette structure, and ease of propagation mean that creating an entire succulent garden would be a breeze with Echeveria Black Prince. The striking centerpiece in any collection, it’s no wonder why this elegant specimen is so popular!

Echeveria Light requirements

Echeveria does best in bright, indirect light. If possible, provide the plant with some afternoon shade to prevent sunburn. Too much direct sunlight can cause leaf tips and edges to become dry or discolored. In winter, you can move the succulent near a south-facing window to keep it happy during the cold months. If the light levels are too low, the plant may become spindly or lose its rich coloration.

While natural light is always best for plants, grow lights can be used to supplement Echeveria Black Prince’s lighting needs. When using grow lights, the type of bulb is important to consider. LED or fluorescent bulbs are generally preferred over incandescent bulbs because they emit less heat and provide more focused light. The exact amount of time your Echeveria Black Prince should receive supplemental lighting will depend on the type of bulb being used as well as its wattage. As a general rule of thumb, however, try to maintain a distance between the plant and light source that is approximately 4 times the bulb’s wattage. For example, if you’re using a 40-watt bulb, keep the succulent at least 16 inches away from the light source. This will provide enough light without overdoing it.

Finally, the amount of time your Echeveria Black Prince receives supplemental light will depend on its specific needs. Start out with a few hours and adjust accordingly until you find the ideal balance for your plant. Too little and it won’t thrive; too much and you risk burning the leaves. With proper lighting, you should soon be enjoying vibrant colors and lush growth from this elegant succulent.

Echeveria black prince soil Requirements

When it comes to the soil for Echeveria Black Prince, you want a light and well-draining mix. A cactus potting mix or succulent-specific mix is ideal. Be sure to use one that not only drains quickly but also contains some organic material, such as decomposed bark or coir. This will help the soil retain moisture, while still allowing excess water to drain away quickly.

Best Pot for Echeveria Black Prince

When it comes to pots for the Echeveria, a shallow terracotta pot is best. The porous material of the terracotta will allow the soil to dry out quickly while also providing adequate air circulation. For added drainage, you can add some gravel or pebbles at the bottom of the pot before adding your succulent soil.

If you’re looking for something a bit more decorative, you can also use a shallow ceramic pot or hanging basket with plenty of drainage holes. Hens and chickens are also excellent options for grouping multiple succulents in one container.

Water requirements

When it comes to watering Black Prince, the key is to let the soil dry completely between waterings. During the summer months, be sure to check your succulent every few days for signs of wilting and adjust the amount of water accordingly. In winter, you may find that your plant needs less water than in summer, as the weather is cooler and there is less evaporation occurring.

Fertilizing Your Echeveria Black Prince

Looking to keep your Echeveria Black Prince thriving? Fertilizing your plants is an important step in keeping them healthy. Black Prince needs a ratio of nutrients like nitrogen, potassium, and phosphorous that is similar to that found in natural soil. Make sure the fertilizer you choose is specifically formulated for succulents and cacti as regular houseplant fertilizers may be too rich or contain the wrong type of nutrients for your echeveria. When choosing a fertilizer, look out for added trace elements such as iron, manganese, and zinc which are essential components of a balanced nutrition plan. Aim to fertilize lightly every two weeks during the main growing periods of spring and summer.

Pest Control

Caring for your Echeveria Black Prince doesn’t have to be daunting. As an easy-care succulent, the Black Prince is well suited for almost any environment. Though usually low-maintenance, it may at times require attention from pest infestations. Keeping watch for mealybugs, aphids, and scale insects can help ensure your Echeveria Black Prince remains in ideal condition.

The best way to control pest is to remove them by hand. If there are too many of these pests, you can rinse the plant off with a stream of lukewarm water. You can also use insecticidal soap or even natural remedies such as neem oil or horticultural oil to help control more serious infestations. The right combination of pruning and chemical treatments should eliminate the problem in no time. If unsuccessful, contact a professional who can diagnose and deal with more serious issues. With timely care, you’ll have your Echeveria Black Prince thriving again in no time!

Propagating Echeveria Black Prince

Echeveria Black Prince is a striking succulent, with dark purple to black leaves on a solitary stem. If you’re lucky enough to have one of these plants in your home, you may be interested in learning how to propagate it! Propagating this species is relatively easy and takes minimal effort. To do so, simply remove the offsets or pups from the base of the plant without damaging the parent plant, then replant them into some soil mixture specifically for succulents or cacti. Make sure to keep the soil moist for the best chances of success and give them plenty of bright light but not direct sunlight. The extra time and energy invested into propagating Echeveria Black Prince will be well worth the effort when you can enjoy a few more of these beautiful plants around your house!

Echeveria Black Prince Variegated

You may have noticed that there is a variegated version of the Black Prince Echeveria. Variegation means that some of the plant’s leaves have streaks or patches of lighter colors, usually white, yellow, or cream. Although they require more specialized care than other succulents, variegated varieties are truly stunning and worth the extra effort! Variegated Echeveria Black Prince needs more light than its non-variegated counterparts, but even then direct sunlight should be avoided. Keep your plant in bright, indirect light to prevent any sunburn or discoloration of the leaves. Also, make sure that you are careful not to overwater as this can cause root rot. With proper care, your variegated Echeveria Black Prince will remain healthy and beautiful for years to come!

Common Questions about the Echeveria Black Prince

For those looking to add a unique touch to their home or garden, Echeveria Black Prince is an ideal choice. A rare succulent sometimes called a “hens and chicks” plant, it gets its name from the uniquely dark purple and black pointed leaves–a distinct twist on the conventional green. What makes Echeveria Black Prince so special? Understandably, there are several common questions about this interesting variety of echeveria. The primary concern is usually its ability to flourish indoors. As long as proper care is taken for temperature, light, and soil moisture levels, this easy-to-care-for plant can thrive in any setting – no matter how much sun or shade your home receives. Additionally, the Black Prince requires very little pruning and minimal watering throughout the year; simply water when the soil has dried out completely. With its eye-catching coloration and low maintenance needs, Echeveria Black Prince is an excellent addition to any houseplant collection!

Happy Gardening!

The Echeveria Black Prince is a stunning succulent with dark gray to almost black rosettes. It’s an easy-to-care-for plant that can thrive indoors or outdoors while needing minimal time and resources. If you’d like to start growing your own Echeveria Black Prince, remember that it needs the right soil, light, and water to grow successfully. Additionally, make sure you provide ample amounts of fertilizer, pest control measures, and regular care. Having all this in mind, now you know all the basics you need to grow a happy and healthy Echeveria Black Prince! So go ahead, buy your echeveria today, and start enjoying the simple beauty of this succulent in no time!

Please be sure to check out my Gardening Blog Post Page for more tips on all types of gardening. Including Seed Starting, Orchids, Water Gardening, Coldframe Gardening, Indoor Bulb Gardening, Hydroponics, Container Gardening, Mums, Herbs, African Violets, planting Bulbs, Flower Gardening, Vegetable and Fruit Gardening, Indoor Houseplants of all kinds, Cactus, Succulents, Hanging plants, Deer resistant plants and even Bird, Bee, Butterfly and Hummingbird Gardens!

How to Care for Aloe Vera Plant

how to care for aloe vera plant

Aloe vera is a natural choice for even the least experienced gardener. Admired for its unique medicinal and beauty benefits, as well as its ease of care. It’s no wonder that people all over the world have been using this succulent plant to cure various ailments since ancient times! Today, it continues to be used in beauty products and shakes due to its numerous health benefits. Such as increasing blood circulation, boosting energy levels, and treating skin issues like acne. I use mine for sunburns or other types of burns. I simply pick a leaf, split it open and apply the gel to skin, it soothes the burn immediately.

But before you get too excited about having your own Aloe Vera — let’s discuss what requirements must be met to make sure these plants grow healthy! In this blog post, we will cover important topics related to the proper care of your plants. From water requirements and suitable types of soil, pot choices. And even fertilizers needed at specific intervals throughout the year. With special attention given to common pests & how they can easily be prevented/ controlled. And how you can use pieces from an existing plant or a pup offshoot in order facilitate propagation. Whether you’re new to gardening or already a pro. Understanding these tips on properly taking care of your aloe vera plants will ensure maximum health & a hassle-free experience!

Get to Know Your Aloe Vera Plant

This succulent is a popular houseplant due to its features that benefit overall air quality, and its size variations that can fit in almost any room. Of the three main species, Aloe vera is loved for its wide variety of colors such as green, creamy white, yellow, pink, or red. The three sizes range from a miniature aloe at 8 inches tall to a giant aloe at 5 feet tall. Caring for your aloe plant is simple as it only requires moderate watering every week. It prefers well-draining soil and clay pots to have enough oxygen around its roots.

A balanced fertilizer should be introduced several times per year to provide essential soil nutrients for the plant to stay healthy. To extend the life of your plant, remember to continually check for pests. Pest like aphids and mealybugs could harm the plant’s health over time. Once established, you can easily propagate more aloe plants from the original with a small cutting from the leaves or offsets growing from the parent base. With proper care, you’re sure to enjoy this hardy plant for many years!

How to Water Aloe Vera

Aloe vera is a popular succulent plant and is often used for both ornamental purposes as well as its medicinal uses. While they are quite a drought tolerant, there are still many considerations to keep in mind when it comes to understanding aloe vera water requirements. Generally, outdoor plants can be watered more frequently than those grown indoors. However, it is still important to make sure not to overwater this succulent.

Outdoor aloe plants should be allowed to dry out between each watering, while indoor plants can remain wet for a few days before drying out again. When fertilizing your aloe plants, be sure to use a balanced fertilizer at half the strength of what is recommended on the fertilizer label for best results. Propagation of this plant occurs naturally via offsets or as I call them babies. They grow off the sides of mature aloe vera mother plants. It’s also possible to propagate through stem cuttings or leaf cuttings.

Best soil for Aloe Vera Plant Indoors

These easy-care succulents that can thrive in any home. When it comes to soil type, a light, and airy succulent potting mix is best for aloe vera. Or you can use a mix of half perlite and half potting soil. Aloe vera plants prefer the soil to dry out between watering and they want soil that has good drainage, too. To maximize drainage, use clay pots with drainage holes at the bottom as well as quality potting mix or pre-made cactus/succulent mix. Keep a close eye on your aloe vera plant’s soil moisture level to ensure it always has enough water but not too much. With proper soil choices, water requirements, fertilizers, and pest management your aloe vera plant should be successful!

Best Pot for Aloe Plants

Having an aloe plant at home can be a wonderful addition to any living space. Not only is it an aesthetically pleasing succulent. But aloe vera is also known for its healing properties. However, to ensure your plant stays happy and healthy, it’s important to choose the right pot type. The most suitable pots tend to have proper drainage and good airflow. Ceramic or terracotta pots are ideal. Other pot types such as decorative containers or hanging planters may look more stylish. Although they aren’t necessarily the best option for an aloe vera due to the limited drainage and airflow. Ultimately, make sure the pot you choose meets all of the requirements for your houseplant companion to reach its fullest potential.

Best Fertilizer for Aloe Vera

When it comes to fertilizing your Aloe plants, the best option is a fertilizer specifically designed for this succulent species. These will have an optimal nutrient concentration tailored to the plant’s needs. This can help prevent any potential harm from over-fertilization. Remember to water your Aloe Vera plants before or after fertilizing. This will help ensure that all of the nutrients reach its roots. With a balanced fertilizer and mindful application, you can help your Aloe Vera stay as healthy and vibrant as possible!

Giving your Aloe Vera the right amount of fertilizer is an essential part of keeping it healthy and thriving. Too much or too little could cause harm over time. With just a bit of extra attention in providing the necessary nutrients, you can ensure that your Aloe Vera stays healthy and happy!

Pest Control for Your Aloe Vera Plant

Aloe Vera plants are a commonly found succulent and make for great houseplants. But keeping pesky pests away from your aloe vera can be a challenge. Be sure to check for pest like aphids and mealybugs that could harm the plant’s health over time. I use either insecticidal soap or neem oil to keep them at bay.

With the right maintenance and care of your aloe vera plant, you can naturally keep pests at bay. Proper watering and soil type, as well as good potting techniques, can help manage infestations that can damage aloe plants. Additionally, be mindful of natural fertilizer you choose to use on your aloe as some might attract more troublesome pests. With these tips, you can protect your Aloe Vera from any pesky intruders and enjoy this unique succulent for many years to come!

How to Propagate Aloe Vera

Propagating the aloe is a great way to increase your succulent collection or share with others and can be done relatively easily. One way is by cutting off some of the lower leaves, making sure there are no attached roots or bits of soil. Place your cutting in water until they form new roots (which should take about two weeks). Then transfer the new root-covered leaf to a pot filled with quality, well-draining soil.

For optimal growth, ensure that your propagated plant is kept in temperatures between 65 – 75°F (18 – 24°C). Watering should be done sparingly for best results; letting the soil almost completely dry out before watering again. Sometimes your aloe vera will have what I call babies or smaller plants that start at the base of the original plant. You can use a sterile knife to cut off the baby and plant in its own pot. With these tips, you can easily propagate Aloe Vera and enjoy its ornamental beauty for many years to come!

Happy Gardening!

Aloe Vera is a healthy and low-maintenance plant that can be a beautiful addition to any home. With an understanding of basic aloe vera care requirements such as watering, potting soil, pot type, and pest control, you can keep your aloe looking vibrant and lively. Just remember to water it properly, proper soil type and pot type, apply fertilizer carefully, and use pest control methods when needed. With these few tips in mind, you’ll be able to successfully propagate and manage your aloe plant. There’s something special about seeing your plant come to life from just a few leaves. So go ahead take the plunge and get yourself an aloe plant today!

Please be sure to check out my Gardening Blog Post Page for more tips on all types of gardening. Including Seed Starting, Orchids, Water Gardening, Coldframe Gardening, Indoor Bulb Gardening, Hydroponics, Container Gardening, Mums, Herbs, African Violets, planting Bulbs, Flower Gardening, Vegetable and Fruit Gardening, Indoor Houseplants of all kinds, Cactus, Succulents, Hanging plants, Deer resistant plants and even Bird, Bee, Butterfly and Hummingbird Gardens!

Kalanchoe Thyrsiflora

If you’re looking for a beautiful and exotic flowering plant to add to your garden, the Kalanchoe thyrsiflora is an excellent choice. Not only does this species boast gorgeous yellow flowers and lush foliage, but it’s also one of the easiest plants to grow! From its water needs and light requirements to soil type and potting options.

This blog post will give you all the information you need on caring for K.thyrsiflora so that it can look it’s very best in any outdoor garden or indoor container setup. Learn how much water it needs, what kind of soil is best suited for each plant type, which types of pots work best for this particular flower variety, proper fertilizer guidelines, and tips on how to successfully propagate new plants from existing ones so that your beloved property stays in full bloom year-round!

Paddle Plant

Kalanchoe thyrsiflora, otherwise known by its common name, paddle plant, or dessert cabbage is an interesting succulent with interesting characteristics. It produces reddish flowers when it experiences drought-like conditions. It is one of many popular succulents among gardeners and collectors alike. In terms of care, paddle plant needs a moderate amount of water to thrive. It will do best with bright light or partial shade weather conditions.

Its soil should be well draining such as a cactus mix so its roots can store as much moisture as possible. When potting this plant you can use a clay pot or a plastic container both work fine. Propagation-wise, it is quite easily done through division or leaf cuttings. All in all the paddle plant is a beautiful yet unique addition to any home. Kalanchoe does well with only moderate maintenance effort required to keep it looking its best.

Water requirements

Kalanchoe thyrsiflora, also known as the paddle plant or desert cabbage, is a popular succulent with unique foliage and colorful flowers. One key component of its successful cultivation is understanding its water needs. This plant stores water in its leaves, so it doesn’t need frequent watering throughout the year. Water only when the soil becomes dry. About once every two weeks during warmer weather and less frequently during cold weather. Overwatering can lead to rot. Monitor how quickly the soil dries out to determine your best watering schedule. Avoid wetting the foliage while you are watering, as this is not healthy for the plant. Though it’s drought-tolerant, always be sure your paddle plant is getting its required amount of water to thrive!

Light Requirements

As its other names suggest, Kalanchoe Thyrsiflora is a succulent well adapted to dry, warm climates. While known as the ‘paddle plant’ for its paddle-shaped leaves. It’s also known as ‘dessert cabbage’ owing to its preference for bright light. To keep your Kalanchoe Thyrsiflora looking healthy, you should place it somewhere bright with plenty of natural light. Or you can supplement it with fluorescent or LED lighting which gives off the warm tones these plants need. You should also rotate them periodically so the entire plant receives an even amount of light. Having each side receive some amount of light helps give your paddle plant that round and full look typical of happy succulents!

Soil Type

The soil type that is best suited for the paddle plant, also known as a Flapjack plant, is well-draining succulent soil. This is an important factor in the health of the plant, as it allows water to flow freely and prevents water stagnation. If you want to mix a good breathable soil, try a mix of equal parts organic matter such as succulent potting soil and perlite or sand. Some gardeners have even suggested combining one part of horticultural charcoal with the same ratios as above for extra drainage. Ultimately, when it comes to Kalanchoe Thyrsiflora’s soil type needs it’s key to ensure your chosen blend creates an aerated environment that does not retain too much water.

Pot Type

Although the paddle plant, also known as Kalanchoe Thyrsiflora, is a succulent, it needs a little extra special care when it comes to pot type. Be sure to use a pot with drainage capabilities and choose one that is slightly larger than the previous pot. This will give your paddle plant plenty of room for growth. The material you choose like a ceramic pot should be heavy enough so that it does not tip over easily. Yet light enough for ease in maintenance. Terracotta can be a great option because it allows air circulation which helps reduce moisture-related issues such as root rot. No matter what type of pot you choose for your Kalanchoe Thyrsiflora, just make sure it matches the beauty of this extraordinary succulent!

Fertilizer what type and how often

Kalanchoe Thyrsiflora, otherwise known as desert cabbage succulent, requires adequate fertilization to remain healthy and thriving. This can be done most successfully with a balanced, water-soluble fertilizer of 10-10-10 blended specifically for blooming plants. When feeding your plant, be sure to dilute the fertilizer and only apply it every 2-3 months. In the winter, you may reduce the amount of fertilizer. While refraining from any applications entirely if temperatures and light levels are lower than normal. Keep in mind that too much fertilizer will encourage leaf growth at the expense of flowers. While not enough will hinder your plant’s overall health over time.

How to Propagate Your Kalanchoe Thyrsiflora

Giving your Kalanchoe thyrsiflora, the best start possible is key to keeping it healthy and happy for years to come. One of the easiest and most efficient ways to ensure you have a vibrant and thriving succulent is through propagation! All you need are stems or leaf cuttings from an existing plant. These can easily be taken from the mother plant with a pair of clean, sharp scissors or garden shears. They can then be planted in moist soil and given the same light and water requirements your Kalanchoe plant needs. With a little patience, your new succulent should begin sprouting in no time!

Pest

Unfortunately, many succulents, including Kalanchoe Thyrsiflora are susceptible to unwanted pests such as aphids and mealybugs. To prevent any infestation of these nasty creatures, be sure to check your plants regularly and take quick action if you notice any signs of an infestation. For mild cases, a simple blast of water from a garden hose should do the trick for removing any pests that have made your plant their home. In more severe cases, you may need to use a pesticide such as neem oil or insecticidal soap to help get rid of them.

Common Issues with Kalanchoe Thyrsiflora

Kalanchoe Thyrsiflora, also known as desert cabbage, is a beloved succulent with evergreen foliage and vibrant, long-lasting blooms. Despite its reputation for being relatively low maintenance. Common issues such as yellowing leaves and weak stems may occur. This typically happens when proper care is not taken of the plant’s water needs, light requirements, soil type, pot type, and fertilizer levels.

To keep this heart-shaped cactus looking lush and vibrant, you should water it thoroughly only when the top 1 inch of soil feels dry to the touch. Depending on the climate, this can range from once every one to three weeks. Direct sunlight must be provided for at least six hours a day. The soil should also be well-draining to limit root rot; clay, plastic or ceramic pots are ideal as they too will help maintain proper moisture levels. A balanced fertilizer every four to six weeks is recommended; however, be sure not to overfertilize! Finally, if you want to propagate your Kalanchoe Thyrsiflora you can easily do so through stem or leaf cuttings – just make sure the air around them is well circulated. With these helpful tips in hand, your desert cabbage plant should thrive!

Flapjack Plant

In conclusion, Kalanchoe Thyrsiflora, also know as flapjack plant, cabbage plant or paddle plant is a beautiful and easy-care plant with many benefits. You will want to be careful with water, light, temperature, and soil requirements for the best results. You should also keep an eye out for common issues with the plant such as edema or pest infestations and know how to address them properly. One of the most rewarding aspects of tending this plant is its ability to propagate easily from cuttings. Providing proper care for your Kalanchoe Thyrsiflora can help ensure it’ll not only survive but thrive in your home. Don’t delay! Buy a Kalanchoe Thyrsiflora today and watch its beauty grow in your garden every day.

Please be sure to check out my Gardening Blog Post Page for more tips on all types of gardening. Including Seed Starting, Orchids, Water Gardening, Coldframe Gardening, Indoor Bulb Gardening, Hydroponics, Container Gardening, Mums, Herbs, African Violets, planting Bulbs, Flower Gardening, Vegetable and Fruit Gardening, Indoor Houseplants of all kinds, Cactus, Succulents, Hanging plants, Deer resistant plants and even Bird, Bee, Butterfly and Hummingbird Gardens!

Sedum Rubrotinctum Aurora

Green thumbs rejoice! Sedum rubrotinctum ‘Aurora’ also known as the Jelly Bean plant is here to brighten up your garden this season with its unique and vibrant colored foliage that intensifies in the sunlight. With proper care and attention, you can easily make a beautiful statement piece of this hardy succulent anywhere where the sun shines brightest. Our blog post will go into further detail on how to properly care for, pot type, soil type, fertilizer use, water requirements, light requirement as well as best practices for growing indoors and propagating. So if you’re looking for diverse colored succulents that are easy to take care of then read on to find out more about ‘Aurora’!

Sedum Rubrotinctum

Sedum rubrotinctum ‘Aurora’ is a popular and eye-catching succulent that features rosettes of metallic silver leaves that turn pinkish-red in bright light. This attractive plant requires minimal care, making it an ideal choice for those who enjoy growing plants without too much effort. A well-draining potting mix should be used. Also, an appropriate potting container to ensure the soil drains properly.

When grown indoors, make sure to monitor watering, avoiding letting the soil become overly saturated. When the top layer feels dry to the touch it’s time to water again. For sedum rubrotinctum ‘Aurora’, after watering always allow complete drying before watering again. Additionally, plenty of sunlight helps keep this succulent looking its best and can also help to prevent overgrowth. Natural or artificial grow lights are also beneficial during winter months when days are shorter and less sun is available. Though they aren’t essential unless strong growth is desired. Lastly, propagation can be done through stem or leaf cuttings which will easily root if placed in a warm and bright location indoors or outdoors after all risk of frost has passed.

What type of pot is best for growing Sedum Rubrotinctum

Growing sedum rubrotinctum Aurora, commonly known as the jelly bean plant, is easy! When choosing a pot for your new succulent friend, you’ll want to lean toward ones with plenty of drainage holes – resin, ceramic, and plastic all work beautifully. Be sure that the pot you choose has drainage holes that are no smaller than 0.25in (0.6cm) and at least one larger opening to help water leave the soil quickly so it doesn’t become soggy or accumulate salts from fertilizers. If you’d like to get creative, why not try using a repurposed bowl or container and simply add drainage holes yourself? Or even one of these pot head planters, my new obsession!

Which soils are suitable for the Sedum Rubrotinctum ‘Aurora’

Succulents are well-known plants that come in many shapes and sizes, and the Sedum rubrotinctum ‘Aurora’ is no exception. When providing care for this plant, it’s important to consider the type of soil that works best; a good option is to utilize sandy potting mixes. A blend of 2 parts peat moss, 1 part hen manure, and 1 part coarse sand is one great option for potting soil suitable for Aurora. Another possibility is to use soil consisting of 2 parts coarse sand, 1 part perlite, and 1 part soil mix; whichever you choose, make sure drainage is optimal by adding pumice stone on top. Including these components in your soil provides nutrient-dense conditions specifically targeting succulents like the Sedum rubrotinctum ‘Aurora’!

Watering

When it comes to caring for your Sedum rubrotinctum ‘Aurora’ succulent, watering properly is essential. This plant requires weekly watering with an even distribution of water as opposed to lots of water all at once. During the growing season (spring and summer), be sure to adjust your watering schedule to compensate for increased evaporation from heat. In the dormant winter months when temperatures are lower, you’ll need to reduce the amount of water you give the succulent; however, do not allow the soil to completely dry out, and always keep the plant well-drained. If cared for properly, your ‘Aurora’ will be sure to reach its peak beauty!

What type of fertilizer should you use

To keep your sedum rubrotinctum Aurora succulent looking lush and vibrant, the correct type of fertilizer is essential. During the growing season in spring and summer, you should use a balanced liquid fertilizer with an NPK ratio of 10-10-10 every two weeks. Make sure to dilute the solution to half strength before using it, as too high a concentration of fertilizer can damage the succulent. For best results, keep in mind that this type of succulent only needs very little fertilizer – sometimes none at all – and prefers high levels of organic matter in its soil.

How much light does the Sedum Rubrotinctum ‘Aurora’ require

The unique Sedum Rubrotinctum ‘Aurora’, also known as the jelly bean plant, is an attractive succulent that benefits from bright light. A bright spot indoors near a window with ample sunlight is ideal for this plant. If grown outdoors, ensure it has access to at least four hours of full sunlight every day. However, avoid too much direct sunlight as it can scorch the leaves of this succulent. You can supplement natural light with grow lights, set on a timer, and provide up to 16 hours of light per day. With correct care and regular watering, your Sedum Rubrotinctum ‘Aurora’ will add color and texture to your garden all year round.

How to Propagate

The Sedum Rubrotinctum ‘Aurora’ is a beautiful succulent that can be easily propagated. The best time to propagate your plant is during the spring or summer when the weather is warm and humid. To begin, use a sharp blade to cut off parts of a mature stem from your existing ‘Aurora’. Make sure the cutting contains at least two or three small leaves, and allow it to sit in a cool, dry place for a few days before planting. For best results, place the cutting in sandy soil that is slightly damp and contains lots of organic matter. As the propagated stem grows roots, water it lightly and keep it in bright light but away from direct sunlight. With some patience, your Sedum Rubrotinctum ‘Aurora’ will begin to thrive and add beautiful color to your garden!

Jelly Bean Plant

In conclusion, if you’re looking for an attractive succulent, that can survive in most current house conditions and requires minimal effort. Then Sedum rubrotinctum ‘Aurora’ also known as the Jelly Bean plant should be the easy choice. This hardy succulent adds subtle beauty to your home even though it isn’t native it is not difficult to take care of. It prefers lots of light but can still thrive with artificial grow lights. Make sure to use porous soil with good drainage and water only when the top layer of soil dries up completely. Propagating these plants is very easy since they have strong root systems and spring-like leaves. So fertilize every four weeks lightly and you can enjoy your Sedum Ruboritinctum ‘Aurora’ for many years to come! Get a sedum rubrotinctum for your growing succulent collection today.

Please be sure to check out my Gardening Blog Post Page for more tips on all types of gardening. Including Seed Starting, Orchids, Water Gardening, Coldframe Gardening, Indoor Bulb Gardening, Hydroponics, Container Gardening, Mums, Herbs, African Violets, planting Bulbs, Flower Gardening, Vegetable and Fruit Gardening, Indoor Houseplants of all kinds, Cactus, Succulents, Hanging plants, Deer resistant plants and even Bird, Bee, Butterfly and Hummingbird Gardens!

Burro Tail Plant Care

Burro Tail Plant Care
Sedum Burrito or Burro’s Tail

Welcome gardeners! Have you ever seen a Sedum burrito or as some know it a Burro’s Tail in all its eye-catching glory and wondered how to recreate it in your own home? Not to worry, we’ve got the answers for you. Growing Sedum burrito in your indoor or outdoor garden is an easy and low-maintenance way to add some life and color to the garden year round. It requires little attention but has big results. In this blog post, you will find out all the basics for burro tail plant care. From soil type, pot type, light requirements, water needs as well as how simple propagation can be. And of course, our pest control measures so that your precious plants remain safe!

What is a Sedum Burrito or Burro Tail

Sedum Burrito, also known as burro’s tail, is a type of succulent that makes a great addition to your garden. It can be easily recognized by its grayish-green foliage and rosette shape. Each succulent has long, cascading stems and small, paddle-shaped leaves that come together to form a furry-looking “tail”. The plant grows year-round in warmer climates but will die back during winter.

Soil

If you’re looking for the perfect potting soil for your Sedum Burrito, then you’ve come to the right place! A critical factor in its successful establishment and optimal care is selecting the proper potting soil. I love the succulent potting soil for my Burro’s Tail and it seems to love it too! This species prefers a loose, well-draining mix without many organic components (e.g. clay) that can hold onto moisture for too long.

Burro’s Tail pot size and type

It is also important to select an appropriately sized pot with enough drainage holes to avoid over-saturation of roots due to inadequate draining capabilities. Terracotta containers or shallow or any of the pot head planters are ideal choices as they are airy and dry quickly once watered. I have my Burro’s Tail in the Youfui pot, but the Aimebby face pot or Hunthawk pot would also be great and the Sedum Burrito will bring them to life! Tending your Sedum Burrito has never been simpler – just make sure it gets the right pot and soil type to get started!

Watering requirements for the Sedum Burrito

As a succulent, the Sedum Burrito’s water requirements are quite different from those of other plants. The best way to make sure this plant can thrive is to let the soil dry out completely between watering sessions. You should also make sure that you’re only using filtered or distilled water on them. Depending on your home environment, give your Sedum Burrito a good soaking every two to three weeks during the spring and summer months, and reduce it to once a month in fall and winter. When you do water, be generous with it – keeping the pot evenly moist–but never let it sit in standing water as this can cause root rot.

Lighting Requirements

When caring for the Sedum Burrito (also known as Burro’s Tail), setting up proper light is a critically important step. This succulent prefers to receive plenty of bright, natural lighting for most of the day. Such as a few hours of morning sunlight or an east-facing window in your home. If you don’t have access to direct sunlight, artificial light via a grow light installed in the same area can be just as beneficial. Positioning the light about 10” away from the plant is suggested and ensure that it gets at least 8 hours off too (similar to what happens with natural sunlight). Following these lighting tips will ensure that your Sedum Burrito continues to thrive while adding life and greenery to your living space.

Propagating Burro’s Tail

When it comes to the Sedum Burrito, or burro’s tail succulent, one of the best and easiest ways to propagate it is by division. The even better news is that it thrives in a variety of soils, making them a great option for home gardeners who wish to add this aesthetically pleasing succulent to their collection. Division can occur when re-potting or propagating through cuttings as well. When you take a cutting just strip off a few of the petals and stick it down into the soil. I also throw the petals on top of the soil and they will root also!

No matter what technique is chosen, make sure to place the plant in a pot with generous drainage holes and no more than one inch larger in diameter than its current home. Water requirements are minimal, but providing adequate sunlight and following the other care instructions can help ensure the successful propagation of your Sedum Burrito.

Pest control strategies for the Sedum Burrito

For those who are fond of growing the Sedum Burrito, it is important to take note of common pests that may invade the Miniature Succulent. Generally, scale insects and mealybugs are prevalent in succulents so keep an eye out for these particular invaders. To prevent pest infestations, avoid wetting the foliage as much as possible and use a balanced fertilizer to strengthen the plant’s immune system against bug invasions. If infestations do occur, insecticidal soaps and neem oil can be used to kill adult bugs effectively while residual insecticides can be used to keep carper bugs out of potted plants or soil beds. With vigilance and dedication, you may be able to keep your Sedum Burrito well-protected from any potential pest threats!

Enjoy your Burro’s Tail!!

In conclusion, caring for a Sedum Burrito or burro’s tail is an easy and rewarding task. Knowing the soil type requirements, pot size, and types needed to ensure optimal growth, watering requirements, and light needs will ensure that your plant stays happy and healthy. Furthermore, knowing how to propagate the Sedum Burrito through cuttings, division or petals is beneficial in case pests attack. Pest infestations can be prevented through good garden hygiene and practices should be used if one becomes unwelcome. With a proper understanding of these necessary components of your Sedum Burrito care plan, you will have a thriving plant in no time! So why wait? Get a Sedum Burrito for your garden today; you’ll thank yourself later!

Please be sure to check out my Gardening Blog Post Page for more tips on all types of gardening. Including Seed Starting, Orchids, Water Gardening, Coldframe Gardening, Indoor Bulb Gardening, Hydroponics, Container Gardening, Mums, Herbs, African Violets, planting Bulbs, Flower Gardening, Vegetable and Fruit Gardening, Indoor Houseplants of all kinds, Cactus, Succulents, Hanging plants, Deer resistant plants and even Bird, Bee, Butterfly and Hummingbird Gardens!

Aptenia Cordifolia Care

Are you a succulent enthusiast looking for an easy-to-care-for and beautiful plant? Look no further than Aptenia cordifolia! Commonly known as the baby sun rose, which adds vibrant color to any space! This low-maintenance succulent is perfect for beginner gardeners since it can thrive in many different environments. In this post, we’ll discuss how to best care for your new baby sun rose. Including light requirements, soil type, watering habits and pruning advice. We’ll also provide insight on propagation and pest control measures that will keep your plant in tip-top shape all year round!

Aptenia

Aptenia cordifolia, or the baby sun rose succulent, is a bright and cheerful addition to any garden. The subtle pink tones on foliage that form an elegant rosette matte make this plant an eye-catching addition to arrangements. It prefers a tropical climate, so it is important to make sure you provide plenty of sunlight and water at regular intervals for successful growth. Make sure to keep pruning the succulents each year by cutting off dead stems and leaves to stimulate growth and let the Aptenia Cordifolia thrive. If done correctly, propagating won’t be difficult. And you can either use stem cuttings or grow them from seeds. Lastly, take preventive measures against pests.

Light Requirements for Aptenia Cordifolia

Aptenia cordifolia prefers plenty of bright, direct sunlight to thrive. If you live in a particularly shaded part of the house, then it would be best to provide it with extra light. Using grow lights or a windowsill lamp. Additionally, if the temperature drops below 55 degrees F, make sure to move the plant indoors and keep it away from drafts. Make sure to rotate your succulent every few weeks so it can receive an even amount of sunlight on all sides of its leaves. Lastly, if you live in a tropical climate. Please make sure to provide this succulent with plenty of shade during the hottest part of the day.

If your Aptenia cordifolia is not getting enough sunlight, then you may need to provide it with supplemental lighting. The best type of grow lights for this succulent are LED lamps or fluorescent bulbs. They should be hung about 12–18 inches above the plant. And placed on a timer so that they turn on and off at the same time each day. Make sure to leave your succulent under the light for 8–10 hours a day. Or up to 14 hours in the winter months when natural light is scarce.

Watering your Baby Sun Rose

Aptenia cordifolia should be watered regularly, but it is important to not overwater the plant. When watering, make sure the soil is lightly moistened and allow excess water to drain away. During its active growing season (spring and summer), it may need to be watered more frequently; however, in colder months it may need less water. Make sure to check the soil before watering and adjust your schedule accordingly. If you see the leaves drooping or wilting, this is a sign that your succulent needs more water. However, if you see any signs of root rot or mold on the soil, then too much water has been applied and needs to be reduced.

It’s also important to note that Aptenia cordifolia is a succulent and does not require much water compared to other plants. This means that you should allow the soil to completely dry out between each watering cycle, as overly moist soil can lead to root rot or fungal diseases that can damage your plant. Additionally, when watering your Aptenia cordifolia, make sure to use water that has been filtered or treated with a water softener as hard water can cause mineral build-up in the soil and damage the roots of your succulent.

Soil requirements for Aptenia Cordifolia

Aptenia cordifolia prefers sandy or loamy soil that drains quickly and doesn’t retain too much moisture. To help with this, you can add some perlite or pumice to the soil mix. These materials help to keep the soil light and airy which allows for better root growth and drainage. Additionally, adding some peat moss or compost to the soil can help to retain moisture and add nutrients. Lastly, make sure to use a pot with drainage holes so that excess water isn’t kept in the soil which can lead to root rot.

Aptenia Cordifolia Fertilizer

Aptenia cordifolia does not require very much fertilizer. During the active growing season (spring and summer), you can feed the plant with a balanced liquid fertilizer once a month that is specifically formulated for succulents. Avoid using too much fertilizer as this can burn the roots of your plant. In addition to feeding, it is also important to provide your Aptenia cordifolia with plenty of natural sunlight and adequate airflow.

Potting and Re-potting your Baby Sun Rose

Aptenia cordifolia can be grown in a wide variety of pots, including terracotta and ceramic. I also think they would look great in one of these beauties – Yarrow head face planter! When choosing the size of your pot, make sure to pick one that’s slightly larger than what is currently needed as this succulent can get quite large. It’s best to start with a pot size of approximately 10 inches in diameter and 10 inches deep. It’s best to repot Aptenia cordifolia once a year or every two years, so that its roots don’t become too cramped. Make sure to use fresh soil each time you repot and carefully remove any dead leaves or stems. This will help to ensure that your succulent has the best chance of thriving in its new pot.

Pruning Aptenia Cordifolia Succulent

Pruning baby sun rose succulents, or aptenia cordifolia. This is an important step in the plants’ overall care. It helps to create a fuller, stronger, and healthier plant by removing dead foliage and thinning weaker growth. With a few simple steps at the right time of year and with the correct tools, you can easily prune your Aptenia Cordifolia succulent. The best time to prune baby sun rose succulents is in the spring. This is when new growths start to emerge. You can remove any dead leaves or overgrown stems that may be growing too thickly.

To begin, use sharp shears or scissors to carefully cut away any dead foliage or pieces of stem that are not strong enough for new growth. For more severe cases of overgrowth, you may need to use a small saw-toothed pruner. Once you have removed all the weak material from the plant it will help encourage better overall shape and healthier regrowth in its place.

Aptenia Cordifolia how to Propagate

Propagating Aptenia cordifolia is relatively easy and can help create many more of your beautiful succulents. The best way to propagate baby sun rose succulents is through leaf cuttings. When using cuttings, pick healthy leaves from the main plant and be sure to remove any leaves on the bottom of the cutting. Place the cutting onto a small tray filled with potting soil and place it in an area that receives indirect sunlight. Keep the soil slightly moist but not soggy and you should start to see new growth emerge within a few weeks. Once your cuttings have grown some roots, you can separate them from each other and transplant them into individual pots. With a bit of care and attention, your Aptenia Cordifolia will soon be thriving in its new home.

Common Pests for Aptenia Cordfolia Succulent

Aptenia cordfolia, also known as the baby sun rose succulent, is an easy-to-grow plant that makes a great addition to any outdoor or indoor garden. However, it is important to be aware of the common pests that can harm your succulents and take action if they occur. Common pests include mealybugs, aphids, and whitefly. Mealybugs are soft-bodied and covered in white cottony wax and will feed off the sap of foliage, often near the base of the leaves. Aphids are small pear-shaped bugs that may appear green, yellow, blackish, or even pink and congregate on new growths. Whiteflies look like tiny butterflies floating around your plants when disturbed and feed on leaf sap.

To treat these pests there are various containment methods such as introducing beneficial insects like ladybugs. Or spraying insecticidal soap solution as well as avoiding overwatering to reduce humidity outbreaks. Proper identification is key in determining which pest has identified your succulent so you can select the correct treatment plan!

Baby Sun Rose

Growing an Aptenia Cordifolia Succulent can be a great addition to your succulent garden. This low-maintenance, sun-loving succulent is also quite versatile. Since it provides ground cover outside it can be trained as a hanging succulent. It’s best to water it just enough and keep the soil moist to prevent root rot and make sure that your pot has proper drainage. Pruning weekly will help keep your plant healthy. Also the occasional propagating of cuttings is always a good option if you’d like to bring more of this beautiful plant into your home. Don’t forget to watch out for common pests such as mealybugs and brown webworms. Then treat them with insecticidal soap if needed. Over time you should see fantastic growth of these baby sun roses providing color year-round in a variety of settings around your garden.

Heart Hoya Plant Care

Hoya Heart Succulent Care

The Hoya Heart succulent, also known as Hoya kerrii or sweetheart plant, is popular due to its heart-shaped leaves. These cute succulents make perfect gifts and are easy to care for. However, proper care helps them thrive and grow, leading to a full plant instead of just a single leaf. Hope you enjoy this post on how Heart Hoya plant care, including potting, soil, light, water, fertilizer, and propagation.

Potting Your Hoya Heart

Soil for Hoya Heart

Light Requirements for Hoya Heart

Watering Your Hoya Heart

Fertilizing Your Hoya Heart

Propagating Your Hoya Heart

Happy Hoya Gardening

Caring for a Hoya heart succulent is simple once you understand its needs. Choose the right pot, use well-draining soil, and provide plenty of bright, indirect light. Water sparingly and fertilize during the growing season to encourage healthy growth. If you want to propagate your plant, remember to use a stem cutting with a node for the best chance of success. With proper care, your Hoya heart will thrive and grow, adding a touch of charm to your home for years to come.

Please be sure to check out my Gardening Blog Post Page for more tips on all types of gardening. Including Seed Starting, Orchids, Water Gardening, Coldframe Gardening, Indoor Bulb Gardening, Hydroponics, Container Gardening, Mums, Herbs, African Violets, planting Bulbs, Flower Gardening, Vegetable and Fruit Gardening, Indoor Houseplants of all kinds, Cactus, Succulents, Hanging plants, Deer resistant plants and even Bird, Bee, Butterfly and Hummingbird Gardens!

Flapjack Kalanchoe Care

If you’re a gardener or succulent grower, then you may have come across Kalanchoe luciae ‘Flapjack’ but weren’t sure what type of succulent it was. With its wide leaves that often curl inward and thick stems, this unique plant is certainly eye-catching! It belongs to the Crassulaceae family and genuinely thrives in sunny environments which makes it an ideal addition to any garden. In this blog post, we everything about Flapjack Kalanchoe care and how it should be grown including light needs, water requirements, and pot types, fertilizer tips, how to propagate it as well as pest control advice. Read on if you want to learn more about the amazing characteristics of this interesting species.

Introducing the Kalanchoe luciae Flapjack Succulent

The Kalanchoe luciae ‘Flapjack’ is a succulent native to South Africa, and it belongs to the Crassulaceae family. It has thick stems with leaves that curl inward and downward giving it a unique look. The leaves are green in color and have red or purple edges which add an even more eye-catching appearance. The plant usually grows to be around 12 inches (30 cm) tall and 12 inches (30 cm) wide. But its size can vary depending on the environment in which it’s grown. It is also known as the ‘Pancake Plant’ because of its striking resemblance to pancakes when viewed from a distance!

Type of Soil

Kalanchoe luciae ‘Flapjack’ is a succulent that needs well-draining succulent soil to thrive. Sandy loam mix is an ideal potting soil for this plant, as it ensures all excess moisture drains away, giving dry roots. Adding 1/4 coarse sand or grit provides even better drainage. For optimal growth, you should use a good fertilizer every other month and make sure the soil remains moist but not wet. Just keep in mind too much water can result in root rot. By providing the right nutrients and environment, you’ll enjoy many years of lush, healthy foliage.

Light requirements for a Kalanchoe luciae ‘Flapjack’

Kalanchoe luciae ‘Flapjack’ is a succulent that needs lots of light to thrive. It prefers at least four hours of sunlight per day. To help it achieve maximum growth indoors, this plant should be kept under grow lights or in a south-facing window that offers ample sunlight. While Kalanchoe luciae plants are resilient and can survive in low-light environments. They thrive best in bright, direct light. To make sure your Kalanchoe luciae ‘Flapjack’ gets the right amount of sunshine and artificial lighting to keep it healthy. Consider using a timer with grow lights if you don’t have access to natural sunlight. Doing so will ensure your Kalanchoe luciae is getting the best environment possible for its growth and health!

Pot size and type for a Kalanchoe luciae ‘Flapjack’

The pot size and type for a Kalanchoe luciae ‘Flapjack’ are important factors to consider when growing this succulent. A pot with drainage holes is the best option, as the soil needs to be well-drained so that it doesn’t stay soggy. For pot size, it should be mid-sized with dimensions of approximately 6 inches in diameter or slightly larger. The pot must have some depth, at least 3-inch deep pot is ideal. It’s beneficial to use either a plastic pot or a terra cotta pot – both provide effective drainage and airflow to help prevent fungal diseases. With potting mix that has sand in it, you can create an environment where moisture can easily evaporate. All while still maintaining oxygen in the soil. This is essential if you want your Kalanchoe luciae ‘Flapjack’ to thrive!

Water requirements

The kalanchoe luciae, also known as Flapjack, is a succulent that thrives with minimal water requirements. Generally, it needs to be watered once or twice per month with only enough water to moisten the soil. This plant loves to dry out between waterings so it’s important not to overwater this succulent. This can cause root damage and other issues. During the growing season in spring and summer, you’ll need to water a bit more often when the soil begins to feel slightly more dry than damp. With proper care, you’ll soon find yourself enjoying your beautiful kalanchoe luciae ‘Flapjack!’

Fertilizer needs of a Kalanchoe luciae ‘Flapjack’ succulent

The kalanchoe luciae (‘Flapjack’ succulent) is a beautiful houseplant that is known for its thick, oval-shaped leaves. To keep this plant looking vibrant and healthy, it is important to provide the appropriate amount of fertilizer. Fertilizing kalanchoe luciae plants requires a dilute solution of complete fertilizer applied once per month during the active growing season (spring and summer). Choose an all-purpose water-soluble liquid fertilizer with equal ratios of nitrogen, phosphorus, and potassium (10:10:10 formula). Make sure you apply the fertilizer to the instructions on the product label and do not overfertilize as this will cause leaf burn and stress to your succulent. Following these guidelines should leave your kalanchoe luciae looking happy and splendid!

Propagating the Kalanchoe luciae ‘Flapjack’

The Kalanchoe luciae (‘Flapjack’) is a succulent that can easily be propagated from stem cuttings. Start by taking a 3-4 inch long cutting and remove any leaves at the bottom. Allow your cutting to dry for a few days before planting it in well-draining potting soil. Water your cutting sparingly and place it in bright, indirect light. After a few weeks, you should start to see roots appear as the cutting takes root and begins to grow. Once established in its new pot, give your Kalanchoe luciae ‘Flapjack’ plenty of sunshine, water, and fertilizer to help it thrive. Additionally, you can use propagation powder or liquid rooting hormone to give your cutting an extra boost!

Happy Gardening!!

The Kalanchoe luciae ‘Flapjack’ is a unique and eye-catching succulent that is sure to make your flower garden or potted display stand out. Its light and water requirements are moderate, as long as you use well-draining soil, make sure its pot size isn’t too big, and avoid overfertilizing. Remember to position it in a spot with sufficient sunlight exposure for optimal growth. If taken care of properly, it will look stunning for years to come. With the abundance of ideas on how to propagate it from cuttings, you can easily start a larger collection from the one plant you already have! So don’t miss out – grab your kalanchoe luciae ‘Flapjack’ and bring some extra color into your life. That’s right, you need to get a kalanchoe luciae ‘Flapjack’ for your succulent collection!

Please be sure to check out my Gardening Blog Post Page for more tips on all types of gardening. Including Seed Starting, Orchids, Water Gardening, Coldframe Gardening, Indoor Bulb Gardening, Hydroponics, Container Gardening, Mums, Herbs, African Violets, planting Bulbs, Flower Gardening, Vegetable and Fruit Gardening, Indoor Houseplants of all kinds, Cactus, Succulents, Hanging plants, Deer resistant plants and even Bird, Bee, Butterfly and Hummingbird Gardens!