
Black Eyed Susans bring cheerful golden blooms to the garden year after year. Their daisy-like flowers brighten borders, pollinator gardens, and naturalized areas all summer long. If you want to enjoy their beauty without buying new plants every season, learning how to save Black Eyed Susan seeds is a simple and rewarding project. With the right timing and care, you can collect seeds in the fall and grow an abundance of plants the following spring.
In this post, we’ll walk through everything you need to know about saving Black Eyed Susan seeds, including when to harvest, how to dry and store them, and tips for planting later.
Why Save Black Eyed Susan Seeds?
Saving seeds gives you an endless supply of plants at no cost. Black Eyed Susans (Rudbeckia hirta and other varieties) are prolific seed producers, so even a few flowers can provide hundreds of seeds. Beyond saving money, seed collection also allows you to continue growing flowers adapted to your specific garden. Over time, the plants you grow from your own seeds may become even stronger and more resilient in your soil and climate.
In addition, saving seeds helps support pollinators. Black Eyed Susans attract bees, butterflies, and birds, and leaving the seed heads on the plant until harvest provides valuable food for goldfinches and other seed-eating birds.
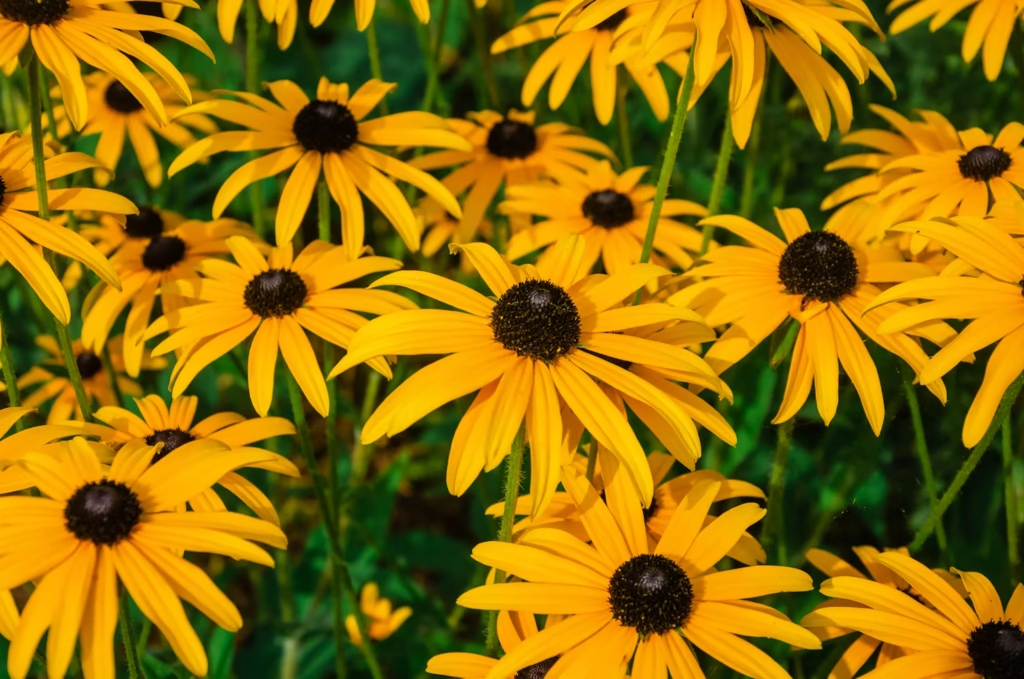
When to Harvest Black Eyed Susan Seeds
Timing is the most important factor in seed saving. If you collect seeds too early, they may not be fully mature and will not sprout. If you wait too long, the seeds may fall to the ground or be eaten by birds.
The best time to harvest Black Eyed Susan seeds is in late summer to early fall, once the flower heads have dried on the plant. After the petals fade and drop, the center cone of the flower will turn dark brown and feel stiff. This is a sign that seeds are mature. On dry, sunny days, check the cones carefully. If you rub them between your fingers and tiny dark seeds come loose, they are ready for harvest.
How to Collect the Seeds
Collecting Black Eyed Susan seeds requires only a few simple tools. You will need garden scissors or pruners, a small bucket or paper bag, and gloves if you want to avoid prickly flower heads.
Start by snipping the dried flower heads off the stems, leaving a short piece of stem attached. Place them into your bucket or bag as you go. Once you have collected as many as you want, sit down at a table or bench to separate the seeds. Hold each seed head over a bowl or tray and gently rub the cone between your fingers. The seeds will fall out easily along with some chaff and dried plant material.
Drying the Seeds Properly
After harvesting, it’s important to dry the seeds before storing them. If they remain damp, mold can develop, and the seeds may not survive. Spread the seeds in a thin layer on a paper towel, newspaper, or a fine mesh screen. Place them in a warm, dry spot out of direct sunlight for about a week. Stir or shake them gently every few days to make sure they dry evenly.
Once the seeds feel hard and dry, they are ready for storage. To test dryness, pinch one between your nails. If it snaps rather than bends, the seed is fully dry.
Storing Black Eyed Susan Seeds
Proper storage is key to keeping seeds viable until planting time. Store seeds in seed saving envelopes. Avoid using plastic bags because they can trap moisture, which may cause seeds to rot. Write the plant name and the year of harvest on the envelope so you can keep track of freshness.
Place the envelopes in an airtight container such as a glass jar or plastic storage box. For extra protection add a silica gel packet to absorb any moisture. Keep the container in a cool, dark, and dry location. A basement, closet, or refrigerator works well. When stored properly, Black Eyed Susan seeds remain viable for up to three years, although germination rates are highest in the first year.
Tips for Growing from Saved Seeds
Planting saved Black Eyed Susan seeds is just as easy as collecting them. For the best results, sow the seeds in the fall or early spring. These flowers benefit from a period of cold stratification, which mimics winter weather and helps seeds break dormancy. If you plant in fall, nature takes care of this process for you. Simply scatter seeds directly on prepared soil, lightly cover them with a thin layer of soil, and water well.
If you want to start seeds indoors, place them in the refrigerator for about four to six weeks before sowing. This step ensures higher germination rates. Then plant them in seed trays filled with well-draining soil, keep the soil moist, and place trays in a sunny window or under grow lights. Once seedlings have two sets of true leaves, transplant them into larger pots or directly into the garden after the last frost.
Common Mistakes to Avoid
While saving Black Eyed Susan seeds is straightforward, a few mistakes can reduce your success. First, avoid harvesting seeds from flowers that are still green or moist. Immature seeds won’t sprout. Second, don’t skip the drying stage. Storing damp seeds almost always leads to mold problems. Third, avoid storing seeds in hot or humid spaces, such as garages or kitchens, because high temperatures can kill seed viability.
Finally, remember that some Black Eyed Susan varieties are hybrids. Seeds from hybrid plants may not grow true to the parent plant, meaning the flowers may look different in color or shape. If you want consistent blooms, stick with open-pollinated varieties.
Benefits of Seed Saving for Wildlife and Pollinators
Saving seeds also benefits wildlife. If you leave a few flower heads on the plant through winter, birds will feed on them during the cold months. This provides a natural food source when other seeds are scarce. At the same time, you can still collect plenty of seeds from other flowers to store for your own planting needs.
In addition, growing new plants from saved seeds creates more nectar and pollen for pollinators. Bees and butterflies rely on long-blooming flowers like Black Eyed Susans, and expanding your patch each year helps support them.
How to Use Saved Seeds in the Garden
Once you have a collection of seeds, you can use them in many creative ways. You can sow them directly into garden beds for a burst of summer color or scatter them in a meadow or naturalized area. They also work well in container gardens, pollinator patches, and cut flower gardens.
Black Eyed Susans mix beautifully with other perennials such as coneflowers, asters, and coreopsis. Planting them together creates a colorful display from midsummer through fall. With your own saved seeds, you can expand these plantings without spending extra money.
Final Thoughts
Saving Black Eyed Susan seeds is a rewarding way to ensure your garden bursts with golden blooms season after season. With simple steps—harvesting dried flower heads, drying seeds thoroughly, and storing them in a cool, dry place—you can create a sustainable supply of plants for years to come. Not only does seed saving save money, but it also supports pollinators, birds, and the natural cycle of your garden.
When spring arrives, you’ll be ready to sow your seeds and enjoy a fresh wave of Black Eyed Susans brightening your landscape. By practicing seed saving, you give your garden continuity, beauty, and life year after year.
Please be sure to check out my Gardening Blog Post Page for more tips on all types of gardening. Including Seed Saving, Seed Starting, Orchids, Water Gardening, Coldframe Gardening, Indoor Bulb Gardening, Hydroponics, Container Gardening, Mums, Herbs, African Violets, planting Bulbs, Flower Gardening, Vegetable and Fruit Gardening, Indoor Houseplants of all kinds, Bonsai, Cactus, Succulents, Hanging plants, Deer resistant plants and even Bird, Bee, Butterfly and Hummingbird Gardens!