
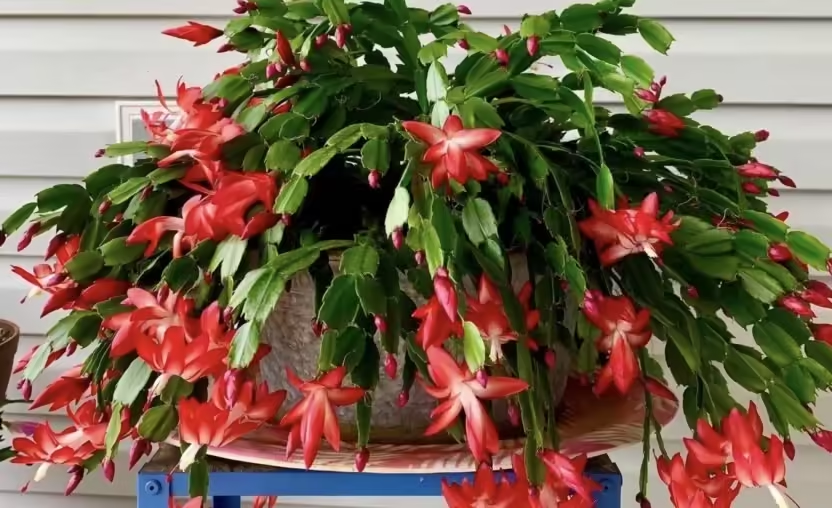
Propagating a Thanksgiving cactus is an easy way to expand your plant collection and share this beautiful holiday bloomer with friends and family. This plant, known for its stunning winter blooms and unique segmented leaves, roots well from cuttings. By following a few steps, you can successfully grow new Thanksgiving cacti from your own plant. In this guide, we’ll cover the best methods for propagating Thanksgiving cactus, including choosing and preparing cuttings, selecting the right soil and pot, caring for new cuttings, and promoting strong growth. With a little attention, you’ll have vibrant new plants to enjoy or gift.
Why Propagate Thanksgiving Cactus?
Thanksgiving cactus propagation allows you to enjoy more of this beloved plant without needing to buy new ones. Since Thanksgiving cactus is often shared as a gift, it’s satisfying to create multiple plants for loved ones, all from a single “mother” plant. Moreover, propagating helps refresh older plants and rejuvenate growth by encouraging branching in the main plant. Propagating also guarantees that you’ll have backup plants if the original cactus becomes damaged or needs to recover.
When to Start Propagating
The best time to propagate a Thanksgiving cactus is in late spring or early summer, right after it has finished its blooming period. During this time, the plant focuses on new growth rather than flowering, making it more receptive to propagation. Avoid propagating in fall or winter when the plant is preparing to bloom or is already in bloom, as this can stress the plant and affect its flowering cycle.
Choosing and Preparing Cuttings
For Thanksgiving cactus propagation, start by choosing healthy segments from the mother plant. Look for sections with at least two to three leaf segments; these sections should be plump and healthy without any signs of disease or damage. Select cuttings from newer growth for the best results, as these segments typically root faster than older parts of the plant.
To take a cutting, hold the chosen segment firmly at its base and twist it gently. This method separates the segment cleanly from the plant without causing too much stress. Alternatively, you can use a sharp, clean knife or scissors to cut the segment just above a joint. Always ensure your cutting tools are sterilized to prevent any risk of infection.
After removing the cuttings, let them dry in a shaded area for about 24 hours. Allowing the cut ends to callous over helps prevent rot once you plant them in the soil. This drying step is crucial, as it strengthens the segment for successful rooting.
Choosing the Right Soil for Propagation
Thanksgiving cactus cuttings thrive in a well-draining soil mix, similar to what the mature plant needs. A blend designed for cacti or succulents works perfectly. This type of soil contains sand, perlite, or pumice, which promotes good drainage and prevents excess moisture from lingering around the new roots.
If you prefer a DIY soil mix, combine two parts potting soil with one part sand and one part perlite. This blend provides a stable base for your cuttings and ensures they receive the right amount of moisture. Using the right soil from the start sets up a successful environment for rooting, minimizing the risk of rot and promoting quicker establishment.
Planting the Cuttings
Once your cuttings have dried and your soil is ready, it’s time to plant. Fill a small container or pot with the prepared soil mix, and moisten the soil slightly. Thanksgiving cactus cuttings root best when the soil is damp but not soaked.
Next, insert each cutting about a half-inch into the soil, making sure it remains upright. You can place one or multiple cuttings in the same pot, but give each one enough space to grow. Press the soil gently around the base of each cutting to provide stability.
After planting, find a bright location with indirect light. Direct sunlight may be too intense for new cuttings and could cause the segments to dry out. A spot near a bright window, filtered with a sheer curtain, works well. The indirect light encourages rooting while protecting the cuttings from harsh sun exposure.
Watering and Caring for New Cuttings
Thanksgiving cactus cuttings don’t need a lot of water as they root. Overwatering can lead to rot, so it’s essential to keep the soil just barely moist. Check the top inch of soil every few days, and water only when it feels dry. Lightly misting the soil can also provide just the right amount of moisture without overwhelming the cuttings.
As roots start to form, you’ll notice some resistance if you give a gentle tug on the cuttings. This is a sign that they’re taking root, which generally happens within two to four weeks. Once you notice roots developing, you can begin a more regular watering routine, though still moderate, to help the new plants grow strong.
Providing the Right Light
Thanksgiving cactus plants, even in their early stages, thrive best in bright, indirect light. Keep the cuttings in a place where they get steady light without direct sun, which can be too intense and dry out the soil too quickly. If you don’t have a suitable window, using a grow light for a few hours each day can also work. Consistent lighting encourages strong, healthy growth and helps the new cuttings adjust to their environment.
Fertilizing Young Plants
Young Thanksgiving cactus plants don’t need fertilizing right after they’ve been planted. However, after about two to three months, you can start using a balanced, water-soluble fertilizer at half-strength to support growth. Feeding your plants every two months during the growing season, usually spring through early fall, provides the nutrients they need for strong, leafy segments.
Avoid over-fertilizing, as this can lead to soft or leggy growth. When in doubt, start with a light feeding and gradually adjust as your new Thanksgiving cactus plants mature.
Moving Cuttings to Individual Pots
Once your cuttings have established roots and show new growth, it’s time to consider moving them to individual pots. Choose small pots with drainage holes, as Thanksgiving cactus plants prefer shallow containers. Repotting can take place about six months to a year after propagation, depending on the growth rate of each plant.
Use the same well-draining cactus mix when repotting. Transfer each young plant carefully, and avoid burying it too deeply. Placing each plant in its own pot gives it the space and nutrients it needs to continue growing into a mature, blooming cactus.
Long-Term Care for Propagated Thanksgiving Cactus
Once established, young Thanksgiving cactus plants need care similar to that of mature plants. Continue to water them moderately, allowing the top inch of soil to dry out between waterings. Keep the plants in bright, indirect light, and use a balanced fertilizer during the growing season.
By fall, reduce water and avoid fertilizing to prepare your Thanksgiving cactus for the blooming season. Cool nights and longer dark periods encourage bud formation, bringing vibrant flowers to your new plants.
Happy Propagating!
Thanksgiving cactus propagation is a rewarding process that doesn’t require much effort but delivers big rewards. By carefully selecting and preparing cuttings, planting them in the right soil, and giving them consistent care, you’ll have new, healthy plants that will eventually bloom each holiday season. Propagation lets you enjoy even more of this festive plant, whether you’re expanding your indoor garden or gifting a beautiful, homegrown Thanksgiving cactus to friends and family.
Please be sure to check out my Gardening Blog Post Page for more tips on all types of gardening. Including Seed Starting, Orchids, Water Gardening, Coldframe Gardening, Indoor Bulb Gardening, Hydroponics, Container Gardening, Mums, Herbs, African Violets, planting Bulbs, Flower Gardening, Vegetable and Fruit Gardening, Indoor Houseplants of all kinds, Cactus, Succulents, Hanging plants, Deer resistant plants and even Bird, Bee, Butterfly and Hummingbird Gardens!