
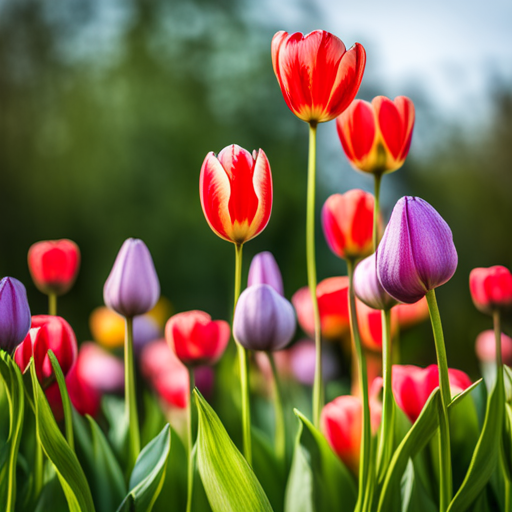
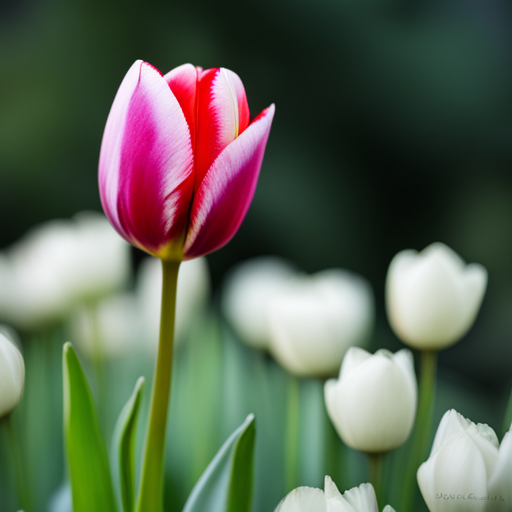
Spring is just around the corner, and there is no better way to welcome this beautiful season than by planting tulip bulbs in your garden. Tulips are a favorite among gardeners because of their amazing beauty and easy maintenance. However, planting tulip bulbs can be tricky, especially for beginners. With the right preparation and knowledge, you can grow a beautiful tulip garden that will fill your yard with color and fragrance. In this blog post, we’ll cover all the steps you need to know on how to plant tulip bulbs, including when to plant, how to prepare the soil, how deep to plant, and how to care for them when they come up in the spring. Also the zone type, growing tulips in pots both indoors and outside!
Just as with any other plant, tulips thrive best under specific climatic conditions. These conditions are referred to as zones. Understanding the proper zone for your tulip bulbs is not only essential but also can greatly enhance their growth and blooming. Tulips are most suitable for USDA hardiness zones 3 through 8. However, they can grow successfully in zones 9 and 10 with extra care, particularly in providing a chilling period. Remember, knowing your garden’s zone type will provide an excellent guide for the timing and care of your tulip bulbs.
When to Plant Tulip Bulbs per Zone
Like all flowering bulbs, tulips need a period of winter chill to bloom. The timing for planting tulip bulbs varies depending on the USDA hardiness zone.
Zone 3-4: In these coldest zones, you should plant bulbs in late August to early September. This allows the bulbs enough time to establish roots before the winter freeze.
Zone 5-6: If you are in zones 5 or 6, it’s best to plant your tulip bulbs in late September to early October. The ground in these zones cools down faster, providing a suitable environment for the bulbs to root.
Zone 7-8: For those in zones 7 and 8, the optimal time to plant tulip bulbs is from October to early November. The soil in these zones stays warmer longer, enabling the bulbs to root well before the winter.
Zone 9-10: Finally, in zones 9 and 10, tulips should be planted in late November to early December. These zones do not provide a natural chilling period, so you may need to refrigerate your bulbs for 6 to 8 weeks before planting.
By following these guidelines, you can ensure your tulip bulbs are planted at the right time to bloom beautifully in the spring, regardless of your garden’s hardiness zone.
How to Prepare Soil before Planting
Tulips require well-draining soil and full sun exposure to thrive. Before planting, prepare the soil by incorporating organic matter like compost or peat moss to add nutrients and improve drainage. Avoid heavy soils that retain water, as this can cause the bulbs to rot. You can also add bone meal or bulb fertilizer to promote bulb development.
How Deep to Plant Tulip Bulbs
The depth of planting tulip bulbs is crucial for their growth and blooming. Plant bulbs at a depth of 6 to 8 inches, or about 3 times the height of the bulb. Avoid planting bulbs too shallow or too deep, as this can affect their ability to grow and increase their chances of being eaten by pests. Plant bulbs pointy-side up, as this is the side where the sprout will emerge.
How to Care for Tulips after they Bloom
Once the tulips have bloomed, remove the faded flowers, but leave the foliage intact until it turns yellow. This allows the bulb to stock up on nutrients for the next growing season. Tulips prefer moist soil but do not need to be watered regularly, especially during the dormant period, as this can cause the bulbs to rot. Avoid overcrowding tulips, as this can lead to fungal diseases. If you notice overcrowding, divide the bulbs after they have finished flowering.
Dividing Tulip Bulbs
Dividing tulip bulbs, also known as deadheading, is an essential step in maintaining a healthy tulip garden. It promotes flower production and prevents overcrowding that can lead to fungal diseases. To divide your bulbs, follow these steps:
- Wait until the foliage has turned yellow: This is usually 6 to 8 weeks after the tulips have finished blooming. The yellowing foliage indicates that the bulb has stored enough nutrients for the next growing season, and it’s safe to divide them.
- Remove the tulip bulbs from the soil: Using a trowel or hand fork, gently dig around the tulip bulb, taking care not to damage it. Lift the bulb from the soil, along with the attached baby bulbs, known as offsets.
- Separate the offsets from the mother bulb: Carefully pull the offsets apart from the mother bulb. If the offset does not come away easily, use a sharp knife to cut it off.
- Replant the bulbs: Replant the mother bulb and the offsets at the same depth and spacing as before. If you have too many bulbs, consider expanding your tulip garden or gifting some to your fellow gardening enthusiasts.
Remember, dividing tulip bulbs is not always necessary. If your tulips are blooming beautifully and are not overcrowded, you may choose to leave them undisturbed. However, if the flowers are diminishing in size or quantity, it might be time to divide your tulip bulbs.
How to Plant Tulip Bulbs in Pots
Planting tulip bulbs in pots offers a versatile and convenient way to add color and beauty to your garden, especially if you have limited space. Here’s how to do it:
- Select the Right Pot: Choose a pot that is at least 12 inches deep and has sufficient drainage holes. This depth allows enough room for the bulbs to root and the drainage holes prevent waterlogging, which can cause rotting.
- Prepare the Pot: Fill the pot with a mix of well-draining potting soil and compost. Leave about a quarter of the pot empty at the top to make room for the bulbs.
- Plant the Bulbs: Place the bulbs pointy-side up in the soil, spaced at least 3 inches apart. Cover with soil, ensuring the bulbs are planted at a depth of three times their height.
- Water and Place: Water the pot thoroughly and place it in a sunny location.
As to when to pot, you should aim to plant tulip bulbs in pots in the fall, about six weeks before the first hard frost. This will give the bulbs a chance to establish roots before winter sets in.
Caring for tulips in pots involves regular watering, especially in the growing season. However, be careful not to overwater as this can lead to bulb rot. Once the tulips have bloomed, remove the faded flowers but leave the foliage until it turns yellow. This allows the bulb to store nutrients for the next growing cycle. During the dormant period, keep the pot in a cool, dry place to mimic the winter chill tulips need to bloom. If you live in a warmer climate, consider chilling the bulbs in your refrigerator before planting.
Remember, tulips in pots may not perennialize as well as those in the ground, so you may need to plant new bulbs each year for a reliable display. But with the right care, you can enjoy a spectacular show of tulips in your potted garden every spring.
How to Grow Tulips Indoors
Growing tulips indoors allows you to enjoy their vibrant colors and graceful forms regardless of the season. While the timing outdoors is dictated by nature, indoors you have more flexibility to plant anytime. Here’s how you can successfully grow tulips indoors:
- Choose the Right Bulbs: Select high-quality tulip bulbs for indoor growing. Consider dwarf or short-stemmed varieties, which are less likely to become top-heavy in pots.
- Chill the Bulbs: Tulips need a chilling period to bloom. If you plan to plant outside of the fall season, first refrigerate the bulbs for 12-16 weeks in a paper bag.
- Prepare the Pot: Choose a pot that’s at least 6 inches deep with good drainage. Fill it with well-draining potting mix, leaving space for the bulbs.
- Plant the Bulbs: Nestle the bulbs into the soil, pointy-side up. They should be close but not touching, and covered with potting mix.
- Water and Place: After planting, water thoroughly and place the pot in a bright, cool location. Tulips prefer cool temperatures (around 60°F/15°C) and plenty of sunlight.
- Caring for Indoor Tulips: Keep the soil lightly moist and rotate the pot regularly for even growth and sun exposure. Once the tulips bloom, deadhead the spent flowers but leave the foliage until it turns yellow, to allow the bulb to store energy for its next growth cycle.
Growing tulips indoors can bring a touch of spring to your home at any time of the year. With the right care, you can enjoy their beauty inside as well as in your outdoor garden.
Pest and Diseases
Tulips are not immune to diseases and pests that can affect other plants in your garden. Some common problems to watch out for include botrytis blight, which causes brown spots on the foliage and flowers, and aphids, which can suck sap from the plant and stunt their growth. If you notice any of these issues, treat them immediately using organic pesticides or insecticidal soap.
Different Types of Tulips
Tulips, originating from Central Asia, are classified into 15 different divisions according to their flower shapes, bloom time, and height. Let’s explore some of the most popular types of tulips, their features, and the best zone types for them.
- Single Early Tulips: These tulips bloom in early spring and feature classic, cup-shaped flowers. The ‘Prinses Irene’ is a popular variety with its striking orange blooms and purple flame. They thrive in USDA hardiness zones 3 to 8.
- Double Early Tulips: Known for their peony-like blooms, Double Early Tulips are a sight to behold in mid-spring. The ‘Foxtrot’ variety, with its soft pink blossoms, is a favorite among gardeners. They do best in zones 3 to 8.
- Triumph Tulips: Triumph Tulips are renowned for their sturdy stems and wide variety of colors. They bloom in late spring. The ‘Blue Ribbon’ variety is particularly notable for its stunning purple blooms. They grow well in zones 3 to 8.
- Darwin Hybrid Tulips: These tulips boast large, long-lasting blooms on strong stems, perfect for cut flower arrangements. They flower in late spring. The ‘Red Impression’ variety is well-loved for its vibrant red blossoms. They thrive in zones 3 to 8.
- Single Late Tulips: The tallest of the tulip varieties, Single Late Tulips are dramatic additions to any garden and bloom in late spring. The ‘Queen of Night’ variety, with its deep, velvety maroon petals, thrives in zones 3 to 7.
- Lily-Flowered Tulips: Named for their slender, pointed petals that arch outward, Lily-Flowered Tulips bloom in late spring. The ‘Ballerina’, an orange lily-flowered tulip, does well in zones 3 to 8.
Remember that the best zone type for your tulips largely depends on the specific variety of tulip. Always check the recommended hardiness zone before planting.
Happy Gardening!
Planting tulip bulbs can seem daunting at first, but with the right preparation and care, you can grow a stunning tulip garden that will bring joy to your home and neighborhood. Remember to plant bulbs in the fall, prepare soil with organic matter, plant bulbs at the correct depth, and care for them properly throughout the year. With these tips, you’ll be able to create the tulip garden of your dreams!
Please be sure to check out my Gardening Blog Post Page for more tips on all types of gardening. Including Seed Saving, Seed Starting, Orchids, Water Gardening, Coldframe Gardening, Indoor Bulb Gardening, Hydroponics, Container Gardening, Mums, Herbs, African Violets, planting Bulbs, Flower Gardening, Vegetable and Fruit Gardening, Indoor Houseplants of all kinds, Cactus, Succulents, Hanging plants, Deer resistant plants and even Bird, Bee, Butterfly and Hummingbird Gardens!