
Organic gardening is not just about growing your produce without synthetic fertilizers; it’s a complete lifestyle that embraces sustainability and nature. For avid organic gardeners, composting is a core practice that nourishes the soil, reduces waste, and contributes to a healthier planet. But what if you’re just starting with composting and the thought of investing in expensive compost bins gives you pause? We’re here to explore how you can create your DIY compost bins, and how to maintain them effectively. Let’s turn that kitchen and garden waste into ‘black gold’ for your garden!
I got into composting years ago when my kids had rabbits and I had to figure out something to do with all that waste!! I started composting and it was so easy, I just kept adding grass clippings, leaves, vegetable and fruit peelings, rabbit poo along with the cedar shavings. And before I knew it I had the most beautiful flower gardens, that I continued to enlarge each year. I even ended up on our counties garden walk, where they picked 5 gardens each year and over a weekend I had over 500 people actually pay to walk through my yard. They all kept asking how do you have such beautiful flower beds and my answer – compost all thanks to pet rabbits!
Why Compost?
Before we dig into building compost bins, it’s essential to understand why composting is beneficial. Compost, often referred to as “gardener’s gold,” is rich in nutrients and a fantastic natural fertilizer for your plants. But its benefits extend far beyond feeding your garden. Composting:
- Reduces the volume of waste going to landfills, which in turn reduces greenhouse gas emissions.
- Builds healthy soil by introducing beneficial microorganisms that improve soil structure and support plant health.
- Retains and balances moisture in the soil, which can play a crucial role in saving water.
Composting is a win for your plants, a win for your garden, and a win for the environment.
Easy DIY Compost Bins
Creating your compost bin does not need to be complicated. Here are several straightforward ways to craft one from simple, inexpensive, or even free materials.
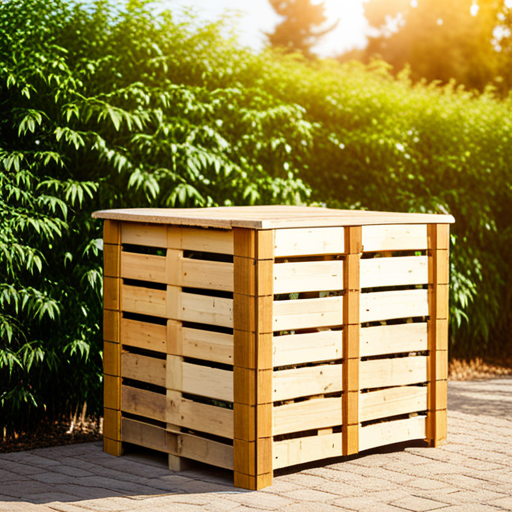
Pallet Compost Bin
Pallets are incredibly versatile and make for excellent compost bin materials. A pallet compost bin involves a straightforward assembly process and is perfect for gardeners with larger spaces.
- 2 to 4 wooden pallets, depending on the size of the desired bin
- Screws or hinges for fixing
1: Stand the pallets upright and attach them at the corners using screws or hinges.
2: Leave one side or one set of two sides accessible for turning and removing the compost.
This design allows for plenty of aeration and makes turning the compost an easy, less labor-intensive process.
Garbage Can Composter
A large plastic trash can can easily be repurposed as a compost bin. Here’s how:
- A durable plastic garbage can with a secure lid
- A drill or any device that can punch holes into the can
1: On the body and the lid of the garbage can, drill multiple holes for aeration. These should be about 1 to 1.5 inches apart.
2: Place the can on its side to fill and roll or turn it regularly to aerate.
This simple bin design is ideal for small spaces as it can be tucked away discretely and is great for those just starting with composting.
Wire Mesh Compost Bin
For gardeners looking for an easy, cost-effective solution, wire mesh compost bins can be the answer. This type of bin allows for excellent ventilation and is quite straightforward to make.
- Roll of wire mesh or chicken wire
- Stakes or metal posts
1: Measure and cut a length of wire mesh to create a cylinder of your desired size.
2: Use stakes or metal posts to secure the wire mesh in place in your garden.
3: Fill the bin with your compost materials, ensuring to layer greens (such as kitchen scraps) and browns (like dead leaves) for optimal composting.
This bin is easily accessible and makes turning the compost simple. Plus, you can adjust the size as your composting needs grow.
Tumbler Composter
A tumbler composter is great for those who want to speed up the composting process and have a bit more budget. It involves a rotating barrel that makes turning the compost effortless.
- A large barrel or drum
- A stand to hold the barrel off the ground
- Screws and bolts to secure the barrel to the stand
1: Ensure the barrel has a secure lid and drill holes for aeration.
2: Attach the barrel horizontally to a stand that allows it to rotate.
3: Fill the barrel with compost material, close the lid, and turn it every few days.
Tumblers are an excellent option for keeping your composting process neat, tidy, and efficient. They’re particularly suitable for urban gardeners with limited space.
How to Set Up Your DIY Compost Bin
Once you’ve built your new compost bin, it’s critical to set it up correctly to ensure you harness all the benefits of this natural process.
Select Your Site
Choose a level, well-drained spot in your yard for your compost bin. Avoid placing it directly on grass as it can block drainage. The site should also be easily accessible, especially when it comes to turning the compost and adding materials.
Layer Green and Brown Materials
To start composting, remember that your pile needs ‘green’ nitrogen-rich materials (like food scraps, grass clippings, and manure) and ‘brown’ carbon-rich materials (like leaves, straw, and wood chips).
Start with a layer of brown materials, then add green materials, and sprinkle with a handful of finished compost or garden soil to introduce the necessary microorganisms.
Keep it Moist
Your compost pile should be about as damp as a wrung-out sponge. If it’s too dry, decomposition slows down. Too wet, and you risk creating bad odors and encouraging pests. Monitor the moisture level by checking with your hands when you turn the pile and water lightly if necessary.
Turn Your Compost
To speed up the process, turn the compost regularly. This aerates the pile, prevents odors, and ensures that all the materials break down evenly. You can use a garden fork or shovel for this job.
Maintaining Your DIY Compost Bin
Once your compost bin is set up and materials are added, it’s important to maintain it to ensure successful decomposition.
Monitor the Temperature
The best composting temperature ranges between 110°F and 160°F. High temperatures indicate that decomposition is occurring effectively. This compost thermometer is perfect for monitoring the temps. Turning the pile regularly helps distribute the heat, enabling even breakdown.
Keep Adding Materials
Remember to keep adding materials to the compost bin. A good compost pile should have a mix of materials that you are continuously adding to as well as ready-to-use compost that you are taking out.
Practice Patience
Composting is not a quick process—it can take anywhere from a few months to a year for the compost to be fully mature. Be patient and continue adding materials as you wait.
Happy Composting!
Creating a DIY compost bin is a fantastic beginner’s step toward achieving a more sustainable garden and life. It’s an endeavor that’s good for the planet, for your garden, and for aspiring to be more self-sufficient. By following these basic guidelines, even the newest gardener or environmentalist can start turning their organic waste into a valuable resource, enriching their garden soils and fostering a healthy, thriving green space. Composting with DIY compost bins is an art that gets better with time and practice, so why not start today? Your garden—and the earth—will thank you.
Please be sure to check out my Gardening Blog Post Page for more tips on all types of gardening. Including Seed Starting, Orchids, Water Gardening, Coldframe Gardening, Indoor Bulb Gardening, Hydroponics, Container Gardening, Mums, Herbs, African Violets, planting Bulbs, Flower Gardening, Vegetable and Fruit Gardening, Indoor Houseplants of all kinds, Cactus, Succulents, Hanging plants, Deer resistant plants and even Bird, Bee, Butterfly and Hummingbird Gardens!