African Violet Leaf Propagation

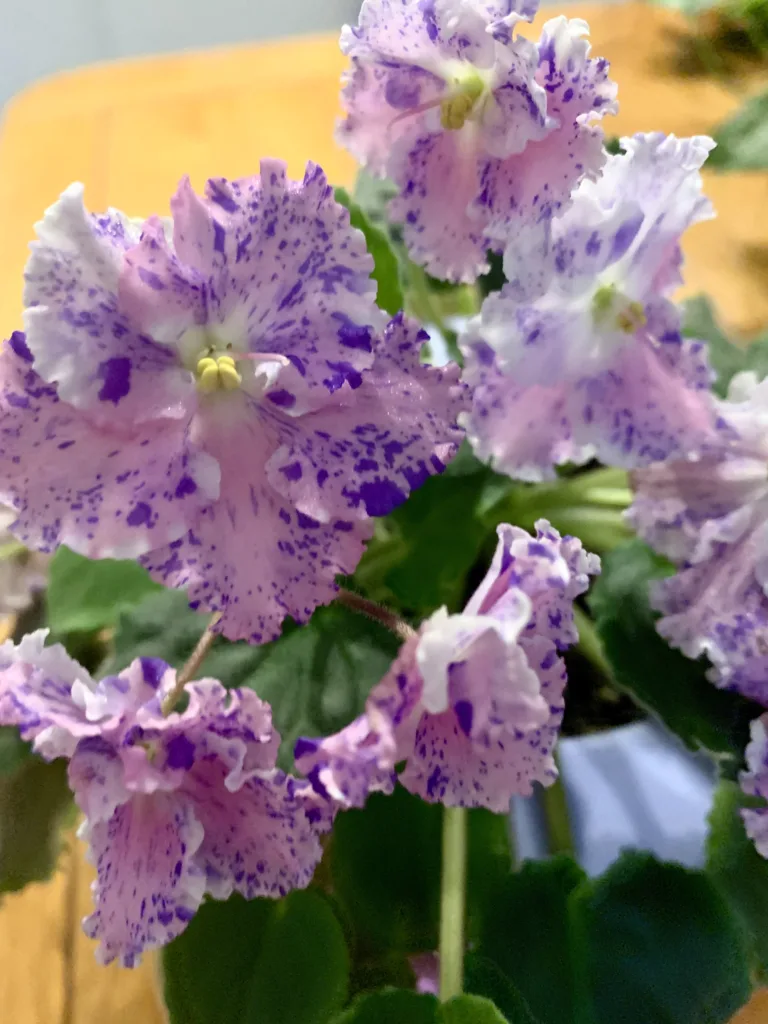
African Violets (Saintpaulia) are a popular indoor plant because of their stunning blooms and unique leaves. When you know how all the tips and tricks to care for them properly they are easy to grow. Many gardeners want to propagate their African violets to create more plants inexpensively and share them with family and friends. In this blog post, we will discuss African Violet propagation, specifically leaf propagation and step-by-step guide.

Propagating by Leaf Cutting in Soil

Leaf cutting is one of the most common methods for propagating African violet plants. To do this, you’ll need a healthy leaf and a sterile cutting tool. Follow these steps for successful propagation:

  1. Choose a healthy leaf: Select a mature leaf from your African violet plant, preferably one that is sturdy and lush green. Avoid leaves that show signs of disease or stress.
  2. Make a clean cut: Using a sterile knife or pair of scissors, cut the leaf stem at a 45-degree angle. This increases the surface area for roots to develop.
  3. Prepare the growing medium: Fill a small pot with a sterile, well-draining potting mix, such as an African violet mix or perlite.
  4. Plant the cutting: Push the cut end of the leaf stem, dip in rooting hormone powder and plant about 1 inch into the soil. Position the leaf to stand upright.
  5. Provide the right conditions: Place the pot in a warm, bright spot but out of direct sunlight. Keep the soil consistently moist but not waterlogged.

Within a few weeks, you should see new plantlets emerging from the soil. This method may require some patience, but it’s an effective way to multiply your African violet collection. Remember, the healthier the parent leaf, the more successful the propagation will be.

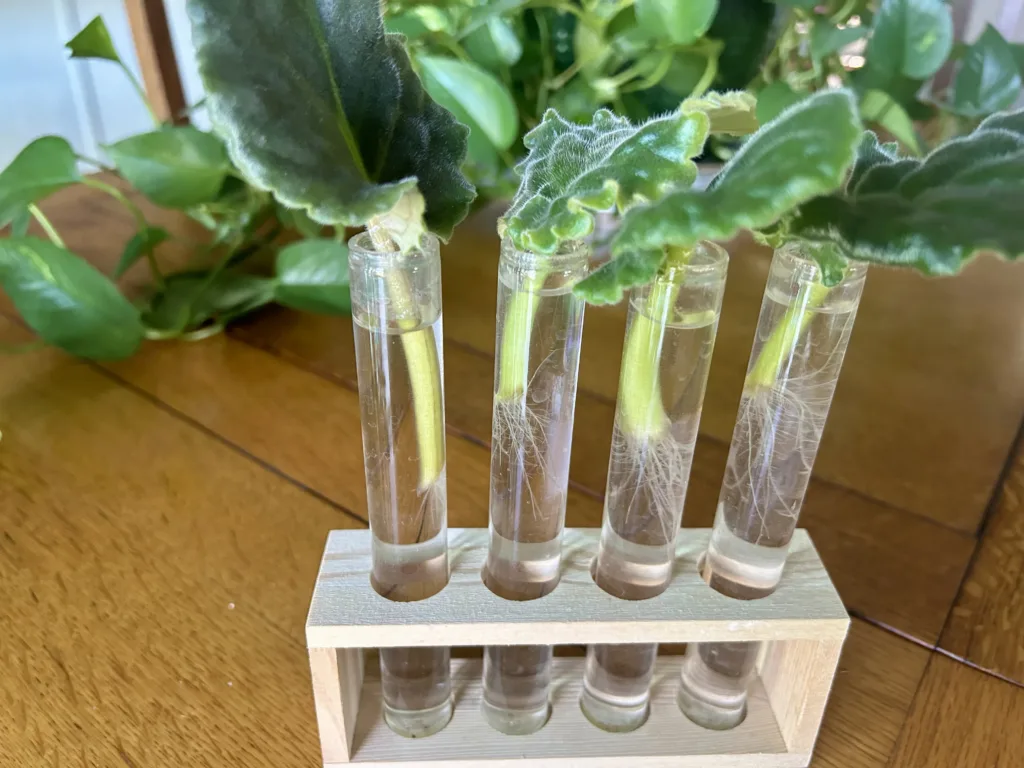
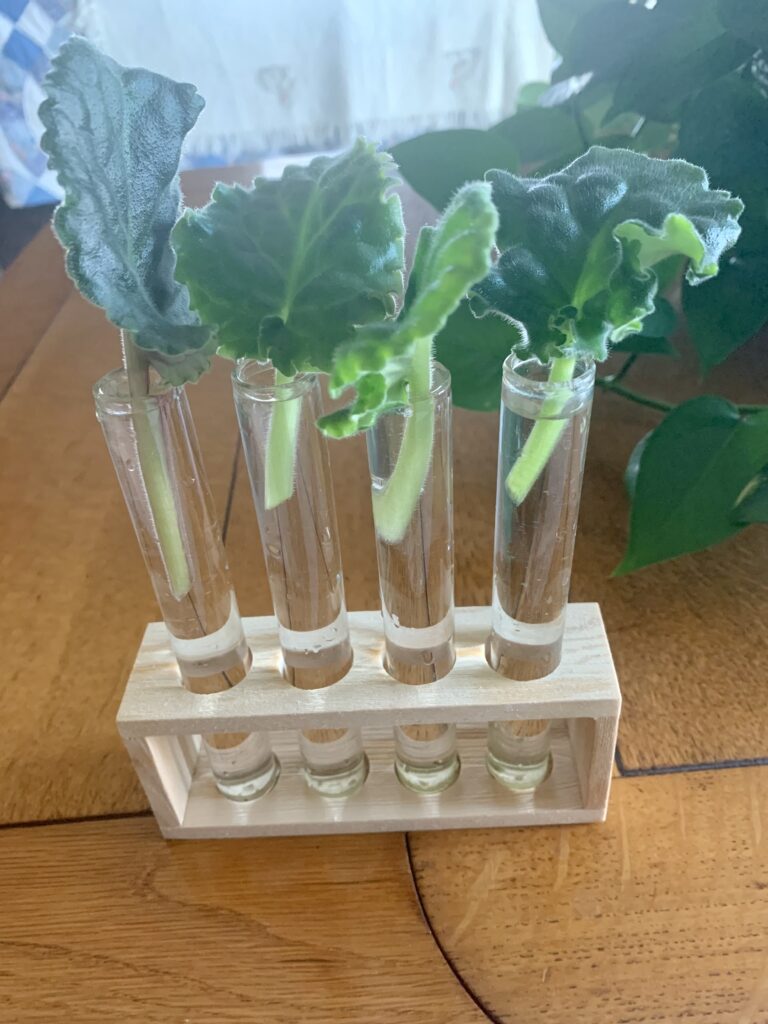
Propagating by Leaf Cutting in Water

Another method for propagating African Violets is through water propagation. This method is especially beneficial for those who wish to visually monitor the root development. Here’s how to do it:

  1. Choose a healthy leaf: Much like the soil method, select a mature, healthy leaf from your African Violet. A good leaf will increase the chance of successful propagation.
  2. Make a clean cut: With a sterile cutting tool, cut the leaf stem at a 45-degree angle. This will provide a larger surface area for root development.
  3. Prepare a water container: Find a small glass vase or propagation station for multiple leaves and fill it with filtered or distilled water. 
  4. Position the leaf: Place the cut end of the leaf stem into the water, making sure the leaf itself does not touch the water.
  5. Provide the right conditions: Position the container in a warm, bright area but away from direct sunlight. Change the water every one to two weeks to keep it fresh.

In a few weeks, you should notice roots starting to form. Once the roots are about an inch long, you can transfer the new plant to a pot filled with African Violet potting mix. Like the soil propagation method, the water method also requires patience, but it provides the joy of watching the root development process.

Propagating African Violet leaves in water
Propagating my leaves in water!

Rooting Hormones: Pros and Cons

Rooting hormones can be an advantageous tool when propagating African Violets, but they also come with some considerations. 

Pros

  1. Increased Success Rate: Rooting hormones can significantly improve the chances of successful propagation. They contain auxins, a type of plant hormone that stimulates root growth. This can be particularly beneficial when propagating a difficult or finicky plant.
  2. Faster Root Development: Rooting hormones can expedite the process of root formation. This could mean a shorter wait time before you can repot your new African Violet plant.
  3. Stronger Plants: The plants propagated with rooting hormones often develop a robust root system, which can lead to healthier, more resilient African Violets.

Cons

  1. Possible Health Risks: Some rooting hormones contain synthetic chemicals that can be harmful if not used properly. It’s important to follow the product instructions closely and to keep the product out of reach of children and pets.
  2. Unnecessary for Some Plants: Not all plants require rooting hormones for successful propagation. African Violets, in particular, are often able to root well on their own.
  3. Additional Cost: Although relatively inexpensive, rooting hormones do represent an additional cost. Depending on how often you propagate plants, this can add up.

In conclusion, while rooting hormones can increase the success rate and speed of African Violet propagation, they are not always necessary. It’s a personal decision whether to use them, based on your own propagation needs and preferences.

Removing the Mother Leaf: When and How

Once you start seeing a clump of leaves forming on the new plant, it signifies successful propagation. This usually happens after several weeks but can vary based on conditions. However, don’t be in a rush to remove the mother leaf. This leaf is still providing the new plantlets with much-needed nutrients. 

The best time to remove the mother leaf is when the new plantlets have established their own strong root system. This usually happens when they’ve grown three to five leaves of their own. At this point, the new African Violet is capable of sustaining itself, and the mother leaf can be cut off. 

To remove the mother leaf, use a sharp, sterile knife or pair of scissors. Make a clean cut as close to the base of the stem as possible, taking care not to damage the new plant. Remember to handle your new African Violet delicately to avoid causing any trauma. This is an exciting time in the propagation process and a sign that you are close to having a fully independent new plant.

Choosing the Right Pot Size for New Leaf Start and When to Upsize

When it comes to planting your new African Violet leaf start, choosing the right pot size is crucial. Ideally, the initial pot should be relatively small – usually around 2 to 3 inches in diameter. Smaller pots help maintain a favorable root-to-soil ratio and encourage the development of a robust root system.

As the new plant grows, it will eventually require a larger pot. Typically, the time to move up in size is when the width of the plant reaches approximately one-third the diameter of the current pot. Alternatively, you can observe the root system; if the roots are becoming crowded and starting to circle the bottom or sides of the pot, it’s a clear sign that repotting is needed.

When upsizing, don’t go too big too soon. A common mistake is to move the plant to a significantly larger pot, thinking it will allow the plant to grow bigger and faster. However, a pot that is too large can lead to waterlogging and root rot, as the soil will stay wet longer than necessary. A good rule of thumb is to move up to a pot that is 1 to 2 inches larger in diameter than the current one.

Remember, every plant is unique and may grow at a different pace. Always monitor your African Violet’s growth and adjust accordingly. Regular repotting not only prevents the plant from becoming root-bound but also provides fresh soil and nutrients, contributing to a healthier, more vibrant African Violet.

Happy Gardening!

African violets are a perfect plant for those who want to propagate and increase their collection. With the different methods of propagation available, you can easily produce new plants from the parent plant. Whether you prefer leaf cutting or crown division, these methods are easy to do, and with a little patience, you can grow healthy and beautiful African violets. 

Please be sure to check out my Gardening Blog Post Page for more tips on all types of gardening. Including Seed Saving, Seed Starting, Orchids, Water Gardening, Coldframe Gardening, Indoor Bulb Gardening, Hydroponics, Container Gardening, Mums, Herbs, African Violets, planting Bulbs, Flower Gardening, Vegetable and Fruit Gardening, Indoor Houseplants of all kinds, Cactus, Succulents, Hanging plants, Deer resistant plants and even Bird, Bee, Butterfly and Hummingbird Gardens!

How to Propagate African Violets

African violets are one of the most popular houseplants due to their unique beauty and low-maintenance requirements. But if you’d like to create more plants from your African Violet collection then propagation is the answer and possible – with just a few simple steps. This is by far my favorite thing to do and I love sharing leaves with my friends so can all increase our collection! Below are some tips on how to propagate African violets easily at home.

Gather the supplies for African Violet Propagation

It’s important to use potting soil specifically designed for African violets, as a regular potting mix may contain too many nutrients that can harm delicate plants. You will also need a sharp knife or scissors, rooting hormone, various sizes of pots, baggies, or small domes for humidity. If you prefer the water propagation method then a vessel to hold the water will be needed.

Pot sizes needed for African Violet Propagation

It is important to choose the right pot for your African Violet propagation. You’ll want a smallish container with drainage holes and one that can fit inside another slightly larger one to create humidity. Another option would be to use baggies or miniature domes over the top of each pot.

Many of my friends start their new leaves in 2″ plastic pots but I just put mine directly into the 4″ pots and let them grow into them-I have started hundreds of Violets and never had an issue with this method. My reason is you are messing with the root balls less so minimizes the risk of damaging the young roots.

Identify the Healthiest African Violet Plant for Propagation

Look for healthy leaves that are thick, dark green, and without any signs of discoloration or disease. It’s important to choose a plant that is in its prime so you can ensure success with the propagation process.

How to prepare the African Violet for Propagation

It’s best to propagate African violets during the warmer months of spring or summer when the conditions are most favorable for growth. Gently remove any wilted or dead leaves from the plant and cut off any stems that have multiple blooms.

Different Types of Propagation for African Violets

There are two main ways to propagate African violets – through leaf cuttings or by growing new plants from their runners. Leaf cuttings involve snipping off healthy leaves and using them as the basis for a brand-new plant by either soil or water propagation. While runners grow out of the mother plant and can be disconnected and planted elsewhere.

Propagation into African Violet Soil

Using a sharp knife or scissors, carefully slice off a few healthy leaves from the middle row of leaves of the plant. The leaves should be at least two inches long with some stem or petiole attached. Using a sterile knife or scissors (I wipe mine with alcohol and let them air dry) cut the leaf end at an angle.

Dip the leaves in a rooting hormone and place them into a small pot of damp African violet potting soil. Cover with a plastic bag or small dome to create humidity. Place your newly potted leaves in a spot where they will receive indirect sunlight but not direct sun.

Propagating in Perlite or Vermiculite

If you prefer to propagate your African Violet leaves in Perlite or Vermiculite or a combination of both. Some even like to add a small amount of African Violet soil to the mix. Use a sharp knife or scissors, and snip off several healthy leaves from the middle row of leaves of the plant.

Dip them in rooting hormone and then place them into a vessel filled with damp perlite or vermiculite. Move your vessel to a spot that gets indirect sunlight and cover it with a plastic bag or small dome. Mist the leaves perlite/vermiculite with water, making sure not to overwater, as this can cause root rot and other diseases.

Propagating African Violets in Water

African Violet leaf propagation in water
Leaf propagation in Water-look at those beautiful roots!!

Snip off healthy leaves and place them in a vessel that contains water. There are some beautiful propagation stations for water. Make sure the petiole or stem of the leaves is securely submerged.

Change out the water every few days to prevent bacterial buildup, and then after about 3-4 weeks when you notice new roots appearing on the leaves, it’s time to transfer them into African Violet soil. Cover with a plastic bag or small dome to create humidity. Place your propagated plants in a spot where they will receive indirect sunlight but not direct sun.

Propagation by Runners or Plantlets

Runners or plantlets are fast-growing stems that grow from the base of the mother plant. They can be removed from the parent and planted directly into a new pot of soil. Fill in your new pot with African violet potting soil and create a small hole for planting. Carefully remove a runner from the parent, making sure to keep as much root system attached as possible. Place it in the pre-made hole and lightly press down on the soil to secure it. Cover with a plastic bag or small dome to create humidity. Place your propagated plants in a spot where they will receive indirect sunlight but not direct sun.

Monitor Progress and Transplant to a larger pot once root ball forms.

Once you’ve planted your African violet cuttings or runners, keep an eye on how they are progressing. Look for signs of new growth and a stronger root system. When the plants’ roots have grown into a solid ball, it’s time to transplant them into a larger pot with fresh soil. Follow the same steps for transferring your plantlets or cuttings into the new pot. Make sure to water them thoroughly after transplanting and keep in mind that it may take a few weeks before they start blooming again.

Continue Care of the African Violet Plant once rooted

Once you’ve successfully propagated African violets, it’s important to continue to care for them regularly. Water the plants when the soil feels dry and add fertilizer with each watering, as African violets need added nutrients to stay healthy.

Make sure to keep in indirect sunlight or fluorescent light and make sure that the temperature of the room is warm (60-75°F) and humid (around 50%) – an ideal environment for African violets. If the leaves start to become yellow or the flowers fall off, this could be a sign of too much fertilizer.

Keep an eye out for pests such as mealybugs or aphids and treat them with insecticidal soap if needed. With proper care, you’ll be able to enjoy blooming African violets for years to come!

Conclusion on How to Propagate African Violets

Propagating African violets can be a fun and rewarding experience. Whether you choose to propagate by leaf cuttings or plantlets, in water or soil, it’s important to keep in mind that each method takes patience and the right environment for success. With the proper care and attention, you’ll be able to enjoy your African violets for years to come!

Play around with the different propagation methods and see which one you have the best success with. I have friends that swear by African Violet soil only and others who only use Perlite or Vermiculite. And myself I start all mine in water, once roots form I transplant them to a pot of African Violet soil.

Once you get your method down, then begin trading leaves with friends and your new African Violet obsession has started!

Please be sure to check out my Gardening Blog Post Page for more tips on all types of gardening. Including Seed Starting, Orchids, Water Gardening, Coldframe Gardening, Indoor Bulb Gardening, Hydroponics, Container Gardening, Mums, Herbs, African Violets, planting Bulbs, Flower Gardening, Vegetable and Fruit Gardening, Indoor Houseplants of all kinds, Cactus, Succulents, Hanging plants, Deer resistant plants and even Bird, Bee, Butterfly and Hummingbird Gardens!

One of my Favorites-Amour Elite!!