Succulents are an incredibly popular and low maintenance way to add a touch of color and life to your garden. Whether you’re looking for a pop of color around your front door or an interesting houseplant, succulents are the perfect choice. Now that you know you want to grow succulents, let’s break down how exactly you can do it! Succulents and cacti can turn your living space into an oasis of flourishing foliage, bringing a refreshing touch to any home.
Growing these plants at home offers a great opportunity to discover the unique characteristics they possess and master the craft of caring for them. Succulents and cacti don’t require too much watering or maintenance; with proper care, their wonderful colors and shapes will calm the senses and freshen up your environment. Take a dive into the world of succulent and cactus gardening to spruce up your space! Hope this was helpful, let me know if you have any questions. Happy Gardening!
Hens and chicks (Sempervivum) are a popular choice for gardeners because they are easy to grow, drought-tolerant, and come in a variety of colors and textures. These succulent plants, often found in rock gardens or containers, are perfect for adding visual interest without requiring much maintenance. If you’re looking to grow hens and chicks. Then this post will walk you through everything you need to know about how to grow hens and chickens. From soil preparation to overwintering, and even unique pot ideas to display them.
Preparing the Soil
Hens and chicks thrive in well-drained soil. Since they are succulents, water retention in the soil can lead to root rot, which is a common issue. To create the perfect environment, start by choosing a sandy or gritty soil mix. If your garden soil is heavy or clay-based, amend it with sand, perlite, or gravel to improve drainage. A good rule of thumb is to use a cactus or succulent mix, which is designed specifically for plants that prefer dry conditions.
In addition to proper drainage, hens and chicks do well in soil that is slightly acidic to neutral, with a pH level between 6.0 and 7.5. Testing your soil’s pH can help you make any necessary adjustments before planting.
Light Requirements
When it comes to light, hens and chicks love full sun. They need at least six hours of direct sunlight each day to thrive and show off their vibrant colors. If you live in a particularly hot climate, providing them with a bit of afternoon shade can prevent scorching. However, too much shade can cause the plants to stretch out and lose their compact shape.
If you are growing hens and chicks indoors, place them in a sunny window where they can receive plenty of light. A south-facing window is ideal, but an east or west-facing one can also work as long as it gets enough sunlight throughout the day.
Water Needs
Hens and chicks are drought-tolerant, making them perfect for gardeners who don’t want to worry about frequent watering. In fact, overwatering is one of the most common reasons these plants fail. Water them sparingly, allowing the soil to dry out completely between waterings. A good rule is to water deeply but infrequently.
During the summer growing season, water them once every week or two, depending on the weather. In the winter, reduce watering to once a month or even less. The plants will go dormant in colder months and require very little water.
Fertilizer
Hens and chicks don’t need much fertilization. In fact, over-fertilizing can lead to leggy growth and fewer offsets. However, if you want to give your plants a boost, you can feed them with a diluted, balanced fertilizer once during the growing season. A slow-release granular fertilizer for cacti and succulents works well. Apply it sparingly, as too much can do more harm than good.
Pest Control
Pests rarely bother hens and chicks, but they are not completely immune. Mealybugs, aphids, and spider mites can occasionally become a problem. To prevent infestations, regularly inspect your plants and remove any visible pests by hand or with a stream of water.
If the problem persists, treat your plants with insecticidal soap or neem oil. Both options are safe for succulents and effective at controlling common pests. Remember to avoid overwatering, as soggy conditions can attract pests and lead to fungal issues.
Pruning
Hens and chicks require very little pruning, but you can clean them up by removing dead or dried-out leaves. Simply pluck off the withered leaves to keep the plants looking tidy. The main rosette, known as the “hen,” will produce smaller offsets or “chicks” that grow around it. If these chicks become overcrowded, you can thin them out to give the main plant more room to grow.
Removing the flower stalks is also a good idea, as hens and chicks are monocarpic, meaning the main rosette will die after flowering. However, it will leave behind plenty of offsets to continue growing.
Propagating
Propagating hens and chicks is incredibly easy. The plant naturally produces offsets, which you can separate from the mother plant and replant elsewhere. To propagate, gently pull the chick away from the main plant, making sure it has some roots attached. Then, simply plant it in a new spot with well-drained soil and water sparingly until it becomes established.
Overwintering
Hens and chicks are cold-hardy plants, capable of surviving freezing temperatures. However, if you live in an area with harsh winters, you can take some extra steps to ensure their survival. First, avoid watering them in the winter, as excess moisture can freeze and damage the roots. If your hens and chicks are in containers, consider moving them to a sheltered spot, like a covered porch or garage, to protect them from extreme cold and wind.
If you are growing them in the ground, you can add a layer of mulch around the base of the plants to provide extra insulation. The mulch helps to keep the roots warm and prevents the soil from freezing too quickly.
Unique Pots and Places to Plant Them
One of the best things about hens and chicks is their versatility in container gardening. Their shallow root systems allow them to grow in a wide variety of unique pots and places, adding charm to your garden or home. For a rustic look, plant them in old wooden boxes, weathered terra cotta pots, or vintage watering cans. The natural textures of these containers complement the succulents’ rugged appearance.
Hens and chicks also thrive in rock gardens, wall crevices, or even tucked into cracks in stone steps. They make excellent ground cover between stepping stones or along garden paths. If you want to create a striking display, try planting them in a vertical garden or hanging planter. The cascading effect of the chicks spilling over the edge of the container adds visual interest and draws attention to their unique form.
Happy Gardening
In conclusion, growing hens and chickens is simple and rewarding. By providing them with well-drained soil, plenty of sunlight, and minimal water, you can enjoy these resilient plants year-round. Whether you choose to display them in unique pots, rock gardens, or traditional flower beds, they will add texture and charm to your outdoor space.
Please be sure to check out my Gardening Blog Post Page for more tips on all types of gardening. Including Seed Starting, Orchids, Water Gardening, Coldframe Gardening, Indoor Bulb Gardening, Hydroponics, Container Gardening, Mums, Herbs, African Violets, planting Bulbs, Flower Gardening, Vegetable and Fruit Gardening, Indoor Houseplants of all kinds, Cactus, Succulents, Hanging plants, Deer resistant plants and even Bird, Bee, Butterfly and Hummingbird Gardens!
Propagating sedum is a straightforward and gratifying way to expand your garden with minimal effort. Sedums, also known as stonecrops, are resilient succulents that flourish in poor soil and require little care. To propagate sedum successfully, follow these steps focusing on soil type, light, water, when to transplant into their own pots, and fertilizer needs.
Soil Type
Begin by choosing the right soil for your sedum starts. Sedums thrive in well-draining soil that mimics their natural rocky environments. Use a commercial cactus or succulent mix, or create your own by mixing equal parts potting soil, coarse sand, and perlite. This blend ensures proper drainage and prevents water from accumulating around the roots, which can lead to rot. Before planting, fill your pots or garden bed with this soil mix, creating an ideal environment for your new sedums.
Light Requirements
Provide ample light for your new sedums to thrive. Place your pots in a location that receives at least six hours of direct sunlight each day. For outdoor planting, choose a spot with full sun to partial shade. Sedums can tolerate some shade, but insufficient light can result in leggy growth and reduced vigor. For indoor propagation, position the pots near a south or west-facing window to ensure they get enough sunlight. If natural light is limited, consider using grow lights to provide the necessary light spectrum for healthy growth.
Watering Your Sedums
Water sedums sparingly, as they are drought-tolerant and prefer to dry out between waterings. After planting your cuttings, water them lightly to settle the soil around the roots. For established plants, water only when the soil is completely dry. Overwatering is a common mistake and can cause root rot. To check if your sedums need water, insert your finger into the soil up to the first knuckle; if it feels dry, it’s time to water. When watering, soak the soil thoroughly and allow excess water to drain away. Avoid letting the plants sit in water, as this can quickly lead to root issues.
Propagation Steps
There are several ways to propagate sedum, including stem cuttings, leaf cuttings, and division. The stem cutting method is one of the easiest and most effective.
Stem Cuttings: Select a healthy, non-flowering stem and cut a 4-6 inch section just below a leaf node. Remove the lower leaves, leaving a few at the top. Allow the cutting to dry for a day or two to form a callus over the cut end. This step helps prevent rot when the cutting is planted. Insert the cut end into the prepared soil mix, firming the soil around it to hold the cutting in place.
Leaf Cuttings: Gently twist a healthy leaf from the main plant, ensuring that the entire leaf, including the base, is intact. Let the leaf dry for a day or two, then lay it on top of the soil mix. Press it lightly into the soil. Leaf cuttings will take longer to root than stem cuttings but will eventually form new plants.
Division: For mature sedum plants, you can divide them to create new plants. Carefully dig up the plant and gently separate the roots into smaller sections, each with a few stems and roots. Replant these sections in new pots or garden locations with the prepared soil mix.
When to Transplant
Transplant your sedum cuttings into their own pots once they have established roots and show new growth. The best time to do this is during the growing season, typically spring to early summer. This timing allows the cuttings to establish roots and grow before the dormant season. However, sedums are resilient and can be propagated almost any time of the year if provided with proper care.
Fertilizing
Sedums are low-maintenance plants that don’t require much fertilizer. Too much fertilizer can cause leggy growth and reduce the plant’s overall health. During the growing season, you can feed your sedums with a balanced, water-soluble fertilizer diluted to half strength once a month. Alternatively, use a slow-release fertilizer at the beginning of the growing season. If your sedums are planted in nutrient-rich soil, they may not need additional feeding at all. Always err on the side of under-fertilizing to maintain the plant’s natural, compact form.
Happy Gardening
Propagating sedum provides an easy and effective way to enhance your garden with these versatile and attractive plants. By preparing well-draining soil, ensuring adequate sunlight, watering appropriately, and using the right propagation methods, you can successfully grow new sedum plants. Remember to fertilize sparingly and transplant during the growing season for the best results. With minimal effort, you can enjoy a lush, vibrant display of sedums that will thrive in your garden or home.
Please be sure to check out my Gardening Blog Post Page for more tips on all types of gardening. Including Seed Starting, Orchids, Water Gardening, Coldframe Gardening, Indoor Bulb Gardening, Hydroponics, Container Gardening, Mums, Herbs, African Violets, planting Bulbs, Flower Gardening, Vegetable and Fruit Gardening, Indoor Houseplants of all kinds, Cactus, Succulents, Hanging plants, Deer resistant plants and even Bird, Bee, Butterfly and Hummingbird Gardens!
Beautiful and unique in appearance, echeveria hercules is a popular succulent among gardeners. Its rosette shape and waxy leaves give it an appealing look that stands out in any garden. But how do you care for it properly? Caring for echeveria hercules requires attention to several important factors including the type of pot, soil, watering, light requirements, fertilization, and propagation. In this article, we’ll dive into all of these care tips to ensure that your echeveria hercules thrives and flourishes in any garden space.
Best Pot type for Echeveria Hercules
Choosing the perfect pot for your echeveria is an important part of its care. It’s best to use a terra cotta or clay pot that is slightly larger than the root ball. These types of pots allow for better airflow and drainage. It’s important to ensure the pot has a drainage hole as well to prevent root rot.
Soil Type for Echeveria
Echeveria hercules prefers a well-draining soil with a good balance of nutrients. You can use a cactus or succulent mix that is commercially available or create your own by combining equal parts of sand, perlite, and potting soil. This type of soil helps maintain proper moisture balance while also preventing water-logging.
Water Requirements
Over-watering is a common mistake gardeners make with echeveria hercules. These succulents are drought-tolerant and thrive in dry conditions. Allow the soil to dry completely between watering, and then water deeply to help promote root growth. Be sure to also avoid getting water on the leaves of the plant as it can lead to rotting.
Light Requirements
Echeveria hercules thrives in bright and indirect sunlight. This type of light helps promote healthy growth and vibrant colors. Consider placing your plant near a south-facing window, outdoors in partial shade or under a grow light. Keep an eye on the leaves and if they start to brown or shrivel, it means the plant is getting too much sun.
Fertilizer Needs
Echeveria hercules does not require fertilization often as it can cause the plant to grow too quickly and become leggy. Use a diluted, cactus-focused liquid fertilizer during the growing season, which is typically spring to fall. Avoid fertilizing during the winter months as the plant enters dormancy.
Propagating Echeveria Hercules
Propagating echeveria hercules can be done by separating offsets or leaves from the main plant. Allow the cuttings to dry out for at least a day before planting. Place the cuttings in well-draining soil and water them lightly. Keep them in a warm, bright spot and in a few weeks, you should notice new growth.
Happy Gardening!
Echeveria hercules is a beautiful succulent that adds a unique touch to any garden space. To care for it properly, consider its pot type, soil, watering, light, fertilization, and propagation needs. By following these tips, you’ll be able to ensure your plant thrives and flourishes for years to come.
Please be sure to check out my Gardening Blog Post Page for more tips on all types of gardening. Including Seed Saving, Seed Starting, Orchids, Water Gardening, Coldframe Gardening, Indoor Bulb Gardening, Hydroponics, Container Gardening, Mums, Herbs, African Violets, planting Bulbs, Flower Gardening, Vegetable and Fruit Gardening, Indoor Houseplants of all kinds, Cactus, Succulents, Hanging plants, Deer resistant plants and even Bird, Bee, Butterfly and Hummingbird Gardens!
Are you a succulent lover looking to expand your collection? Or maybe you’re new to gardening and want to start with low-maintenance plants that have unique textures, shapes, and colors? Look no further than Korean succulents! These fascinating plants have become increasingly popular in recent years, thanks to their ability to thrive in a variety of environments. In this ultimate guide, we’ll cover everything you need to know about growing and caring for these succulents, including pot types, soil requirements, light and water needs, fertilizer recommendations, and propagation tips.
Just a few Korean Succulents are: Sedum Sarmentosum, Crassula Ovata ‘Hobbit’, Echeveria Pilosa ‘Etna’, Sempervivum Arachnoideum ‘Cebenese’, Graptopetalum Paraguayense ‘Ghost Plant’, Pachyphytum Oviferum ‘Moonstone’, Aechmea Fasciata ‘Silver Vase Plant’, Graptoveria ‘Fred Ives’, Haworthia Limifolia ‘Fairy Washboard’ and Graptopetalum Superbum.
Pot Type
Korean succulents can be grown in a variety of pot types, including clay, ceramic, glass, and plastic. The most important thing is that the pot has drainage holes to prevent water from accumulating and causing root rot. Some Korean succulents have shallow root systems, so a wide, shallow dish may be ideal for them. Alternatively, taller succulents will appreciate a deeper pot that allows for more soil volume.
Soil Type
When it comes to soil, Korean succulents prefer well-draining, sandy or gritty soil that mimics their natural environment. Avoid using garden soil or potting soil, as these tend to hold onto moisture and can suffocate the roots. Instead, consider mixing your own soil using one part perlite or coarse sand, one part coconut coir or peat moss, and one part small gravel or pumice.
Light and Water Requirements for Korean Succulents
Most succulents prefer bright, indirect sunlight, but some can tolerate full sun or partial shade. Aim to give them at least 6 hours of bright, indirect light per day, either by placing them near a sunny window or using grow lights. As for water, Korean succulents are drought-tolerant and can go long periods without it. Water them only when the soil is completely dry, and be careful not to get water on the leaves or stem, as this can lead to rot or fungal disease.
Fertilizer Type
Like water, Korean succulents don’t require a lot of fertilizer, but they can benefit from a light feeding every few months during the growing season. Choose a succulent-specific fertilizer with a balanced NPK ratio (such as 10-10-10 or 7-7-7), and dilute it to half strength before applying. Avoid fertilizing during the winter months, as succulents enter a period of dormancy and don’t require as much energy.
Propagating Your Korean Succulents
If you want to expand your collection or share your Korean succulents with friends, propagation is a great option. Korean succulents can be easily propagated using stem cuttings or leaf cuttings. Simply take a healthy cutting, let it dry out for a day or two, then stick it into a pot of well-draining soil. Water sparingly and wait for new growth to appear. Some Korean succulents can also produce offsets or pups, which can be separated and potted up on their own.
Happy Gardening!
These succulents are a delightful addition to any collection, with their unique textures, shapes, and colors. By following these tips for growing, caring, and propagating Korean succulents, you can ensure they thrive in your environment and bring you joy for years to come. Remember to choose a well-draining pot, use sandy or gritty soil, provide bright but indirect light, water sparingly and feed lightly, and don’t be afraid to propagate and share your succulent babies with others.
Please be sure to check out my Gardening Blog Post Page for more tips on all types of gardening. Including Seed Saving, Seed Starting, Orchids, Water Gardening, Coldframe Gardening, Indoor Bulb Gardening, Hydroponics, Container Gardening, Mums, Herbs, African Violets, planting Bulbs, Flower Gardening, Vegetable and Fruit Gardening, Indoor Houseplants of all kinds, Cactus, Succulents, Hanging plants, Deer resistant plants and even Bird, Bee, Butterfly and Hummingbird Gardens!
Petal leaf succulent, also known as echeveria, is a popular and delightful succulent that is grown for its beautiful foliage and low maintenance care. It is an ideal plant for both indoor and outdoor settings and is a great choice for gardeners who want to add a touch of sophistication to their plant collection. In this ultimate guide, we will discuss everything you need to know about growing and caring for petal leaf succulent, including the best pot type, soil type, light and water requirements, fertilizer type, and how to propagate. So, let’s get started!
Pot Type for the Echeveria
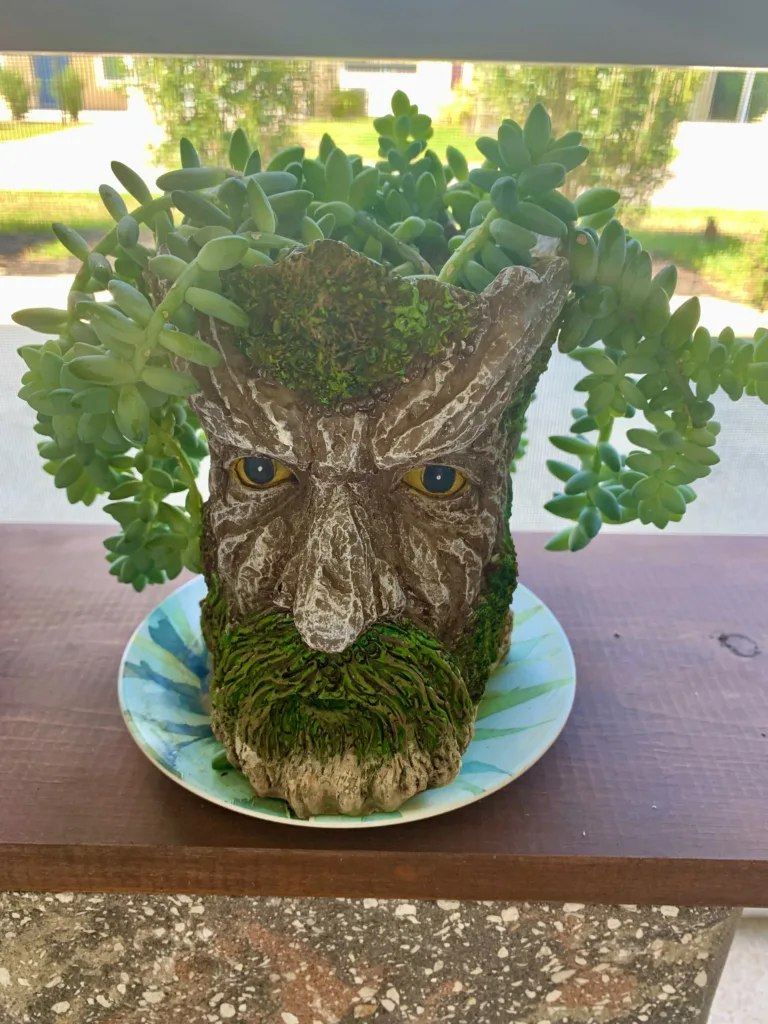
When it comes to selecting the perfect pot for your petal leaf succulent, size is key. It’s important to choose a pot that is slightly larger than the root system of your plant. This allows enough room for the plant to grow and develop healthy roots. Additionally, petal leaf succulent prefers a well-draining pot to ensure that its roots are not sitting in water. A terracotta pot is an ideal option as it allows air to circulate around the roots and keeps the soil from becoming waterlogged. I planted mine in a pot head planter because it’s just adorable!!
Petal Leaf Succulent-Echeveria
Soil for Echeveria
The right soil mix is essential for healthy petal leaf succulent growth. A well-draining soil mix that is high in organic matter is ideal. You can create your soil mix by combining equal parts of peat moss, perlite, and potting soil. These ingredients provide the perfect balance of nutrients, moisture, and air circulation, which are necessary for your plant’s success.
Light and Water Requirements for Petal Leaf Succulent
Petal leaf requires bright, indirect sunlight for optimal growth. When grown indoors, place your plant near a south-facing window where it can get plenty of natural light but avoid direct sunlight as it can scorch the leaves. Additionally, water your plant only when the soil is completely dry to the touch. Overwatering can cause root rot, which can be harmful to your plant’s health.
Fertilizer Requirements
Fertilizer is not a necessity for echeveria, but if you want to give your plant an extra boost, you can use a balanced, water-soluble fertilizer. Feed your plant once a month during the growing season and reduce or stop feeding in the winter when the plant goes dormant. Be sure not to overfertilize your plant as it can damage the root system.
Propagating the Petal Leaf
Petal leaf succulent propagates quickly and easily through leaf or stem cuttings. To propagate using leaf cuttings, gently twist off a mature leaf from the plant and allow it to dry for a few days until the wound has calloused over. Once the leaf has calloused, plant it in a well-draining soil mix and mist it lightly every few days until the new plant has established roots and begins to grow.
Happy Gardening!
Growing and caring for petal leaf succulent can be an enjoyable and rewarding experience for gardeners of all levels. With proper care and attention, this stunning and versatile succulent will thrive and bring beauty to any indoor or outdoor setting. Remember to choose the right pot and soil type, provide the right amount of light and water, use a balanced fertilizer, and propagate using leaf or stem cuttings. Follow these tips, and you’ll have a healthy and thriving petal leaf succulent in no time.
Please be sure to check out my Gardening Blog Post Page for more tips on all types of gardening. Including Seed Saving, Seed Starting, Orchids, Water Gardening, Coldframe Gardening, Indoor Bulb Gardening, Hydroponics, Container Gardening, Mums, Herbs, African Violets, planting Bulbs, Flower Gardening, Vegetable and Fruit Gardening, Indoor Houseplants of all kinds, Cactus, Succulents, Hanging plants, Deer resistant plants and even Bird, Bee, Butterfly and Hummingbird Gardens!
Growing Succulents is easier than you think! Succulents are an incredibly popular and low maintenance way to add a touch of color and life to your garden. Whether you’re looking for a pop of color around your front door or an interesting houseplant, succulents are the perfect choice. Now that you know you want to grow succulents, let’s break down how exactly you can do it!
Gathering Supplies for Growing Succulents
The first step in growing succulents is to gather the supplies that you need. You will need potting soil, fertilizer, a container for your succulent (or multiple containers if you plan on growing more than one), and of course- the plant itself! If you plan on buying from a nursery, be sure to check for any pests that may have hitchhiked on the plant before taking it home with you.
Sunlight and Watering your Succulents
Succulents typically love full sun but they can also survive in part shade or partial sun. Just make sure their containers are placed close enough together so that they don’t become too hot or too cold. When watering your succulents, make sure not to overdo it – too much water can cause root rot and kill your plants! Succulents usually only need water once every 1-2 weeks depending on the temperature outside. It’s best to use tepid water when watering your plants – avoid using ice-cold water as this can shock them.
Grow Lights for Succulents
Succulents are known for their love of sunlight, but sometimes they may not be getting enough light from the natural sources available in your home. In these cases, grow lights can be a great solution to help your succulents grow and thrive.
When choosing a grow light, there are a few key factors to consider. Here are some of the best grow lights for succulents and what to look for when making your selection:
LED grow lights: LED lights are a popular choice because they are energy-efficient, long-lasting, and provide the right spectrum of light for plant growth.
Wattage: Depending on the size of your succulent collection, you may need a light with a higher or lower wattage. Generally, 25-50 watts is sufficient for a small to medium-sized collection.
Distance and coverage: Make sure the light is placed at the right distance from the plants to avoid burning, and that it covers the necessary area. Be sure to read the direction of the grow light you get and they will instruct you on the distance.
Timer: A timer can help ensure that your succulents are getting the right amount of light each day without overexposure.
Here are a few grow lights that are highly recommended for succulents:
By selecting the right grow light, you can ensure that your succulents are getting the light they need to thrive, no matter the season or location of your home.
Potting Soil for Growing Succulents and Cactus
Succulents and cacti are plants that thrive in soil with excellent drainage. To provide succulents and cacti with the necessary drainage, it’s important to use a soil mix that consists of materials that hold minimal moisture.
Succulent potting soil mixes typically contain items such as sand, pumice and perlite. Adding sand to succulent potting soil is a great way to increase drainage. Sand helps ensure that the succulent’s roots are not submerged in water for too long, helping avoid root rot. Sand also encourages air circulation around the succulents’ roots which can help succulents thrive.
Another material to include in succulent potting soil is pumice. Pumice helps improve drainage and aeration, allowing succulents more access to oxygen for healthy root development. Additionally, pumice has a neutral pH balance which can be beneficial for succulents. Perlite is also a common material used in succulent potting soil mixes. Like sand and pumice, perlite has excellent drainage properties which helps succulents and cacti avoid root rot. Perlite is lightweight and can contain moisture, allowing succulents to stay hydrated.
By using a succulent potting soil mix with items like sand, pumice and perlite succulents and cacti can grow healthy and strong.
When selecting a succulent potting soil mix, it is important to look for one that is well-draining and contains the appropriate ingredients for succulents. By making an informed decision, succulent enthusiasts can enjoy their plants for years to come.
If you want your succulent plants to really thrive, adding fertilizer is highly recommended! Fertilizers provide essential nutrients that help keep them healthy and strong. Choose a fertilizer specifically designed for cacti and succulents. These types of fertilizers are often low in nitrogen but high in phosphorus which helps promote blooming.
Depending on the size you need or the style you want for your home or patio there are a multitude to choose from. For your tiny succulents these 2″ plastic pots are perfect. I have these small adorable owl and penguin planters and everyone comments on how cute they are!
If you want color this 8 pack of colorful Kinglake 4″ pots with saucers are great. My latest obsession has been pot head planters! They are all so unique and change with succulent or cactus you put in them! I even find myself talking to them often! I have my string of pearls in this Unie head planter. My burro’s tail in this Youfui head planter or as I call it my old man planter. I have recently added these beauties to my collection-Celapurora face planter and Aimebby face planter.
Easiest Succulents to Grow
Succulents are a great addition to any garden and make excellent houseplants. And even better, many of them are very easy to care for! Whether you’re a beginner or an experienced gardener, these succulents can add color, texture, and interest to your garden. Succulents are versatile and resilient plants that look great in any setting. With the right care and attention, they’ll be sure to bring a unique touch to your outdoor space. Here are some of the easiest succulents to grow:
Aloe Vera
Aloe vera is perhaps the most popular and well-known succulent. The fleshy leaves are filled with a gel-like substance that helps soothe burns and heal skin irritations, making it a great medicinal plant as well as a decorative one. Aloe vera is extremely low maintenance and easy to grow – all you need is some direct sunlight and occasional watering.
Jade Plant
The jade plant is another easy succulent to grow. Its glossy, oval-shaped leaves are what make this plant so popular. Jade plants require plenty of sun and occasional watering to thrive. They also look great in containers or as part of a dish garden.
Cactus
Succulents don’t always come in the form of plants – cacti are also considered succulents! Cacti come in a wide variety of shapes and sizes, making them ideal for any kind of garden. They prefer dry conditions and plenty of sun, so they’re perfect for hot climates. And best of all, they require virtually no maintenance. Just give them the occasional watering and you’re good to go!
Burro’s Tail
Burro’s Tail
The burro’s tail is an easy-to-grow succulent that grows quickly in warm, dry climates. It has long trailing stems covered with small, oval leaves.
It produces delicate pink flowers when it blooms. This plant requires minimal care – just give it some bright, indirect light and occasional watering. My Burro’s Tail in what I call my Old Man pot is one of my favorites!
Easiest Succulents to Grow Indoors
Succulents are the perfect house plant for those who don’t have a green thumb or a lot of time to devote to their plants. Not only do they require minimal maintenance and attention. Succulents also come in many varieties that can add visual interest to any indoor space. The following succulents are some of the easiest to grow indoors.
Aloe Vera
Aloe vera is one of the most popular succulent plants and has many uses, both medicinal and ornamental. It prefers bright light but can also tolerate partial shade and needs well-drained soil to thrive. The pot should be shallow since over watering can cause root rot. Water once a week and wait until the soil is completely dry before watering again.
Snake Plant
Snake plants are an easy-to-care-for succulent that can tolerate low light conditions. This makes them perfect for indoor spaces with minimal natural light. Use a potting mix specifically designed for succulents. Then water it every two weeks or when the top inch of soil is dry.
Panda Plant
Panda plants are an interesting and unique succulent with furry leaves that can tolerate even lower light conditions than snake plants. It needs well-draining, sandy soil and should be watered when the top two inches of soil have dried out completely.
Jade Plant
Jade plants are a popular choice for indoor succulents and are easy to care for. They need bright light and should be watered when the top inch of soil is dry.
To care for all of these succulents, use a pot or planter with drainage holes that allows excess water to easily escape. Use soil made specifically for succulent plants, mix it with perlite (or something similar) to ensure that it drains quickly. Finally, make sure the plants get enough light and only water when the soil is completely dry. With a little extra attention, they should be easy to grow indoors and enjoy for years to come!
Propagating Succulents and Cactus
Are you a home gardener looking to expand your garden by propagating succulents and cacti? If so, you’ve come to the right place! With basic knowledge of gardening and a few simple supplies, virtually anyone can learn how to easily propagate these fascinating plants. In this blog post, we’ll go over the basics of propagating succulents and cactus plants using various methods. From seed starters to stem cuttings, we’ll provide all the information needed for successful propagation of these beautiful additions to any garden. So grab some dirt and get ready to start propagating!
Selecting Succulents and Cactus for Propagating
If you’re looking to get into propagating plants, selecting the right variety can be just as important as the techniques you use for successful growth. Succulents such as sedums and echeverias are some of the easiest plants to propagate, making them excellent choices for beginners. If you’re feeling a bit more adventurous, cacti such as prickly pears or old lady cacti are also simple to successfully divide into multiple specimens. With a bit of patience and the proper knowledge, propagation is a wonderful way to add variety to your garden with minimal effort.
How to Grow Succulents from Cuttings
For those looking to expand their succulent and cactus collection, propagating them at home can be an affordable and fun project. To begin, find succulents or cactus that have healthy stems with a few leaves – this will increase the chances of successful propagation. Next, use a sharp knife to carefully cut off an existing stem from the main succulent or cactus plant. After that, gently place the stem on some succulent soil in a pot and water regularly until you see new growth emerge. Be sure to supply adequate sunlight to your succulent before fertilizing with fertilizer made specifically for succulents and cactus plants. With patience and these simple steps you will soon have new succulents and cacti thriving in your garden!
1. Taking Succulent and Cactus Cuttings or Clones
Gardening is a great hobby that brings beauty and tranquility to the home. Taking cuttings or clones of plants greatly simplifies the process if you’re looking to expand your garden. Succulents, cacti and many other plants are especially ideal for taking cuttings because they easily regenerate into new growth and it doesn’t take long to see results. With a little bit of knowledge on how to care for them, clones will soon become great additions to your existing plants!
2. Preparing the Soil
When it comes to preparing the soil for succulents and cacti, it’s definitely worth taking your time. With a seemingly infinite variety of succulents and cacti that require different combinations of light, water, and fertilizer, you’ll want to do plenty of research if you plan to create the perfect environment for your succulent or cactus friend! That said, once you’ve figured out what makes your succulent or cactus happy – be it sand, soil, or even a pot made of bark – the next step is to prepare soil accordingly. It’s important to use well draining materials like gravel and perlite as they help conserve moisture as well as dissipate excess heat better; both of these are important factors in keeping succulents and cacti happy.
3. Planting & Watering the Cuttings
Succulents and cactus are popular plants for taking cuttings because the process of rooting them from a single leaf or stem is straightforward. Once the cutting has been taken, it should be planted in soil that drains well so that it won’t become waterlogged. It is also important to not overwater the cutting, as this could lead to root rot and other problems. To test whether or not a cutting needs water, lightly press your finger into the soil; if it feels moist then it doesn’t need to be watered just yet. With patience and proper care, the cutting will soon be established enough to transplant into its new home outdoors!
Caring for Your Propagated Succulents
Caring for your propagated plants doesn’t need to be intimidating! Cactus and succulents, in particular, are wonderful beginner plants. While other houseplants require frequent attention, these hearty plants can live long and healthy lives with minimal help from you. Cacti and succulents need a lot of indirect light so your windowsill is the perfect spot – plus, you’ll get the satisfaction of watching their new growth each season! They don’t need plenty of water – just make sure you wait until the soil is dry before you give them a light sprinkle. With some TLC, your propagated cacti and succulents will be thriving for years to come.
Common Challenges with Propagating Succulents & Cacti – Troubleshooting Tips
Growing succulents and cacti can be a great way to get your hands dirty and create a stunning living garden. But propagating these resilient plants isn’t always easy — pest infestations, watering issues, lack of light, or picking the wrong pot size are all common stumbling blocks. Fortunately, it is possible to troubleshoot these problems without having to give up on succulent gardening altogether. A few simple solutions can go a long way in terms of protecting succulents and cacti from pests, getting sufficient sunlight, controlling the amount of water used in each session, and being mindful of the size of the pot used for growth. Get creative, have patience, and your succulents will flourish in no time!
Succulent Gardener
Growing succulents and cacti can turn your living space into an oasis of flourishing foliage, bringing a refreshing touch to any home. Growing these plants at home offers a great opportunity to discover the unique characteristics they possess and master the craft of caring for them. Succulents and cacti don’t require too much watering or maintenance; with proper care, their wonderful colors and shapes will calm the senses and freshen up your environment. Take a dive into the world of succulent and cactus gardening to spruce up your space! Hope this was helpful, let me know if you have any questions. Happy Gardening!
Please be sure to check out my Gardening Blog Post Page for more tips on all types of gardening. Including Seed Saving, Seed Starting, Orchids, Water Gardening, Coldframe Gardening, Indoor Bulb Gardening, Hydroponics, Container Gardening, Mums, Herbs, African Violets, planting Bulbs, Flower Gardening, Vegetable and Fruit Gardening, Indoor Houseplants of all kinds, Cactus, Succulents, Hanging plants, Deer resistant plants and even Bird, Bee, Butterfly and Hummingbird Gardens!
If you’re looking to incorporate a unique and low-maintenance houseplant, then hanging succulents might be the perfect fit for you! Hanging succulent plants are virtually effortless and require minimal attention, but still provide a pop of greenery and natural beauty in your home. In this ultimate guide, we’ll cover everything you need to know about hanging succulent plants – from pot type, soil type, watering, light requirements, fertilizer, and propagation tips.
When it comes to hanging succulent plants, pot type is essential to ensure that the roots and soil are not overwatered. It is recommended to use a pot with drainage holes to prevent the soil from becoming oversaturated, causing root rot. Additionally, make sure that the pot has enough space to allow for growth and that it’s not too heavy to hold. Hanging baskets made of natural materials, such as woven baskets or clay pots, make great options for hanging succulents.
Best Soil for Hanging Succulents Plants
Hanging succulent require well-draining soil to prevent root rot. You can mix regular potting soil with sand or perlite to enhance drainage and oxygenation. Another popular soil mix for succulents is cactus soil, which is a specially-formulated soil blend for drought-tolerant plants like succulents. Make sure to use a high-quality soil mix to ensure your plants receive the necessary nutrients.
Watering your Hanging Succulents
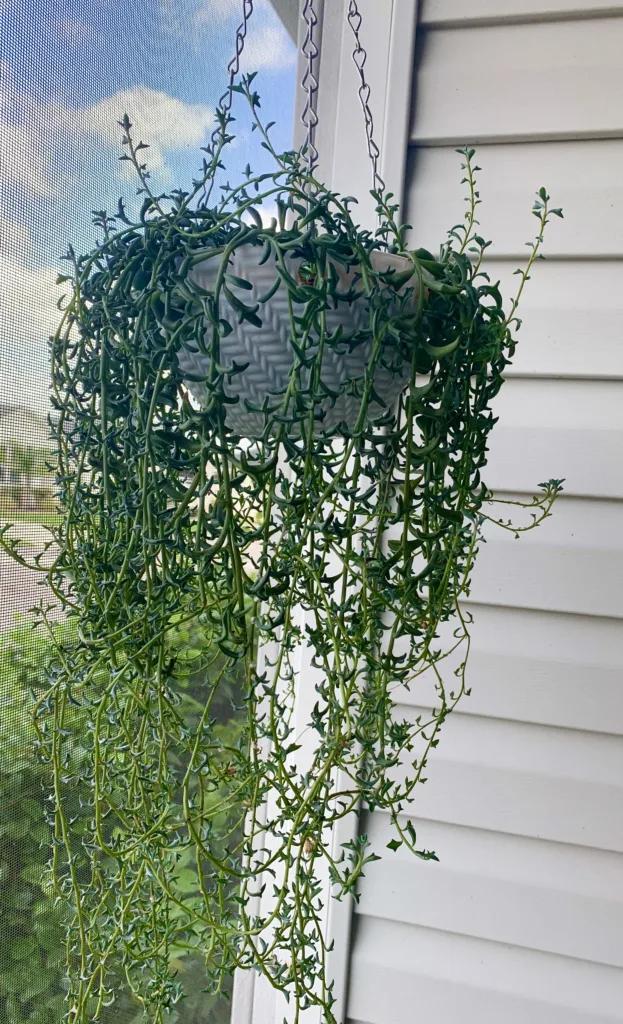
My string of pearls in one of my favorite pot head planters!
Watering is crucial for hanging succulent plants, as they’re susceptible to overwatering. It is recommended to water only when the soil is completely dry (usually once every 7-10 days). You can also use a moisture meter to check the soil’s dryness level. Additionally, make sure to water directly into the soil, avoiding the leaves, to prevent the growth of mold and fungus.
Light Requirements
Hanging succulent plants prefer bright, indirect sunlight or morning sunlight and afternoon shade. While they are tolerant to full sun, it is better to provide shade during the hottest parts of the day. If you notice that your plant is getting too much sun, move it to a shadier spot. Too little sunlight, on the other hand, can cause your plant to stretch and become spindly.
Fertilizer and Propagating your Hanging Succulent Plants
Hanging succulent plants do not require frequent fertilizer, but it’s recommended to supplement their growth with fertilizer twice a year. You can use a low-nitrogen fertilizer or a succulent-specific blend, such as a cactus fertilizer. Propagation is another way to expand your collection of hanging succulent plants. You can propagate a succulent plant by stem cuttings, leaf cuttings, or offsets. For my string plants, pearls, bananas and dolphins I strip off the bottom leaves and place the stems in a propagation station until roots form and then pot them. For my burro’s tail or donkey’s tail I just take a stem cutting, remove the bottom stems and place the cutting directly in soil.
Happy Gardening!
Hanging succulent plants are a popular and stunning addition to any garden, balcony, or indoor space. They provide natural beauty with minimal effort. Pot type, soil type, watering, light requirements, fertilizer, and propagation are essential factors to consider when taking care of these unique plants. We hope this ultimate guide has provided all the necessary information you need to grow and enjoy your hanging succulent plants. Happy planting!
Please be sure to check out my Gardening Blog Post Page for more tips on all types of gardening. Including Seed Saving, Seed Starting, Orchids, Water Gardening, Coldframe Gardening, Indoor Bulb Gardening, Hydroponics, Container Gardening, Mums, Herbs, African Violets, planting Bulbs, Flower Gardening, Vegetable and Fruit Gardening, Indoor Houseplants of all kinds, Cactus, Succulents, Hanging plants, Deer resistant plants and even Bird, Bee, Butterfly and Hummingbird Gardens!
Succulents are the perfect addition, they are low maintenance, adaptive to harsh environments, and come in an array of colors, sizes, and shapes. One variety that’s especially popular among gardeners is the donkey tail succulent. With its cascading, rope-like stems and adorable foliage, it’s a stunning plant that’s sure to catch anyone’s eye. But, how do you care for this unique succulent to ensure it grows healthy and strong? In this blog post, we’ll dive into the specifics of pot type, soil types, water requirements, light requirements, and how to propagate your donkey tail succulent.
Pot Type for Donkey Tail Succulent
When it comes to pot type, the donkey tail succulent needs a container that accommodates its unique cascading growth pattern. You’re going to want a pot that’s wide and shallow rather than one that’s tall and narrow; this will allow the plant to spread out and thrive. It’s also a good idea to make sure that the pot has proper drainage holes to prevent overwatering and root rot. I have recently started adding pot head pots to my collection and succulents look fantastic in these!
Best soil type
The right soil mix is critical in ensuring the health and growth of your plant. The donkey tail succulent requires a well-draining mix that’s formulated specifically for cacti and succulents. You can create a suitable mix by combining equal parts of regular potting soil, perlite, and coarse sand. This will help ensure that excess water doesn’t get trapped in the soil and that your succulent can absorb essential nutrients.
Water Requirements for Donkey Tail Succulent
One of the most important care tips for the donkey tail succulent is to avoid overwatering. A common mistake made with succulents is watering them too frequently, which can lead to root rot. Instead, allow the soil to become completely dry before watering again. Typically, you’ll need to water your donkey tail succulent once every two weeks. When watering, it’s best to use a watering can with a narrow spout and water the soil rather than the foliage.
Light Requirements for Donkey Tail
Donkey tail succulents are sun-loving plants that require plenty of bright, indirect sunlight to thrive. Make sure to place your plant near a window that receives direct sunlight for at least a few hours a day. If you notice that the leaves are turning yellow or brown, this could be a sign that your plant is getting too much direct sunlight. You can also supplement light with LED grow lights if need be.
How to Propagate Donkey Tail Succulent
Propagating your donkey tail is a fantastic way to add more plants to your collection. The easiest way to propagate this plant is through stem cuttings. To do this, find a stem with a few sets of healthy leaves and cut it with a sharp, clean-cutting tool. I like to wipe my knife down with alcohol and let it air dry before using it. Allow the cutting to dry out for a few days before planting it in a well-draining cactus mix. Keep the soil slightly moist and place the cutting in a location with plenty of indirect sunlight. Within a few weeks, you should notice that the cutting has taken root and has begun to grow.
Happy Gardening!
Donkey tail succulents are mesmerizing plants that can add both height and texture to your plant collection. By following the tips and tricks mentioned above, you can help ensure your donkey tail succulent stays healthy and happy. Remember to use the proper soil mix, avoid overwatering, give it plenty of bright indirect sunlight, and propagate as desired. With a little bit of TLC, your donkey tail succulent can thrive for years to come.
Please be sure to check out my Gardening Blog Post Page for more tips on all types of gardening. Including Seed Saving, Seed Starting, Orchids, Water Gardening, Coldframe Gardening, Indoor Bulb Gardening, Hydroponics, Container Gardening, Mums, Herbs, African Violets, planting Bulbs, Flower Gardening, Vegetable and Fruit Gardening, Indoor Houseplants of all kinds, Cactus, Succulents, Hanging plants, Deer resistant plants and even Bird, Bee, Butterfly and Hummingbird Gardens!
If you’re a succulent enthusiast, you’ve probably heard of Anacampseros also known as the Sunrise Succulent. This beautiful plant with pink and green leaves that change color depending on the amount of sunlight it receives, is an excellent addition to any succulent collection. It’s not only beautiful, but it’s also easy to care for, making it perfect for beginner gardeners. In this ultimate guide, you’ll learn how to grow Anacampseros Succulent, including pot type, soil type, water requirements, light requirements, fertilizer, and how to propagate this lovely plant.
Pot Type
When it comes to growing Anacampseros or Sunrise Succulent, the pot type is essential. A small pot with good drainage is perfect for this plant. Terra-cotta pots are a great choice as they allow for air circulation and prevent moisture buildup. Make sure the pot has a drainage hole to prevent waterlogging, which can lead to root rot.
Soil Type for Sunrise Succulents
Anacampseros grows best in well-draining soil. A cactus or succulent mix is perfect for this plant. However, you can also make your own mix by mixing two parts potting soil and one-part sand or perlite. This mix ensures that the water drains quickly and does not leave the roots sitting in wet soil.
Water Requirements for Anacampseros Succulent
Like most succulents, the Sunrise Succulent does not require much water. Water the plant when the soil is completely dry, about once every two weeks. Make sure to soak the soil and let the water drain out of the pot. Avoid getting water on the leaves, as this can lead to rot.
Light Requirements for Anacampseros
Anacampseros prefers bright, indirect light. Direct sunlight can scorch the leaves, causing them to turn brown or yellow. Placing the plant near a south-facing window or under LED grow lights works best. If the leaves start turning pink, it’s a sign that the plant is receiving enough light. However, if the leaves start turning yellow or brown, it’s a sign that the plant is not receiving enough light.
Fertilizer for Sunrise Succulent
Anacampseros Succulent does not require much fertilizer. A balanced fertilizer, like a 10-10-10, can be used once a month during the growing season (spring and summer). Make sure to follow the instructions on the package and do not over-fertilize the plant as it can lead to burns.
Propagating Anacampseros
The best way to propagate the Sunrise Succulent is by taking stem or leaf cuttings. Make sure to let the cuttings dry out for a day or two before planting them in well-draining soil. Keep the soil slightly moist and out of direct sunlight until the roots have developed, usually in two to three weeks.
Happy Gardening!
Anacampseros or Sunrise Succulent is a beautiful and easy-to-care-for plant. With the right pot type, soil type, water requirements, light requirements, and fertilization, it’s a plant that thrives in any home. Additionally, propagating it is easy, meaning you can have several plants from one. It’s a great addition to your succulent collection, and with the help of this ultimate guide, you can grow it beautifully. Remember to give it all the care it needs, and you’ll enjoy having it in your home for years to come.
Please be sure to check out my Gardening Blog Post Page for more tips on all types of gardening. Including Seed Saving, Seed Starting, Orchids, Water Gardening, Coldframe Gardening, Indoor Bulb Gardening, Hydroponics, Container Gardening, Mums, Herbs, African Violets, planting Bulbs, Flower Gardening, Vegetable and Fruit Gardening, Indoor Houseplants of all kinds, Cactus, Succulents, Hanging plants, Deer resistant plants and even Bird, Bee, Butterfly and Hummingbird Gardens!
Haworthia Truncata is a succulent that has gained popularity among gardeners over the years. It is a unique plant that has a distinct appearance with its transparent leaves that form a rosette. Haworthia grows slowly and can live for many years making it a popular choice for indoor gardening. However, caring for this plant can be challenging for beginners. In this guide, we will discuss how to care for your Haworthia, including pot type, soil type, water requirements, light requirements, fertilizers, and how to propagate.
Best Pot types for Haworthia Truncata
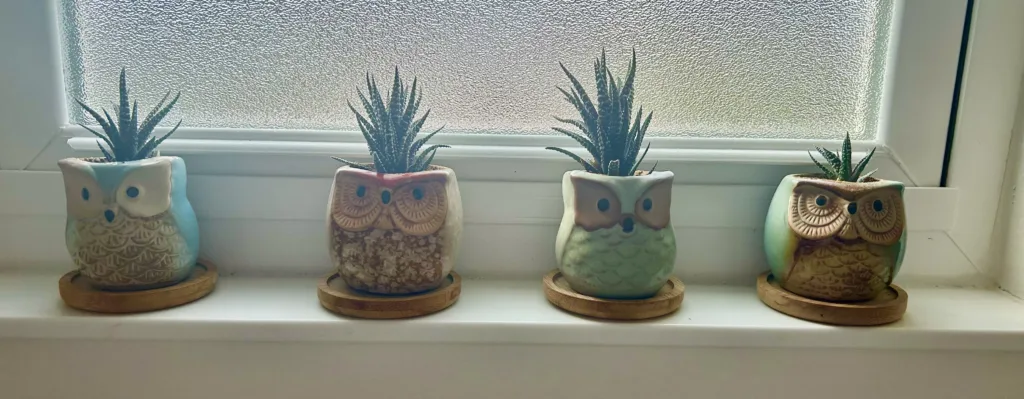
Haworthia Truncata requires a well-draining pot to avoid waterlogging which can lead to root rot. A terra cotta pot is an excellent choice as they are porous and allow air to flow to the roots, promoting healthy growth. Although any pot with drainage holes is ideal as long as it allows excess water to drain out. I love mine in my owl planters-so cute!!
Check out these Haworthia in my cute owl planters
Soil Type
The soil type for your Haworthia Truncata should be well-draining. You can use a cactus mix or create your own soil mix using equal parts of perlite, sand, and potting soil. This will ensure that the roots do not sit in water for long periods, leading to root rot.
Water Requirements for Haworthia Truncata
Haworthia Truncata is a succulent and does not require frequent watering. Water your plant only when the soil is dry, and ensure that you do not overwater it. Overwatering can cause the plant to rot, so it is essential to allow the soil to dry out between waterings. Water deeply, allowing the water to soak into the soil, but ensure that you do not allow water to stand in the plant saucer.
Light Requirements for Haworthia Truncata
Haworthia Truncata thrives in bright, indirect light. They do not require direct sunlight as it can scorch their leaves. A west or south-facing window is ideal as it offers adequate light without exposing the plant to direct sunlight. During the winter months, you may need to supplement your plant’s light with LED grow lights to ensure it receives adequate light.
Fertilizer Needs
Haworthia does not require regular fertilization as it is a slow-growing plant. However, during the growing season, you can use a balanced fertilizer, diluted to half the recommended strength, once a month. Over-fertilizing can lead to overgrowth, causing the plant to lose its shape.
How to Propagate your Haworthia
Haworthia Truncata propagates by offsets that grow from the base of the plant. When these offsets grow big enough, you can gently remove them from the parent plant and plant them in a separate pot. Ensure that they are planted in well-draining soil, and keep them away from direct sunlight until they have rooted.
Happy Gardening!
In conclusion, Haworthia Truncata is a stunning plant that can add a touch of elegance to your indoor garden. With proper potting, soil mix, water requirements, light requirements, fertilization, and propagation techniques, you can enjoy this plant for many years. Remember, succulents like Haworthia Truncata are low-maintenance plants, so avoid the temptation to over-care for them. With good light and occasional watering, your Haworthia is sure to thrive.
Please be sure to check out my Gardening Blog Post Page for more tips on all types of gardening. Including Seed Saving, Seed Starting, Orchids, Water Gardening, Coldframe Gardening, Indoor Bulb Gardening, Hydroponics, Container Gardening, Mums, Herbs, African Violets, planting Bulbs, Flower Gardening, Vegetable and Fruit Gardening, Indoor Houseplants of all kinds, Cactus, Succulents, Hanging plants, Deer resistant plants and even Bird, Bee, Butterfly and Hummingbird Gardens!