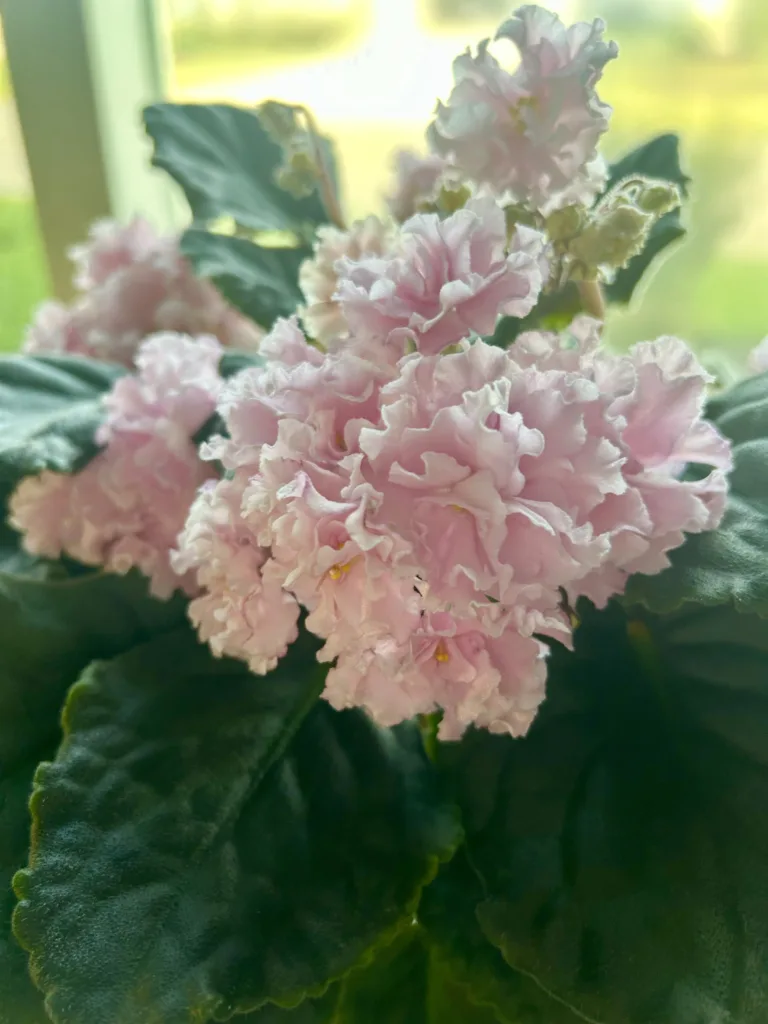
Are you fascinated by the world of African violets? With their delicate flowers, it’s no wonder these majestic plants have captivated the hearts of gardeners everywhere!
With care, patience, and a few expert tips, you can learn how to grow African Violets. And then take your gardening game to the next level and enjoy beautiful blooms year round. Whether you’re looking for easy maintenance tips, learning about the different types of soil. Or the variety of African Violet pots, which light is better, sunlight or grow lights or even advanced watering schedules. This blog post will provide you with all the advice and guidance needed to achieve success as an African violet gardener!
Their leaves can be solid green, variegated green and white and either smooth or quilted/wavy or frilly. Blooms come in a variety of colors from white to pink, purple, blue, yellow and even variegated! The petals can vary from single, to double to triple and be star shaped, rounded or frilly. Finally they come in a variety of sizes from micro-miniature, miniature, trailer, standard or even large. The plant size will help you determine the pot size you will need. Raising African Violets is a rewarding hobby, and if you’re looking for another plant to add to your collection you’ve come to the right place! In my opinion African violets are great! So please enjoy my post on how to grow African Violets and if you have any questions just ask, I am more than happy to help you grow your collection of African Violets!
Pumpkins are a favorite fall crop, whether you grow them for carving, decoration, or delicious recipes. If you want to enjoy pumpkins every year without buying new seeds, learning how to preserve pumpkin seeds is a smart step. Saving seeds lets you keep your favorite varieties, grow strong plants, and save money. With the right preparation and storage, pumpkin seeds can last for years and give you healthy plants season after season.
Why Preserve Pumpkin Seeds
Preserving pumpkin seeds gives you control over your garden. Instead of relying on store-bought packets, you can save seeds from the pumpkins you enjoyed most. This means you can grow the exact same type again, whether it’s a large carving pumpkin, a small sugar pumpkin for pies, or a decorative variety. In addition, seed saving helps preserve heirloom varieties that may not be widely available. By taking time to save and store seeds, you build a personal collection that keeps your garden unique.
Choosing the Right Pumpkins for Seed Saving
Not every pumpkin is ideal for seed saving. To ensure strong plants, you need to select pumpkins from healthy, mature fruits. Look for pumpkins that are fully ripened, free from rot, and grown in good conditions. If possible, use open-pollinated or heirloom varieties because they produce seeds that grow true to the parent plant. Hybrid pumpkins, on the other hand, may not produce reliable results. Their seeds can sprout, but the plants might not look or taste like the pumpkin you saved them from.
Harvesting Seeds from Pumpkins
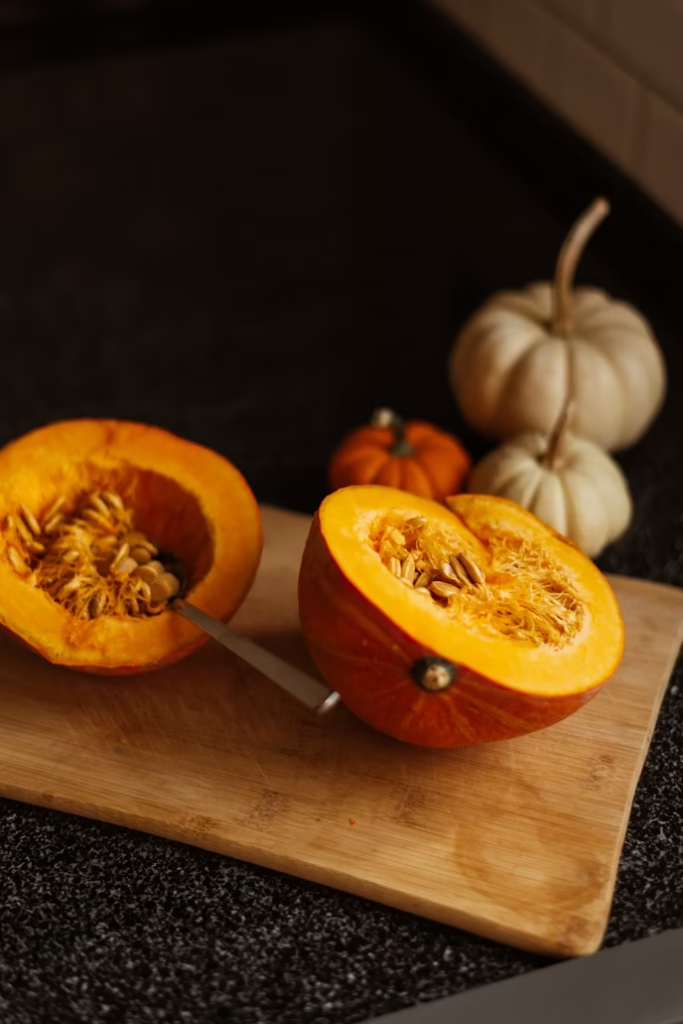
Once you pick the right pumpkin, it’s time to harvest the seeds. Cut open the pumpkin with a sharp knife and scoop out the seeds along with the pulp. Place the seeds in a large bowl to separate them from the stringy insides. Rinse them under cool water while rubbing gently to remove as much pulp as possible. Clean seeds store better, and they are less likely to mold during drying. At this stage, you can set aside the largest, plumpest seeds for planting and roast the rest for snacking.
Cleaning Pumpkin Seeds Properly
Thorough cleaning makes a big difference when preserving pumpkin seeds. After rinsing, spread the seeds on a clean towel or mesh strainer. Rub them gently to remove any last bits of pulp. Some gardeners soak seeds in a bowl of water for a few minutes to loosen stubborn strands. Float any small or thin seeds away, since these are less likely to sprout successfully. Once clean, your seeds are ready for the most important step: drying.
Drying Pumpkin Seeds Correctly
Drying prevents seeds from rotting or molding during storage. Spread your clean seeds in a single layer on a baking sheet, paper towel, or mesh screen. Place them in a well-ventilated, dry area out of direct sunlight. Good air circulation is key, so stir the seeds every day to help them dry evenly. Avoid using an oven or microwave because heat can kill the seed embryo. Depending on humidity, drying usually takes one to two weeks. You’ll know the seeds are ready when they snap in half instead of bending.
Testing Pumpkin Seeds for Dryness
Before storing your seeds, it’s wise to test if they are completely dry. Pick a few and try to break them between your fingers. A dry seed should crack cleanly, while a damp seed will bend or feel soft inside. If your seeds are not fully dry, keep them out a few more days. Proper dryness ensures your seeds stay healthy in storage and do not develop mold.
Storing Pumpkin Seeds Safely
Once dry, pumpkin seeds need the right storage conditions. Place them in paper seed saving envelopes and store in glass jars, or airtight containers. Label each seed envelope with the pumpkin variety and the date you harvested them. Store the containers in a cool, dark, and dry place such as a pantry or basement. Avoid storing them in humid areas or near heat sources, since both can shorten seed life. For extra protection you can add a silica gel packet to absorb any moisture. When stored correctly, pumpkin seeds can remain viable for up to six years, though planting them within three years gives the best results.
Freezing Pumpkin Seeds for Long-Term Storage
For extra-long storage, you can freeze pumpkin seeds. After drying them completely, place the seeds in airtight freezer bags or jars. Freezing keeps them dormant and prevents pests from reaching them. Before planting, remove the seeds from the freezer and let them reach room temperature to prevent moisture from condensing on them. Frozen seeds can often last longer than seeds stored at room temperature.
Labeling and Organizing Pumpkin Seeds
Clear labeling saves time when planting season arrives. Always write down the pumpkin variety, harvest year, and any notes about the fruit. For example, you might note that one pumpkin had a sweeter flavor or that another grew especially large. Keeping your seeds organized ensures you can select the right ones for each season. Over time, you’ll build a collection that fits your garden needs perfectly.
Checking Seed Viability Before Planting
Even with careful storage, not every seed will sprout. Before planting, test your seeds for viability. Place ten seeds between damp paper towels, keep them warm, and check after a week. If most of the seeds sprout, your collection is still strong. If fewer than half sprout, you may need to replace them with fresh seeds. This simple test helps you avoid wasted space in your garden.
Common Mistakes When Preserving Pumpkin Seeds
Many gardeners lose seeds because of a few common mistakes. The first is not cleaning seeds well enough, which leads to mold. Another mistake is storing damp seeds too early. Even a small amount of moisture can ruin a whole batch. Storing seeds in plastic bags without proper drying also traps humidity inside. Finally, forgetting to label seeds can cause confusion later, especially if you grow multiple pumpkin varieties. Avoiding these mistakes ensures your seed-saving efforts succeed.
Benefits of Growing Pumpkins from Preserved Seeds
Growing pumpkins from your preserved seeds gives you many rewards. You save money by reusing seeds each year instead of buying new packets. You also build a more sustainable garden by keeping seeds that thrive in your local soil and climate. Over time, your pumpkin plants can become stronger and more productive because they adapt to your growing conditions. Plus, planting seeds from pumpkins you loved makes gardening even more personal and enjoyable.
Tips for Success with Preserved Pumpkin Seeds
To get the best results, always choose the healthiest pumpkins for seed saving. Dry seeds thoroughly before storage, and keep them in a cool, dry place. Refresh your seed collection every few years by saving new seeds from your strongest plants. By following these steps consistently, you will always have a reliable supply of pumpkin seeds for your garden.
Conclusion
Preserving pumpkin seeds is simple but rewarding. By choosing the right pumpkins, cleaning and drying the seeds, and storing them properly, you can keep seeds viable for years. Whether you want to grow pumpkins for carving, baking, or decoration, saving seeds ensures you always have what you need. With each season, your seed-saving skills will grow stronger, and your garden will become more self-sufficient. Start preserving pumpkin seeds this fall, and enjoy the benefits of your efforts for many seasons to come.
Please be sure to check out my Gardening Blog Post Page for more tips on all types of gardening. Including Seed Saving, Seed Starting, Orchids, Water Gardening, Coldframe Gardening, Indoor Bulb Gardening, Hydroponics, Container Gardening, Mums, Herbs, African Violets, planting Bulbs, Flower Gardening, Vegetable and Fruit Gardening, Indoor Houseplants of all kinds, Bonsai, Cactus, Succulents, Hanging plants, Deer resistant plants and even Bird, Bee, Butterfly and Hummingbird Gardens!
Starting Zinnia seeds indoors is an excellent way to ensure a head start on vibrant summer blooms. Zinnias are popular annual flowers known for their bright colors and long-lasting blooms. Growing them from seeds indoors allows gardeners to control the growing environment and produce strong, healthy plants ready for outdoor planting when the weather warms up. This guide covers when to start Zinnia seeds indoors, how to plant them, and how to care for seedlings until they are ready for the garden.
When to Start Zinnia Seeds Indoors by Zone
The timing for starting Zinnia seeds indoors depends on your USDA hardiness zone. Zinnias thrive in warm weather, so plan to move them outdoors after the last frost.
Zones 3–5: Start Zinnia seeds indoors about 6–8 weeks before the last expected frost. Typically, this means planting seeds in late March to early April.
Zones 6–7: Sow seeds indoors 4–6 weeks before the last frost date, usually around mid-March.
Zones 8–10: Begin seeds indoors 3–4 weeks before the last frost, often in late February or early March.
Check your local frost dates to adjust timing as needed. Starting seeds too early may lead to leggy plants, while starting too late may shorten the blooming season.
Planting Zinnia Seeds Indoors
To plant Zinnia seeds indoors, start with clean seed trays or small pots with drainage holes. Fill the containers with a seed-starting mix, which provides a lightweight, well-draining medium for seedlings.
Prepare the Soil: Use a seed-starting mix rather than garden soil, which may compact and prevent root growth. Moisten the mix before filling the trays to create a damp but not soggy environment.
Plant the Seeds: Place Zinnia seeds about 1/4 inch deep. Space them 1–2 inches apart if using trays, or plant one seed per cell in a seed-starting tray.
Cover and Label: Lightly cover the seeds with soil and gently press down. Label trays with the Zinnia variety and planting date.
Water Gently: Mist the soil with water to keep it evenly moist. Avoid overwatering, which can lead to damping-off disease.
Providing Light and Warmth
Zinnia seeds need warmth to germinate and bright light for healthy growth. Maintain temperatures between 70–75°F for optimal germination.
Grow Lights: Place trays under grow lights as soon as seeds are planted. Set the lights 2–3 inches above the soil and keep them on for 14–16 hours daily. Raise the lights as the seedlings grow to prevent burning.
Temperature: Use a seedling heat mat if your indoor temperatures fall below 70°F.
Moisture Control: Cover trays with plastic domes or clear lids to retain moisture until seeds sprout, then remove covers to prevent mold.
Zinnia seeds typically germinate in 5–7 days. Once seedlings emerge, thin them out if multiple seeds sprout too closely together.
Fertilizing Zinnia Seedlings
Zinnias benefit from light fertilization during their early growth stages. Start feeding seedlings once they develop their first true leaves.
Diluted Fertilizer: Use a half-strength liquid fertilizer high in phosphorus to promote root growth. Feed the seedlings every 10–14 days.
Avoid Overfeeding: Too much fertilizer can lead to leggy growth, so use caution and follow label instructions.
Hardening Off Zinnia Seedlings
Before planting Zinnias outdoors, seedlings need to adjust to outdoor conditions through a process called hardening off. Start this process about 7–10 days before transplanting.
Gradual Exposure: Move trays outdoors for 1–2 hours in a shaded, sheltered spot on the first day.
Increase Time and Sunlight: Each day, increase exposure by 1–2 hours and gradually introduce seedlings to more sunlight.
Protect from Wind and Cold: Avoid leaving seedlings out during windy or cold conditions. Bring them inside at night if temperatures drop below 50°F.
Planting Zinnias Outdoors
Once seedlings are hardened off, plant them outdoors after the last frost date for your zone. Zinnias prefer full sun and well-drained soil.
Prepare the Garden Bed: Loosen the soil and mix in compost to improve drainage and fertility.
Spacing: Plant Zinnias 6–12 inches apart, depending on the variety. Taller varieties need more space for airflow.
Watering: Water thoroughly after planting to help seedlings settle in. Continue watering regularly to keep the soil moist but not waterlogged.
Caring for Zinnias After Planting
Zinnias grow quickly and begin blooming about 8–10 weeks after planting. To encourage continuous blooms:
Mulching: Add mulch around the plants to retain moisture and suppress weeds.
Deadheading: Remove spent flowers to promote more blooms throughout the season.
Feeding: Fertilize with a balanced flower fertilizer every 4–6 weeks to support healthy growth.
Happy Zinnia Gardening
Starting Zinnia seeds indoors allows gardeners to enjoy earlier blooms and healthier plants. By following the steps for timing, planting, lighting, fertilizing, and hardening off, you can grow beautiful Zinnias ready for transplanting into the garden. With proper care, these colorful flowers will brighten garden beds and containers all summer long.
Please be sure to check out my Gardening Blog Post Page for more tips on all types of gardening. Including Seed Saving, Seed Starting, Orchids, Water Gardening, Coldframe Gardening, Indoor Bulb Gardening, Hydroponics, Container Gardening, Mums, Herbs, African Violets, planting Bulbs, Flower Gardening, Vegetable and Fruit Gardening, Indoor Houseplants of all kinds, Cactus, Succulents, Hanging plants, Deer resistant plants and even Bird, Bee, Butterfly and Hummingbird Gardens!
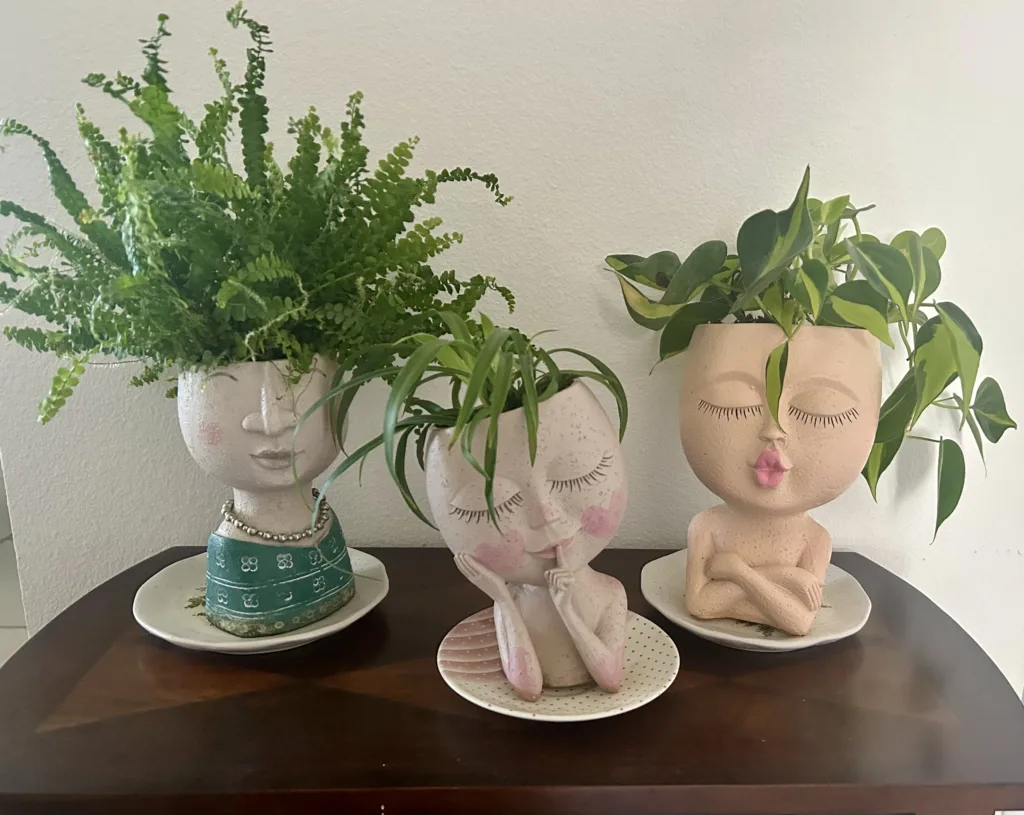
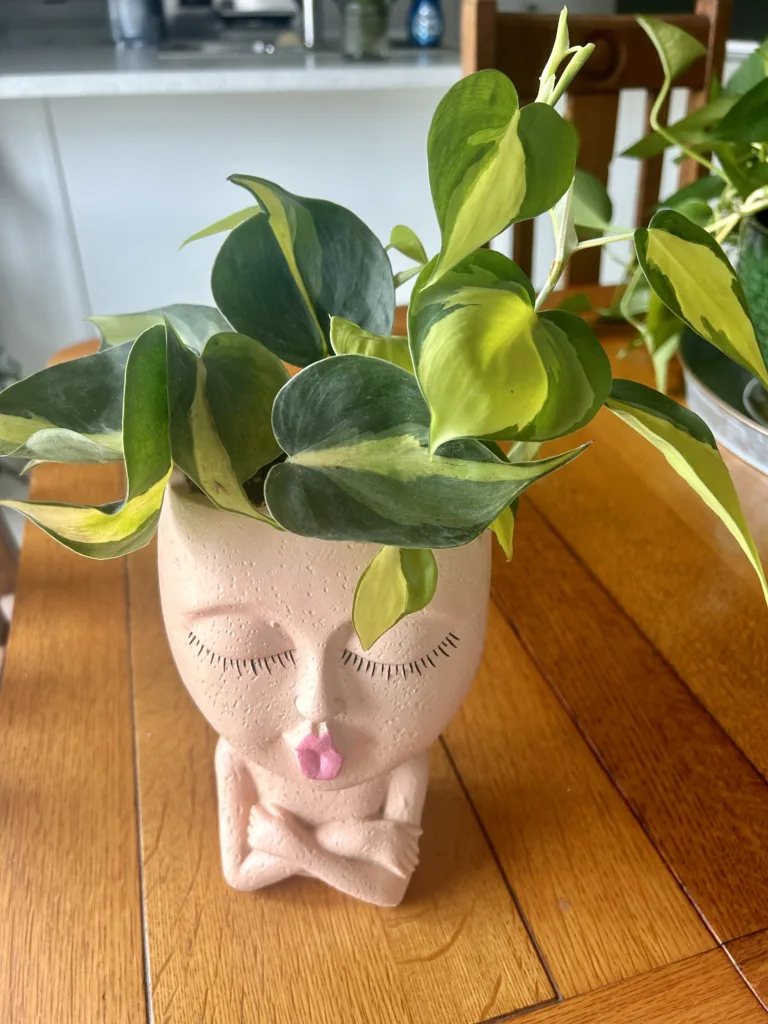
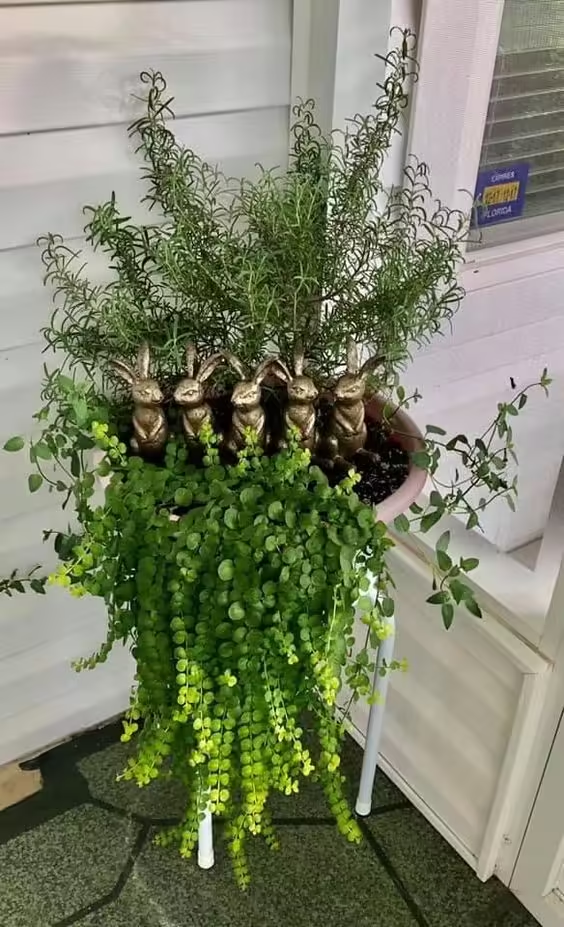
Plant head planters are trendy and unique containers that add personality to any space. From whimsical to sophisticated designs, these planters are perfect for housing small plants that add a touch of greenery and creativity. This guide will walk you through some of the best plants to use in head planters, including Easter cactus, airplane plants, succulents, string of pearls, air plants, and more. You’ll learn what makes each plant ideal and get practical tips on planting and care for each type. I have multiple pot head planters throughout my home with everything from miniature African Violets, miniature ferns, airplane plants, pothos, cactus, succulents, air plants and more. My collection is ever growing, the talk of everyone who comes into my home and can’t wait to purchase my next one. Check out a few of them by clicking here and here and even here!!
Choosing the Right Plants for Your Pot Head Planter
Not all plants thrive in head planters, so choosing varieties that suit this container style is essential. Most head planters don’t have much space for root systems, which means small, shallow-rooted plants work best. Succulents, cacti, and trailing plants with limited water and soil requirements are ideal choices. Let’s dive into the best options!
Easter Cactus (Hatiora gaertneri)
Easter cactus is a unique, low-maintenance option that blooms around the Easter season, producing beautiful flowers in shades of pink, red, and white. Its compact growth makes it an excellent choice for head planters, where you want a pop of color without a large footprint.
Soil and Planting: Use a cactus potting mix that allows for good drainage. Plant it in the upper part of the planter’s head to give its flowers a crown-like appearance when in bloom.
Light and Water: Place your planter in a spot that gets indirect sunlight, as too much direct sunlight can scorch the leaves. Water it sparingly, allowing the soil to dry out between watering.
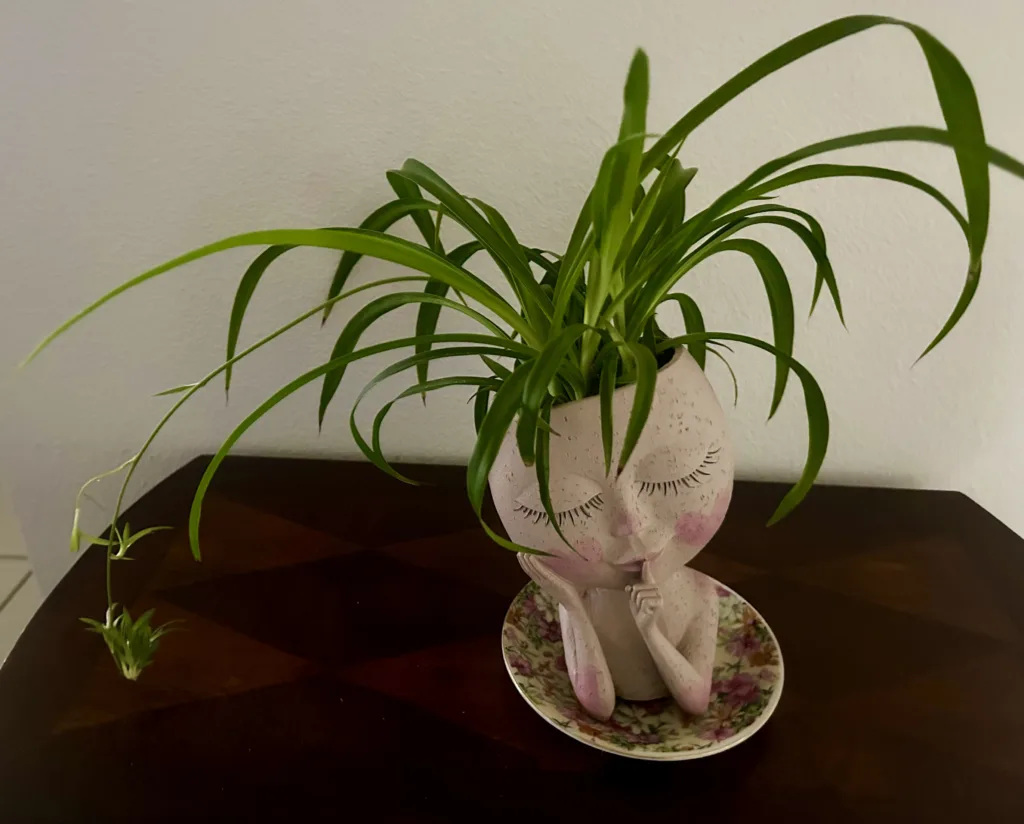
Airplane Plant (Chlorophytum comosum)
The airplane plant, or spider plant, is another excellent choice for head planters. Its long, arching leaves spill over the edges, creating a lively hairstyle effect that adds character to your planter. You can get this planter here along with allot of other pot head planters!
Soil and Planting: Use a general-purpose potting mix that retains moisture but drains well. Since airplane plants are resilient and adaptable, they won’t mind the small soil volume in a head planter.
Light and Water: They thrive in bright, indirect light but can tolerate lower light levels. Water moderately, keeping the soil consistently moist but never soggy.
Succulents
Petal Leaf Succulent-Echeveria
Succulents are perfect for head planters due to their shallow roots and need for minimal watering. With their diverse shapes, colors, and textures, succulents let you customize each planter for a unique look. I have two of these, the other one has a large air plant. You can just click here to purchase this planter.
Soil and Planting: Choose a cactus or succulent potting mix to provide excellent drainage. Arrange a mix of varieties, like echeveria and haworthia, for a dynamic look.
Light and Water: Place your succulent-filled head planter in bright, indirect sunlight. Water only when the soil is dry, as overwatering can lead to root rot.
String of Pearls (Senecio rowleyanus)
My string of pearls in one of my favorite pot head planters!
The string of pearls is a trailing succulent that creates an eye-catching, draped effect. It looks especially stunning in head planters, resembling long, flowing hair. This head planter can also work with string of turtles, string of dolphins and string of frogs.
Soil and Planting: Use a cactus potting mix and plant the string of pearls near the edges of the planter, so its tendrils cascade down.
Light and Water: This succulent loves bright, indirect sunlight and does well with minimal watering. Let the soil dry out completely between watering sessions to avoid rot.
Air Plants (Tillandsia)
Air plants don’t need soil to grow, making them one of the most flexible options for head planters. They can sit in any part of the planter, and you can easily remove them for watering.
Soil and Planting: No soil needed! Simply place your air plant in a spot where it fits comfortably. You can even tuck them into decorative spots around the planter’s head for a playful look.
Light and Water: Air plants need bright, indirect light. To water, remove the plant and soak it in water for about 30 minutes once a week, then shake off the excess water before placing it back in the planter.
Pothos (Epipremnum aureum)
Pothos plants are excellent for head planters because of their adaptability and beautiful trailing vines. They’re resilient, forgiving, and look fantastic spilling out of the planter as if forming a head of flowing hair. Check out this face head planter similar to this one on the right.
Soil and Planting: Use a standard indoor potting mix and plant your pothos slightly toward the edge of the planter for a draped effect.
Light and Water: They grow best in bright, indirect light but can tolerate low-light conditions. Water them when the top inch of soil feels dry to the touch.
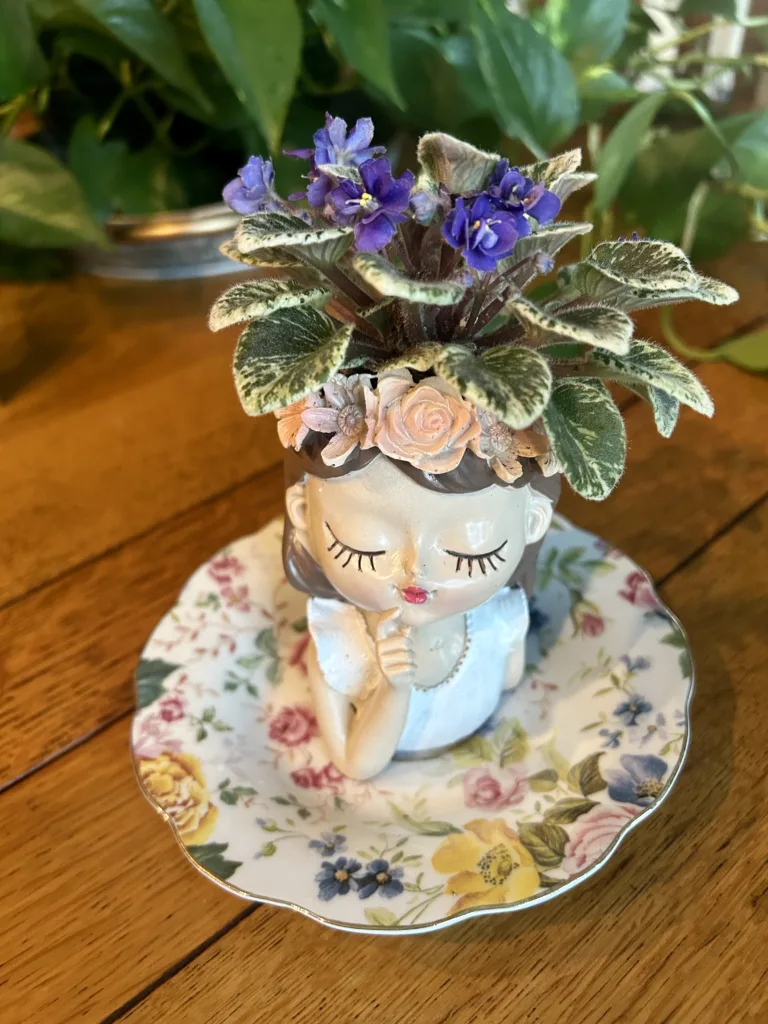
Miniature African Violets
Definitely Darryl Miniature Africa Violet
African violets prefer rich, well-draining soil, which keeps their roots from sitting in water. Opt for a special African violet potting mix or add perlite to regular potting soil for better drainage. Love my miniature African Violets planted in these adorable mini pot head planters.
Planting: Use a shallow head planter with a wide opening. This will provide enough room for the violet’s roots to spread and allow air to circulate around the plant.
Drainage: Ensure your planter has drainage holes to prevent root rot. If your planter lacks drainage, add a layer of small pebbles or stones at the bottom.
Positioning: African violets do well with indirect sunlight. Place your head planter near a bright window where it can get indirect light throughout the day, avoiding direct sun.
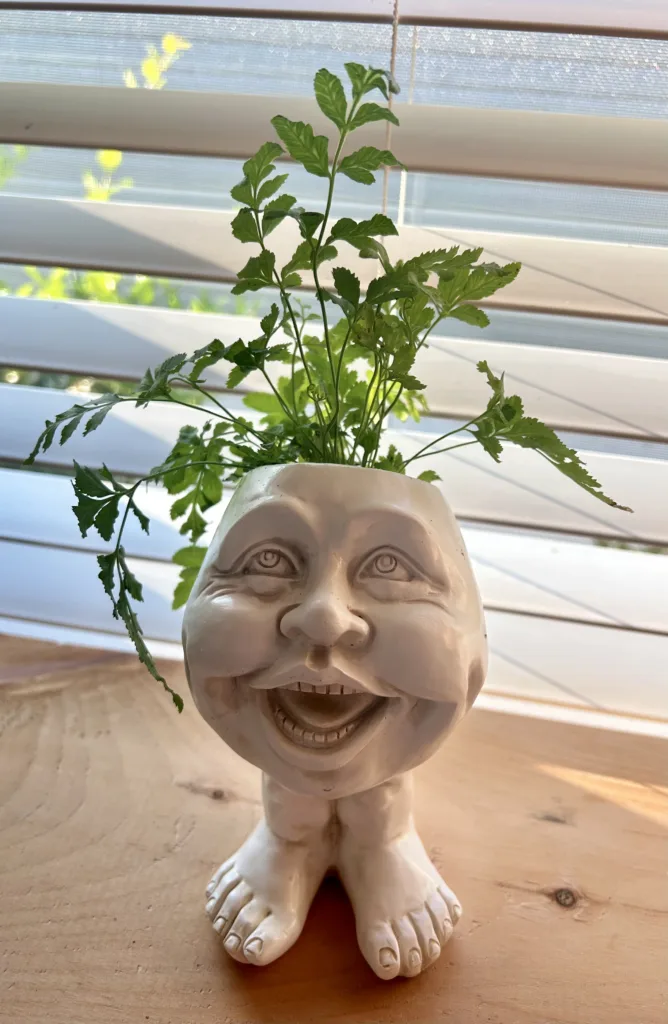
Miniature Ferns
Miniature ferns, such as button ferns, can create a lovely “hair” effect for your head planter. These ferns have delicate, soft fronds that add texture and a bit of wild beauty.
Soil and Planting: Use a mix that retains moisture, such as a potting mix for ferns. Plant the fern in a way that allows the fronds to spread outward.
Light and Water: Ferns prefer indirect light and high humidity. Keep the soil consistently moist without letting it get soggy.
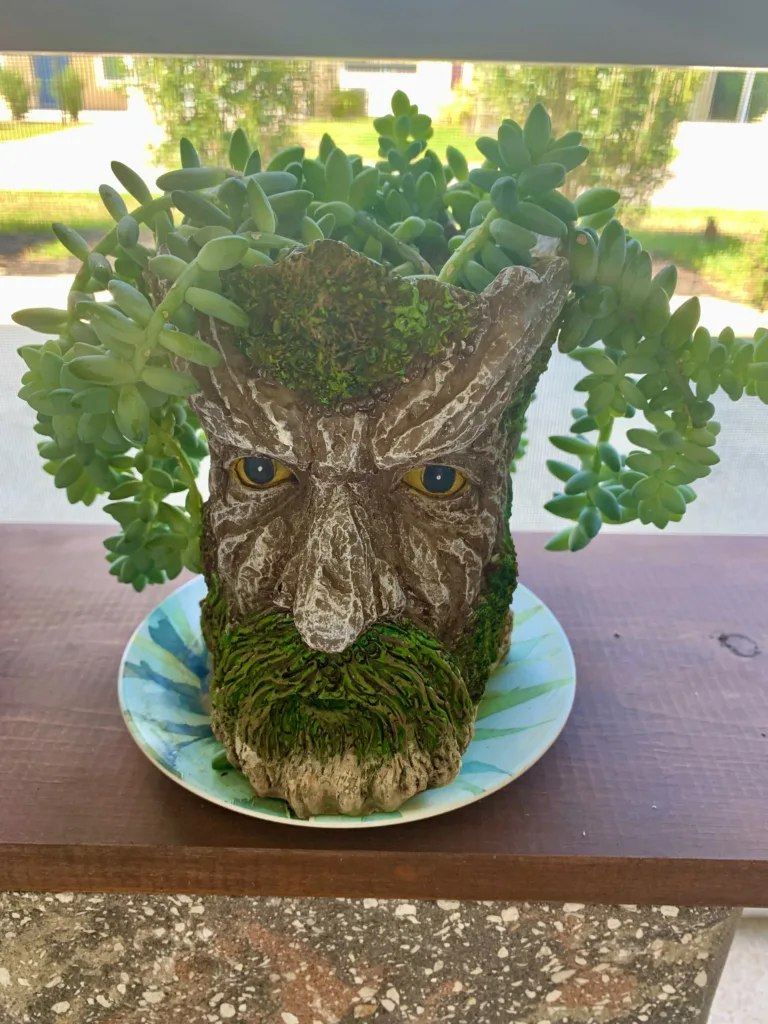
Tips for Successful Head Planter Gardening
Love my old man planter and just click here to purchase. I also have a second one with an Easter Cactus in it-been growing in it perfectly for the last year!
Burro’s Tail
Drainage: Ensure your head planter has drainage holes. If it doesn’t, consider drilling a small hole or using a layer of pebbles at the bottom to prevent water from sitting in the soil.
Regular Maintenance: Plants in small containers require regular pruning to maintain their shape and keep them healthy. Trim any dead leaves or spent flowers to keep your planter looking fresh.
Seasonal Adjustments: Move your planter to different locations depending on the season. For example, place it in a well-lit spot during winter when sunlight is limited, and consider a shadier spot in summer if the sun is too intense.
Styling Your Head Planter for Creative Impact
Consider styling your head planter with a theme. For example, plants like the string of pearls can create a vintage or bohemian look, while air plants can offer a minimalist vibe. Combining different plants in a single planter, such as succulents with a pothos, can also provide an eclectic look. Play with textures and colors to create a plant “hairstyle” that adds personality to your home.
Happy Pot Head Planters-Have Fun and Enjoy!
Head planters are a fun way to introduce greenery with a touch of personality. With the right plants, you’ll create a unique display that brings nature and creativity into your space. I think little guy on a swing is going to have to be my next purchase!
Please be sure to check out my Gardening Blog Post Page for more tips on all types of gardening. Including Seed Starting, Orchids, Water Gardening, Coldframe Gardening, Indoor Bulb Gardening, Hydroponics, Container Gardening, Mums, Herbs, African Violets, planting Bulbs, Flower Gardening, Vegetable and Fruit Gardening, Indoor Houseplants of all kinds, Cactus, Succulents, Hanging plants, Deer resistant plants and even Bird, Bee, Butterfly and Hummingbird Gardens!
African violets are popular houseplants known for their beautiful blooms and vibrant foliage. Rooting these plants from leaf cuttings is a rewarding process that allows you to expand your collection easily. This post will walk you through African Violet rooting from how and where to take leaf cuttings, as well as the methods for rooting them in both water and soil.
Taking Leaf Cuttings
To start rooting African violets, you need healthy leaf cuttings. Choose a mature, healthy leaf from the middle row of the plant. Avoid old or damaged leaves, as they may not root well. Use a sharp, clean knife or scissors to cut the leaf, leaving about one to two inches of stem. A clean cut helps prevent disease and encourages successful rooting.
Rooting Leaf in Water
Propagating my leaves in water!
Rooting African violets in water is a simple and effective method. Fill a small glass or jar with water. Make sure only the stem is submerged, keeping the leaf above water to prevent rotting. You can cover the jar with plastic wrap, poking a hole for the stem, to support the leaf and maintain humidity.
Place the jar or propagation station in a bright location, but avoid direct sunlight, which can cause overheating. Change the water every week to prevent bacteria growth. After a few weeks, you should see small roots developing from the stem. Once the roots are about an inch long, it’s time to transfer the cutting to soil.
Rooting Leaf in Soil
Rooting African violets directly in soil is another effective method. Start with a small pot and fill it with a well-draining potting mix specifically designed for African violets. You can create your mix using equal parts peat moss, vermiculite, and perlite.
Make a small hole in the soil, dampen leaf stem and dip in rooting powder then insert the stem of the leaf cutting. Gently firm the soil around the stem to provide support. Water the soil lightly to settle it around the cutting. Keep the soil consistently moist but not waterlogged, as excessive moisture can lead to rot.
Creating a Humid Environment
To encourage rooting, maintain a humid environment around the leaf cutting. Covering the pot with a clear plastic bag or placing it under a clear plastic dome can help. Ensure the covering doesn’t touch the leaf, as this can cause mold. Ventilate the setup occasionally to prevent excess humidity, which can lead to fungal growth. You can use this small inexpensive hydrometer to monitor your humidity levels.
Monitoring and Transplanting
Whether rooting in water or soil, monitor your cuttings regularly. Look for signs of new growth, which indicate successful rooting. This process can take several weeks, so patience is key.
Once roots and new leaves appear, it’s time to transplant. For water-rooted cuttings, move them to a small pot with fresh soil. For soil-rooted cuttings, you may need to transfer them to a larger pot as they grow. Be gentle during transplanting to avoid damaging the delicate roots.
Caring for Your New Plants
After transplanting, place your new African violets in a bright location with indirect light. Direct sunlight can scorch the leaves, so choose a spot with filtered light. Keep the soil evenly moist and ensure proper drainage to prevent waterlogged roots.
Feed your plants with a balanced, water-soluble fertilizer specifically for African violets every four to six weeks. Follow the package instructions to avoid over-fertilizing, which can harm the plants.
Troubleshooting Common Issues
While rooting African violets is generally straightforward, you may encounter some issues. If the leaf cutting wilts or rots, check for excessive moisture and adjust your watering routine. Ensure proper airflow to prevent mold and mildew.
If roots aren’t developing, ensure the cutting is receiving enough indirect light and that the environment is humid but not overly wet. Adjust the conditions as needed to encourage healthy growth.
Happy AV Gardening!
Rooting African violets from leaf cuttings is a satisfying and economical way to expand your collection. By choosing healthy leaves and following the right steps for water or soil rooting, you can enjoy watching these beautiful plants thrive. With patience and care, your new African violets will soon become a vibrant addition to your indoor garden. Enjoy the process and the rewards of nurturing these lovely plants!
Please be sure to check out my Gardening Blog Post Page for more tips on all types of gardening. Including Seed Starting, Orchids, Water Gardening, Coldframe Gardening, Indoor Bulb Gardening, Hydroponics, Container Gardening, Mums, Herbs, African Violets, planting Bulbs, Flower Gardening, Vegetable and Fruit Gardening, Indoor Houseplants of all kinds, Cactus, Succulents, Hanging plants, Deer resistant plants and even Bird, Bee, Butterfly and Hummingbird Gardens!
Mosquitoes are more than just a pest, they can also carry diseases. Fortunately, there are several plants that mosquitos hate and are known to repel these pesky insects. Incorporating these plants into your garden or patio planters can help create a more enjoyable outdoor space. Here’s a list of mosquito-repelling plants, along with tips on how to plant and care for them, and suggestions for combinations that work well together in planters.
List of Mosquito-Repelling Plants
Citronella Grass (Cymbopogon nardus): Known for its strong lemon-like scent, citronella grass is a popular choice for repelling mosquitoes.
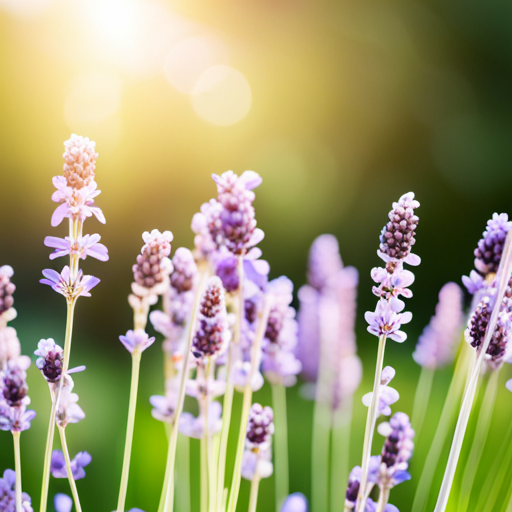
Lavender (Lavandula angustifolia): Lavender’s pleasant fragrance is a natural mosquito deterrent.
Marigolds (Tagetes spp.): These bright, cheerful flowers contain pyrethrum, a compound used in many insect repellents.
Catnip (Nepeta cataria): Catnip is said to be even more effective than DEET in repelling mosquitoes.
Basil (Ocimum basilicum): This herb doubles as a mosquito repellent, particularly varieties like lemon basil and cinnamon basil.
Peppermint (Mentha piperita): The strong scent of peppermint is disliked by mosquitoes.
Rosemary (Rosmarinus officinalis): Known for its woody fragrance, rosemary is another effective mosquito deterrent.
Lemon Balm (Melissa officinalis): This plant, with its lemon scent, can keep mosquitoes at bay.
Scented Geraniums (Pelargonium spp.): Particularly varieties with a lemon scent, these geraniums are effective against mosquitoes.
Garlic (Allium sativum): Planting garlic can help repel mosquitoes, as well as other pests.
How to Plant and Care for These Plants
Citronella Grass:
Planting: Citronella grass prefers well-drained soil and full sun. Plant in a large container or directly in the ground.
Care: Water regularly, although not waterlogged. It can grow quite large, give it plenty of space.
Lavender:
Planting: Lavender thrives in well-drained soil and full sun. It can be grown in containers or the garden.
Care: Water sparingly and ensure good air circulation. Prune back in the spring to encourage new growth.
Marigolds:
Planting: Marigolds prefer well-drained soil and full sun. They can be planted in the garden or in containers.
Care: Water regularly, especially during dry periods. Deadhead spent blooms to encourage more flowers.
Catnip:
Planting: Catnip grows well in full sun to partial shade and in well-drained soil.
Care: Water moderately. Prune regularly to keep the plant bushy and to prevent it from becoming invasive.
Basil:
Planting: Basil requires well-drained soil and full sun. It does well in containers and garden beds.
Care: Water regularly and pinch off flowers to encourage leaf growth.
Peppermint:
Planting: Peppermint prefers partial shade and moist, well-drained soil.
Care: Water frequently and plant in a container to prevent it from spreading uncontrollably.
Rosemary:
Planting: Rosemary thrives in well-drained soil and full sun. It can be grown in containers or the garden.
Care: Water sparingly and prune regularly to maintain its shape.
Lemon Balm:
Planting: Lemon balm prefers well-drained soil and full sun to partial shade.
Care: Water regularly and prune to prevent it from becoming invasive.
Scented Geraniums:
Planting: These geraniums prefer well-drained soil and full sun to partial shade. They do well in containers.
Care: Water regularly and deadhead spent flowers.
Garlic:
Planting: Garlic needs well-drained soil and full sun. Plant cloves in the fall for a summer harvest.
Care: Water regularly, but reduce watering as the bulbs mature.
Planter Combinations for Patios or Decks
For a beautiful and functional mosquito-repelling planter, consider the following combinations:
Citronella Grass, Marigolds, and Lavender:
This trio offers a mix of heights and colors. Citronella grass as the tallest, surrounded by marigolds and lavender.
Rosemary, Basil, and Scented Geraniums:
This combination is not only effective against mosquitoes but also provides herbs for cooking. Plant rosemary in the center with basil and geraniums around it.
Lemon Balm, Catnip, and Peppermint:
This mix of green foliage and varied scents will keep mosquitoes away. Use a large container and keep peppermint in check.
Lavender, Lemon Balm, and Garlic:
These plants offer a blend of aesthetics and functionality. Plant garlic around the edges, with lavender and lemon balm in the center.
Happy Gardening!
When planting in containers, ensure good drainage and choose a quality potting mix. Regularly check for pests and diseases, and water appropriately based on each plant’s needs. With these plants and tips, you can create a mosquito-free oasis on your patio or deck.
Please be sure to check out my Gardening Blog Post Page for more tips on all types of gardening. Including Seed Starting, Orchids, Water Gardening, Coldframe Gardening, Indoor Bulb Gardening, Hydroponics, Container Gardening, Mums, Herbs, African Violets, planting Bulbs, Flower Gardening, Vegetable and Fruit Gardening, Indoor Houseplants of all kinds, Cactus, Succulents, Hanging plants, Deer resistant plants and even Bird, Bee, Butterfly and Hummingbird Gardens!
Growing African violets (Saintpaulia) can be a rewarding experience for both novice and experienced gardeners. These charming, compact plants are known for their beautiful, velvety leaves and vibrant blooms. With the right care, African violets can thrive, providing colorful flowers year-round. Here’s a comprehensive guide to African Violet plant care.
Choosing the Best Pot
Selecting the right pot is crucial for the health of your African violet. These plants prefer small, shallow pots that allow their roots to spread horizontally. Opt for pots made of plastic or ceramic, as they retain moisture better than clay pots, which can dry out too quickly. Ensure the pot has drainage holes to prevent waterlogging, which can lead to root rot.
Ideal Soil Type
African violets require a well-draining, light, and airy soil mix. Standard garden soil is too dense and can suffocate the roots. A specialized African violet potting mix, available at most garden centers, is ideal. This mix typically contains peat moss, vermiculite, and perlite, providing the right balance of moisture retention and aeration.
Planting Your African Violet
When planting an African violet, fill the pot with the soil mix, leaving enough space for the root ball. Gently remove the plant from its current pot, being careful not to damage the roots. Place the plant in the new pot, spreading the roots out gently. Fill in around the roots with additional soil mix, pressing lightly to eliminate air pockets. Water the plant lightly after planting to settle the soil.
Watering Requirements
Proper watering is essential for African violets. They prefer consistently moist but not waterlogged soil. Water the plant when the top inch of soil feels dry to the touch. Bottom watering is recommended to avoid getting water on the leaves, which can cause spots and rot. Place the pot in a saucer filled with water and allow the plant to absorb the water through the drainage holes. After about 30 minutes, remove any excess water from the saucer.
Light Requirements
African violets thrive in bright, indirect light. Place them near a north or east-facing window where they can receive plenty of light without direct sunlight, which can scorch the leaves. If natural light is insufficient, consider using fluorescent or LED grow lights. Position the grow lights about 12-15 inches above the plants and keep them on for 12-14 hours a day. Ensure the lights are not too close, as excessive light can cause leaf burn.
Repotting African Violets
Repotting is necessary when the plant outgrows its current pot or the soil becomes compacted. Typically, African violets should be repotted every 6-12 months. To repot, gently remove the plant from its pot and shake off excess soil. Trim any dead or damaged roots and place the plant in a slightly larger pot with fresh soil mix. Water lightly after repotting.
Fertilizing African Violets
Regular fertilization promotes healthy growth and vibrant blooms. Use a balanced, water-soluble fertilizer specifically formulated for African violets. Dilute the fertilizer to half the recommended strength and apply it every 4-6 weeks. Over-fertilization can harm the plant, so it’s better to err on the side of caution.
Propagating African Violets
Propagating African violets is a rewarding way to expand your collection. The most common method is through leaf cuttings. Start by selecting a healthy leaf with a long stem from the parent plant. Cut the stem at a 45-degree angle, leaving about 1 to 1.5 inches. Insert the stem into moist African violet potting mix in a small pot, and cover it with a clear plastic bag or propagation dome to maintain high humidity. Place the pot in bright, indirect light and keep the soil consistently damp. Within 4-8 weeks, roots will begin to form, followed by small plantlets. Once the plantlets have several leaves and are large enough to handle, separate them from the parent leaf and pot them individually. Continue to provide proper care, including light, water, and humidity, and soon you’ll have new, thriving African violets.
Additional Tips
Humidity: African violets prefer a humid environment. If your home is dry, increase humidity by placing the pot on a tray filled with pebbles and water, ensuring the pot is not in direct contact with the water. You can use this small inexpensive hygrometer to measure humidity levels.
Temperature: Maintain a consistent temperature between 65-75°F (18-24°C). Avoid drafts and sudden temperature changes, which can stress the plant.
Pruning: Remove dead or yellowing leaves and spent blooms regularly to encourage new growth and maintain the plant’s appearance.
Happy AV Gardening!
By following these guidelines, you can successfully grow and care for African violets, enjoying their beautiful flowers and lush foliage. With proper attention to their specific needs, African violets can thrive and bring a touch of natural beauty to your indoor spaces.
Please be sure to check out my Gardening Blog Post Page for more tips on all types of gardening. Including Seed Starting, Orchids, Water Gardening, Coldframe Gardening, Indoor Bulb Gardening, Hydroponics, Container Gardening, Mums, Herbs, African Violets, planting Bulbs, Flower Gardening, Vegetable and Fruit Gardening, Indoor Houseplants of all kinds, Cactus, Succulents, Hanging plants, Deer resistant plants and even Bird, Bee, Butterfly and Hummingbird Gardens!
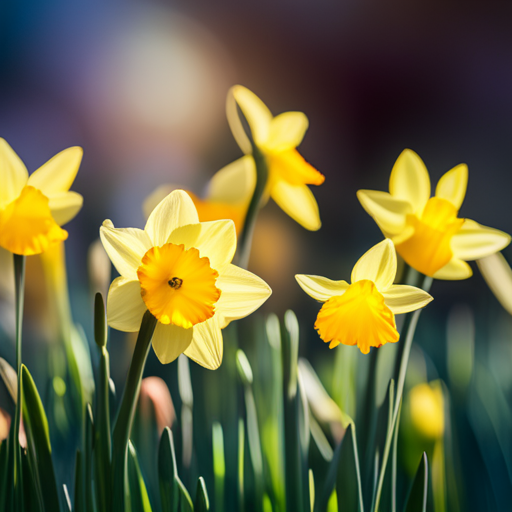
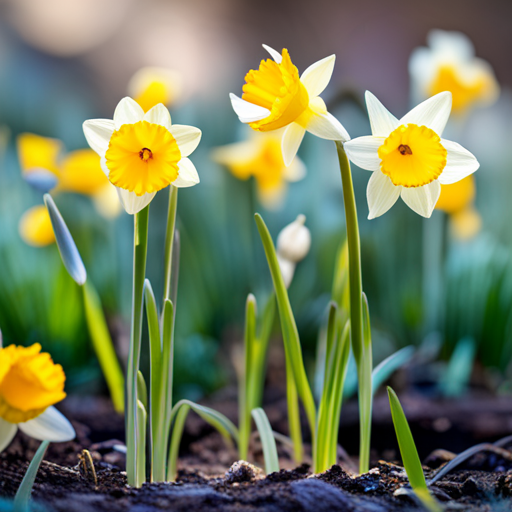
Springtime is a much-awaited season among gardeners. After months of preparing the soil, we are finally able to see the fruits of our labor. One of the most beautiful flowers that bloom in the early spring are daffodils, often recognized for their yellow or golden petals and trumpet-shaped center. If you want to learn how to plant daffodil bulbs in your garden, this post will provide you with tips, tricks, and care to help you produce beautiful blooms.
When to Plant Daffodil Bulbs for Each Zone Type
Planting times for daffodils can vary based on your USDA hardiness zone.
In zones 3-4, the best time to plant daffodils is in late summer to early fall, as soon as the soil cools down a bit.
For zones 5-7, it’s recommended to plant your daffodil bulbs in mid to late fall, leaving enough time before the first hard frost.
Those in zones 8-10 should aim for late fall to early winter planting, taking advantage of cooler temperatures but avoiding deep freezes.
Remember, the key is to give the bulbs a few weeks to establish roots before the ground freezes solid, which can prevent growth.
Preparing the Soil for Planting Daffodil Bulbs
Daffodil bulbs prefer soil that is well-drained and fertile. You can prepare the soil by adding organic compost or fertilizer before planting. Loosen up the soil to allow better air circulation and drainage. Make sure that the soil is neither too wet nor too dry before planting. You can also plant daffodil bulbs on raised beds or slopes to prevent rotting. The soil meter is perfect for checking your soil for nutrients, moisture content and pH levels.
How Deep Do You Plant Daffodil Bulbs
When it comes to planting depth for daffodil bulbs, a general rule of thumb is to plant the bulb two to three times as deep as the bulb is tall. This generally means you’ll be planting your daffodil bulbs about 4 to 6 inches deep. However, larger bulbs may need to be planted a bit deeper, up to 8 inches. The pointy end of the bulb should be facing upward, as this is where the stem will grow from. After placing the bulb in the hole, cover it with soil and pat it down gently to ensure good contact. Remember, daffodils prefer to grow in a sunny spot with well-drained soil. Proper planting depth is crucial for the bulb’s survival during winter and its ability to bloom come spring.
How to Plant Daffodils in Clumps
Planting daffodils in clumps can create a stunning visual effect in your garden, appearing as if a burst of sunshine has descended upon your flower bed. To achieve this effect, here’s how you can plant daffodils in clumps:
Choose the Right Spot: As with individual daffodil planting, ensure the spot you select has good sun exposure and well-drained soil.
Dig a Hole: Unlike single bulb planting, you’ll need to dig a larger hole that can accommodate multiple bulbs. About 8-10 inches in diameter should suffice for a clump of five bulbs.
Arrange the Bulbs: Place the bulbs in the hole with their pointy ends facing upwards, spacing them approximately 3-4 inches apart. This close proximity will result in a dense clustering of daffodils come springtime.
Cover with Soil: Once arranged, cover the bulbs with soil and firm it down gently around them.
Water Thoroughly: Give a generous watering to the newly planted bulbs, ensuring the soil settles around them.
Remember, while clump planting offers a dramatic display, be cautious not to overcrowd the bulbs, as this could lead to poor growth and disease. Stick to small groups of bulbs, and space each clump about a foot apart from each other for the best results.
How to Care for Daffodils
After you have successfully planted your daffodil bulbs, it’s time to shift focus towards their care and maintenance.
Watering: Daffodils don’t require a lot of water after planting, but they do appreciate consistent moisture, especially in dry conditions. Be mindful not to overwater, as this can lead to bulb rot.
Fertilizing: To nourish your daffodils, apply a balanced, slow-release fertilizer in the early spring just as new growth begins to appear.
Mulching: A layer of organic mulch can be beneficial in maintaining soil moisture and temperature, and in suppressing weeds that compete for nutrients. But remember, avoid mulching too closely to the base of the plants to prevent rot.
When daffodils finish blooming, don’t be in a rush to remove the foliage. The leaves are necessary for photosynthesis, which helps the bulb store energy for the next year’s growth.
Foliage: Allow the daffodil leaves to yellow and die back naturally, and do not tie or braid the leaves, as it could interfere with the plant’s ability to photosynthesize.
Deadheading: While it’s not necessary for the health of the plant, removing spent flowers (deadheading) can keep your garden looking neat and tidy. However, be sure to leave the foliage untouched.
Division: After several years, you may notice your daffodil clumps becoming overcrowded and producing fewer flowers. This is a sign that it’s time to divide and replant. Dig up the bulbs after the foliage has died back, carefully separate any bulbs that have grown together, and replant them immediately in a new location.
Remember, each daffodil variety may have specific needs, so always consider the particular care instructions for the type you’re growing. With the right care, your daffodils can continue to provide stunning color and vibrancy year after year.
How to Divide Daffodil Bulbs
Dividing daffodil bulbs helps ensure continued growth and blooming, especially when you notice reduced flowers due to overcrowding. Follow these steps to correctly divide your daffodil bulbs:
Choose the Correct Time: The best time to divide daffodil bulbs is after they have finished blooming and the foliage has naturally yellowed and died back. This typically occurs in late spring or early summer.
Dig Up the Bulbs: Carefully dig around the bulb clumps, starting a few inches away to avoid damaging the bulbs. Lift the clump of bulbs out of the ground using a garden fork or spade.
Separate the Bulbs: Gently separate the bulbs in the clump. Each bulb should have a bit of root attached. Discard any bulbs that are soft, shriveled, or show signs of disease.
Prepare the New Planting Site: The new site should have well-drained soil and receive good sun exposure. You can enhance the soil fertility by adding organic compost or a slow-release fertilizer before planting.
Replant the Bulbs: Plant the divided bulbs as soon as possible. Follow the same planting depth guidelines as provided earlier – 4 to 6 inches deep usually, with the pointy end facing upwards.
Water Thoroughly: Water the newly planted bulbs thoroughly to help settle the soil around them.
Remember, the newly divided and transplanted daffodils may not bloom the following spring as they re-establish themselves, but with proper care, they will return to their blooming glory in the succeeding years.
How to Plant Daffodil Bulbs in Pots
The best time to plant daffodil bulbs in pots is in the fall, about 2 to 4 weeks before the ground freezes. This gives the bulbs a chance to establish roots before the onset of winter. daffodils in pots allows for flexibility and the joy of having these vibrant blooms in various locations. Here are the steps:
Choose the Right Pot: Pick a pot that is at least 10-12 inches deep and has sufficient drainage holes. This depth is important as it allows room for the roots to grow and minimizes the risk of waterlogging.
Prepare the Pot: Fill the pot with a well-draining, fertile potting mix. Leave about 4-6 inches of space from the top.
Plant the Bulbs: Place the daffodil bulbs in the pot with their pointy ends facing upwards. You can plant the bulbs closer in pots than in the ground, but they should not be touching each other or the sides of the pot.
Cover with Soil: Add more potting mix to cover the bulbs, leaving about 2 inches of space from the top of the pot for watering.
Water Thoroughly: Water the pot until the water runs out of the drainage holes. However, avoid overwatering as it can cause the bulbs to rot.
Sunlight: Place the pot in a location that gets at least 6 hours of direct sunlight daily.
Fertilizing: Feed your daffodils with a slow-release bulb fertilizer at planting time and again in the spring when the shoots first appear.
Winter Care: In colder climates, protect the potted daffodils in winter by moving them indoors or to a sheltered location.
Remember to let the foliage die back naturally after blooming as it helps the bulb store energy for the next year’s growth. With the right care, these potted daffodils can bring repeated springtime joy to your home.
How to Grow Daffodils Indoors in a Pot
Bringing a touch of spring indoors is easy with potted daffodils. Follow these steps to successfully grow daffodils indoors:
Choose the Right Bulbs: Opt for larger, healthy-looking bulbs as they produce more blooms. Bulbs should be firm and free of any signs of disease.
Prepare the Pot: Select a container with good drainage that is at least 10-12 inches deep. Fill the pot with a well-draining potting mix, leaving about 4-6 inches of space from the top.
Plant the Bulbs: Arrange the bulbs on the soil surface, with their pointy ends facing up. Space the bulbs so they’re not touching each other or the pot sides. Cover the bulbs with more potting mix, leaving about 2 inches of space at the top for watering.
Proper Lighting: Place the potted daffodils near a window that receives at least 6 hours of direct sunlight each day.
Watering and Fertilizing: Water thoroughly but avoid overwatering as this can cause bulb rot. Add a slow-release bulb fertilizer at planting time and again when the shoots first appear.
Winter Care: If you planted your bulbs in the fall, they need a cold period to bloom. Put the potted bulbs in a dark and cool place, like a refrigerator, for 12-16 weeks before moving them to a brighter area to induce growth.
Post-Bloom Care: After your daffodils have bloomed, continue watering and feeding them as the leaves gather sunlight to create next year’s blooms. Let the foliage die back naturally before removing it.
Remember, indoor-grown daffodils may not bloom again the following year, but the bulbs can be replanted outdoors to possibly bloom in future seasons. With the right care, you can enjoy the bright, cheerful blooms of daffodils in your indoor space.
Different Types of Daffodil Bulbs
Daffodils, also known as Narcissus, boast a diverse range of forms, sizes, and colors. Understanding the differences can help you choose the best variety for your garden or pot.
Trumpet Daffodils-Characterized by their large trumpet-like cups which are as long or longer than their petals. These daffodils are best known for their classic yellow varieties, like ‘Dutch Master’ and ‘Golden Harvest’.
Large-Cupped Daffodils- Recognizable by their large cups, which are more than one-third but less than equal to the length of their petals. They come in a wide range of colors, such as pink, apricot, or orange like the ‘Fortissimo’ or ‘Ice Follies’.
Small-Cupped Daffodils-These varieties possess small cups that are no more than one-third the length of their petals. For instance, the ‘Barrett Browning’ has white petals and a small, vibrant orange cup.
Double Daffodils-Noted for their frilly, packed cups. ‘Tahiti’ and ‘Golden Ducat’ are popular double daffodils with their bright and bold colors.
Triandrus Daffodils-Defined by their drooping, bell-shaped flowers and typically bear two or more blossoms per stem like the ‘Thalia’, which produces elegant, pure white flowers.
Each type of daffodil has its unique beauty and features, but they all share the common trait of being low-maintenance and resilient, adding a burst of color to your garden in early spring.
Happy Gardening!
Fall is the perfect time to plant daffodil bulbs, and with proper soil preparation, planting, and care, you can expect a stunning display of blooms come springtime. Remember to choose firm and healthy bulbs, prepare well-drained soil, plant the bulbs deep enough with the pointed side up, and space them correctly. Caring for daffodils involves periodic watering, ensuring proper drainage, and adding a layer of mulch for added protection. With these tips in mind, you can take pride in knowing you are doing your part in beautifying your garden with daffodils.
Please be sure to check out my Gardening Blog Post Page for more tips on all types of gardening. Including Seed Saving, Seed Starting, Orchids, Water Gardening, Coldframe Gardening, Indoor Bulb Gardening, Hydroponics, Container Gardening, Mums, Herbs, African Violets, planting Bulbs, Flower Gardening, Vegetable and Fruit Gardening, Indoor Houseplants of all kinds, Cactus, Succulents, Hanging plants, Deer resistant plants and even Bird, Bee, Butterfly and Hummingbird Gardens!
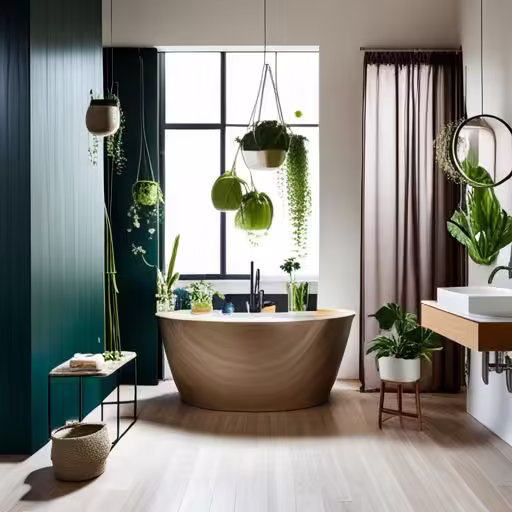
Plants not only add the charm of nature to your home decor but also improve the indoor air quality. However, not all plants can thrive in the bathroom due to the high levels of humidity. But fret not, I am excited to share with you a list of the best hanging plants for your bathroom that can tolerate the warm and humid environment, add color to your space, and uplift your mood with their calming effects.
Spider Plant
The spider plant is a hardy plant that can tolerate low light conditions, making it perfect for bathrooms with halfway-obscured windows. It also has the potential to absorb harmful chemicals present in the air, releasing oxygen and improving overall air quality. Keep the soil consistently moist, but don’t overwater as water can accumulate in the bottom of its leaves.
Pothos
The Pothos plant is a classic favorite amongst gardeners because of its low maintenance and high tolerance to a variety of conditions, including low light and high humidity. It is also considered one of the best plants for improving the air quality indoors. Allow the soil to dry out partially and then water thoroughly until the excess water drains away.
Orchids-Colorful choice for Hanging Plants for your Bathroom
Orchids are known for their exquisite and elegant appearance, making them a popular choice for bathroom decoration. They also love humidity and need very little sunlight to grow. Watering your orchids is essential. Use a spray bottle to spritz the plant’s leaves and roots every few days or water it once a week.
Hoyas
Hoyas, also known as wax plants, are easy to care for, grow well in low light, and require occasional watering. They are beautifully crafted and perfect for hanging baskets that can brighten up any bathroom. You can allow the soil to dry out slightly before watering the plant.
Ferns-Perfect Hanging Plants for your Bathroom
Ferns come in various shapes and sizes, but all thrive in humid environments, making them perfect for the bathroom. They prefer indirect light, and you must keep their soil consistently moist, but avoid overwatering as it may cause root rot.
Just a few more tips for Hanging Plants in Bathroom
• Position the plants away from direct sunlight and at least 6 inches away from any water sources.
• Consider using artificial lights if your bathroom does not get enough natural light. This one can fit in many bathroom lights.
• Hang your plants at an appropriate height to ensure air circulation around them.
Happy Gardening!
Adding hanging plants to your bathroom is a great way to bring a touch of nature and life to the space. By choosing plants such as spider plants, pothos, orchids, hoyas, and ferns, you can be sure that your bathroom will look and feel fresher and livelier. Remember to consider their light, humidity, and water requirements to ensure that they thrive in your bathroom. Start small by adding one or two hanging plants to see how they adjust to the environment. With the right care, your plants will grow and create a tranquil, welcoming atmosphere in your bathroom.
Please be sure to check out my Gardening Blog Post Page for more tips on all types of gardening. Including Seed Saving, Seed Starting, Orchids, Water Gardening, Coldframe Gardening, Indoor Bulb Gardening, Hydroponics, Container Gardening, Mums, Herbs, African Violets, planting Bulbs, Flower Gardening, Vegetable and Fruit Gardening, Indoor Houseplants of all kinds, Cactus, Succulents, Hanging plants, Deer resistant plants and even Bird, Bee, Butterfly and Hummingbird Gardens!
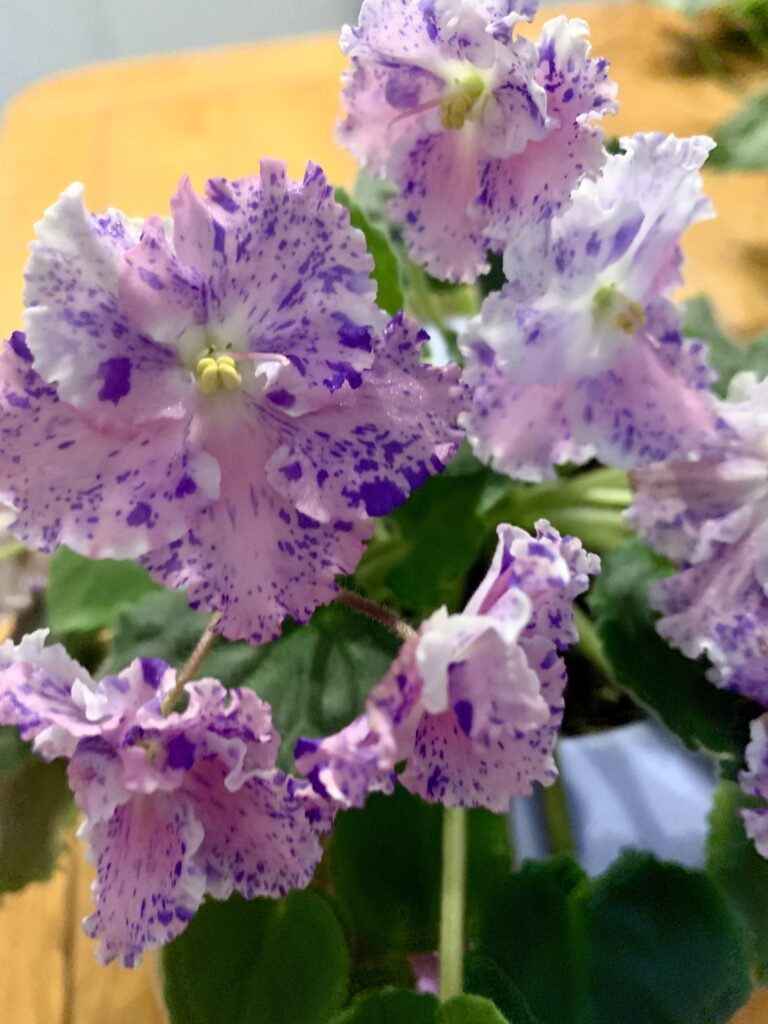
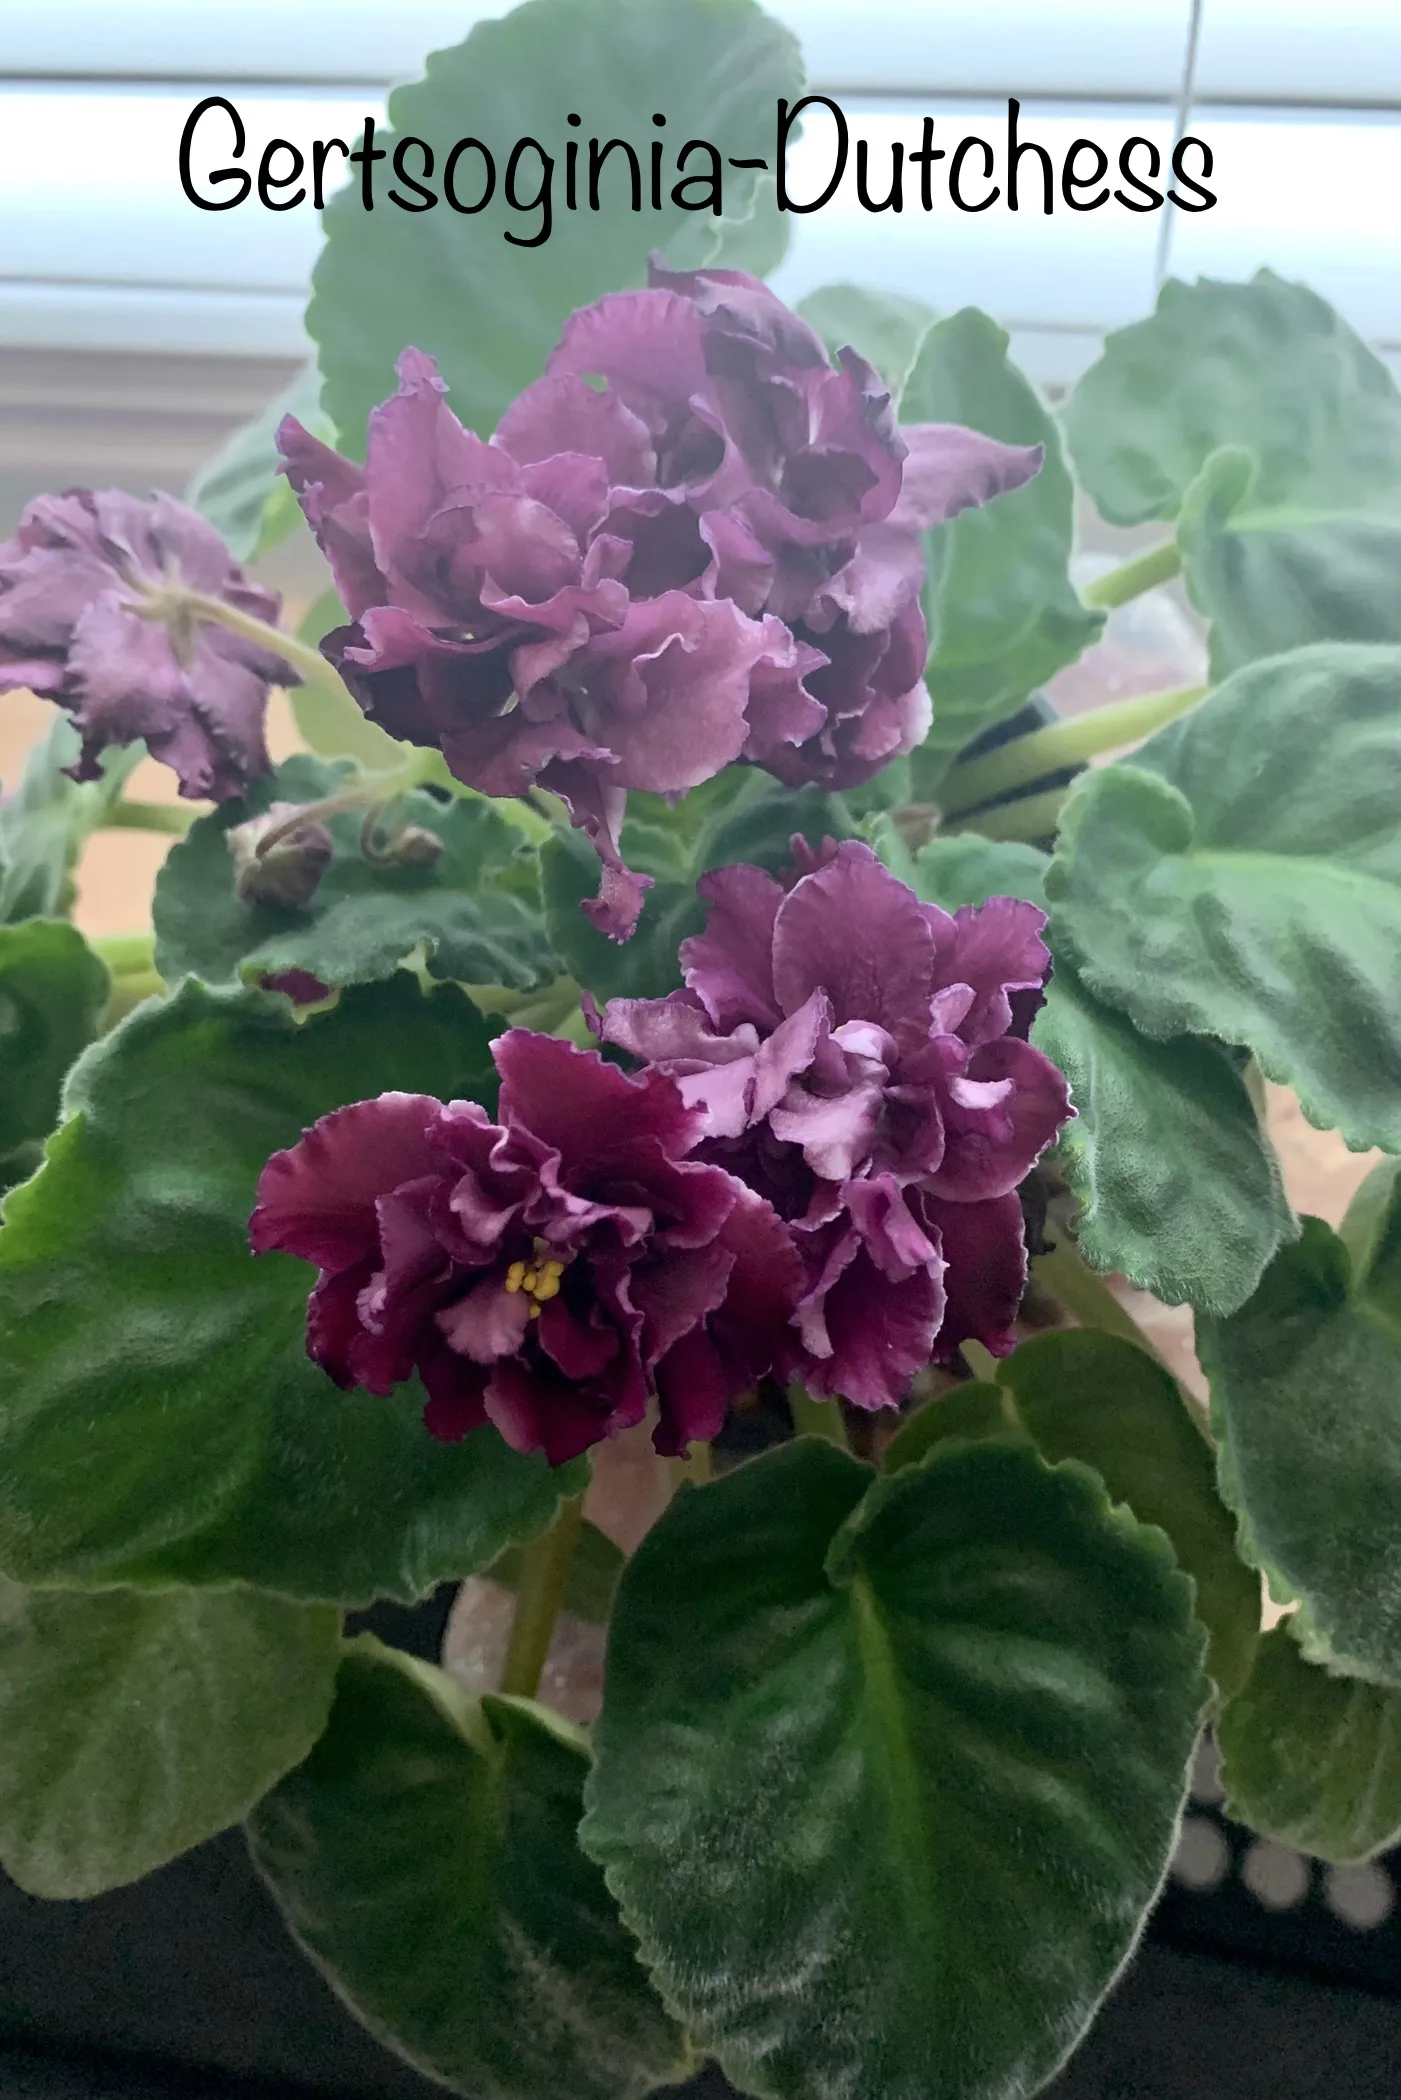
I love my African Violets and currently have over 50 of them! Yes I have a problem, but admitting it is the first step right? African Violets have a bad reputation for being difficult although if you know just a few easy steps on how to care for them they reward you with beautiful blooms of every color!
African violets are a type of flowering plant native to tropical climates. They’re popular houseplants, thanks to their bright flowers and low maintenance requirements. Growing African violets is easy if you follow the right steps. Here’s how you can successfully grow these beautiful plants in your home.
African Violets
Are you fascinated by the world of African violets? From the delicate flowers, it’s no wonder these majestic plants have captivated the hearts of gardeners everywhere! With care, patience, and a few expert tips, you can learn how to take your African violet gardening game to the next level – and enjoy beautiful blooms all year round.
Whether you’re looking for easy maintenance tips or advanced watering schedules, this blog post will provide you with all the advice and guidance needed to achieve success as an African violet gardener! Leaves can be solid green or variegated green and white and either smooth or quilted/wavy or frilly. Finally they come in a variety of sizes which will help you determine the pot size you will need.
Choose your plant
When selecting an African Violet, look for healthy looking plants with dark green leaves and vibrant blooms. Avoid any plants that have yellowing or wilted leaves as this may indicate a pest infestation or disease. If possible, try to select a plant that has multiple buds so that it will flower for longer.
African Violet Sizes
African Violets are a wonderful addition to any home and come in many different sizes. Full-sized African violets range from small, to medium, and large. There is also the option of miniatures, which often appear similar to full-sized African violets but are much smaller. Trailers are closely related to the African violet family, although they have trailing vines instead of rosettes. Finally, micro miniatures offer more intricate shapes and colors than their regular miniature African Violet relatives. African Violets can be quite beautiful when cared for properly and there’s sure to be a variety that fits everyone’s needs perfectly!
Best light for African Violets
African Violets need bright, indirect light to thrive indoors and produce flowers year-round. The best spot in your home will depend on orientation; south-facing windows provide more direct sunlight whereas east-facing windows provide more diffused light throughout the day which is better for plants like African violets which prefer indirect sunlight rather than direct sun rays hitting their delicate petals directly throughout the day. They do not like direct sunlight as this will cause the leaves to yellow and the plant will die.
It is said the best window for African Violets is a South facing window. Although I have mine in South, North and West windows along with a few under grow lights. On my North and West windows I do partially close my blinds a little allowing only filtered light. You can also use a shear curtain to filter the light if you don’t have blinds. Some of my Violets’s thrive best in North window but tend to wither in South window. So I just move them around and see where they want to bloom and grow best. I have a post just on the different types of lights for African Violets that you can read by clicking here.
Grow Lights for African Violets
My grow lights are at least 12″ above my plants and set on 12 hours on and 12 hours off. These Foxgarden full spectrum light stripsare perfect. I have owned two of them for over a year now with no issues at all. My violets are doing great under these grow lights and bloom continuously without fail!
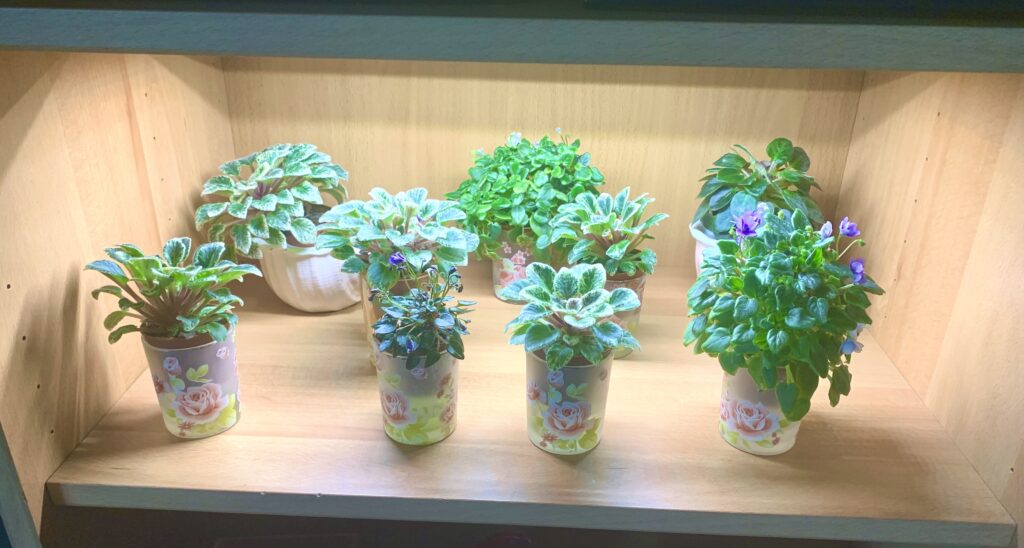
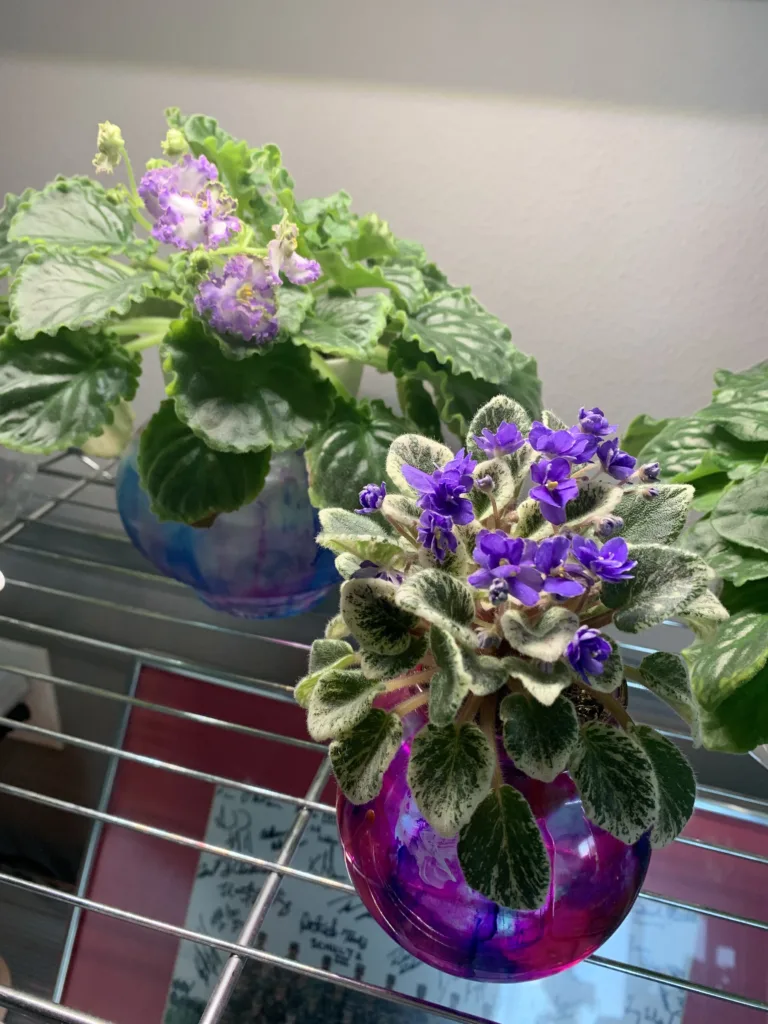
Grow light on my shelf of miniatures!
African Violet Pots – African Violet Planters
African Violets prefer shallow pots with drainage holes at the bottom and plenty of room around the sides for roots to grow. Clay or ceramic pots are best as they help keep soil moist while also providing good air circulation to the roots.
Just like children or pets every African Violet is different. The best pot for one African violet may not work for the next. I have transplanted more than one African Violet that was suffering in its current pot. Once transplanted it flourished! So don’t be afraid to experiment, as with lighting move them around until they are happy! You do what works not only for you and your circumstances but also for the health of the African Violet.
Pot Sizes
It can be tricky to figure out the best pot size for your African Violet, as each size needs a specific one. Generally, for a micro-miniature African Violet, you should use a pot no larger than 2 inches in diameter, while a miniature will do best with a pot between 2-3 inches. For small African Violets you can use a pot that is 3-4 inches in diameter and medium ones should have pots at least 4-5 inches wide. And lastly, large African Violets need to be planted in pots that are 5 or more inches in width.
Picking the right size of the pot is essential for keeping your beloved plants healthy and thriving! African Violets like to be slightly root bound although when they are growing out of the bottom it’s time to move them up a size! If you do water wicking for your African Violets these Greenpara Transparent Pots are great, you can see your roots and they come in various sizes in one package. These Mintra 4 pack of pots come in a variety of colors and range from 4″ up to 7″.
African Violet Self Watering Pots or Water Wicking Pots
A majority of my African Violets are in water wicking pots. You can buy many different types of water wicking pots like this 3 pack of clear water wicking pots or these Santino Calypso 3 pack that come in a variety of colors. Or if you prefer to make your own like I do then you can use these 4″ pots, I love the variety of colors and I can write the name of the African Violet on the pot with a sharpie. Next I put a piece of yarn, split into either two or three strands so not too much water is absorbed, long enough to touch the water, come up through holes in bottom of pot and up to the top of your pot.
These screens are perfect for the bottom of the pot to keep the soil from falling out of the holes. Finally I put them in one of these glass bowl vases that hold the water. I have even started coloring the outside of these vases with this alcohol ink!
Two of the glass bowl vases I mentioned above that I colored with alcohol ink – I love how they turned out! You can see multiple videos on YouTube on how to use Alcohol Ink on vases.
Water Wicking for Trailers, Micro-Miniature and Miniature African Violets
My latest obsession is trailers, miniature and micro-miniature African Violets and they are in water wicking pots I created. I use these 2″ plastic pots with screens on the bottom, piece of 3 strands of acrylic yarn for my wick. And finally put them in shot glasses, I love these beautiful cut glass vases! Trailers differ from the other African Violets as they have multiple crowns. Where all other Violets grow from a center crown, trailers continue to grow and can have multiple crowns causing them to spread wider and wider! I have some in 2″ pots and others in a 4″ shallow pot-the possibilities are endless with trailers!
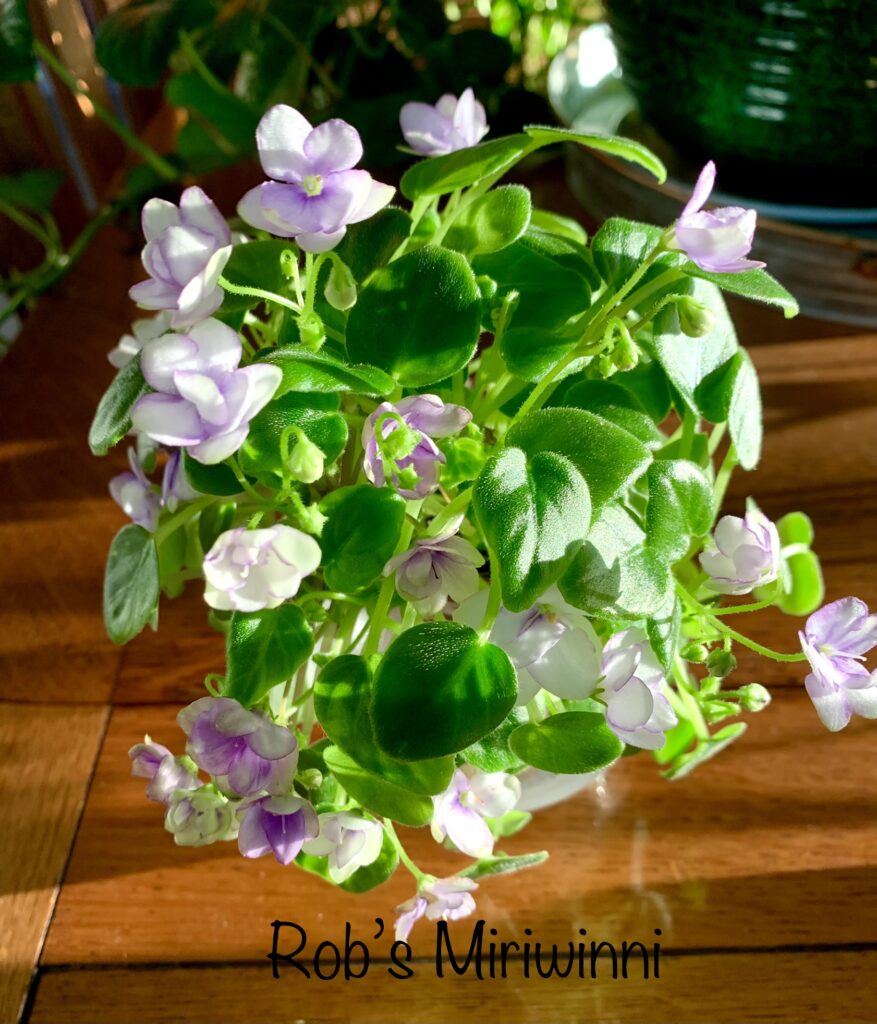
One of my favorite trailers called Rob’s Miriwinni. This is in a shot glass although due to the multiple crowns you can’t even see it! This one is very easy to start new ones from the leaves-I have given away so many of these.
Ceramic African Violet Pots
I also have some that thrive better in ceramic African Violet pots. There are a variety of these, they last forever and you buy in multiple colors to match your decor. They have a ceramic outer pot that holds the water and an inner porous pot that slowly absorbs the water and keeps your soil moist. Here are just a few of my favorites – Laughing Moose Ceramic African Violet pot, Repotme Teardrop African Violet pot and finally this White Glazed African Violet pot that will match any decor.
Pots with Trays
And finally I have few in a regular pot with a saucer, these are watered from the bottom. I love this assortment of colored 4″ pots with matching saucers or you can even put a large assortment of pots on a metal tray with a layer of stones, fill the tray with water weekly to water your violets and promote humidity which they love!
How often do you repot your African Violet?
I care for my African Violets by repotting them once a year to give them fresh soil. If I have them in plastic pots for water wicking then I also give them a fresh pot. For my Violets in ceramic African Violet pots then I remove the plant, clean the ceramic inner pot and then repot with fresh soil. If your inner ceramic pot is not taking in water like it should you can soak it in a mixture of half white vinegar and half water for 30-60 minutes. This will open up the porous inner pot that can build up with minerals and allow water to seep in to the roots again and keep the plant healthy. Also once they are full grown you just repot in the same size pot they were in.
Fertilizing African Violets
Warm Sunshine
Fertilize Regularly – African violets need regular fertilizing to reach their full potential – once every two weeks during spring/summer months and once per month during fall/winter months is ideal depending on how often you water them (more frequent fertilizing may be necessary if you are watering daily). Choose a fertilizer specifically designed for flowering plants such as African Violets as these have higher levels of phosphorus which helps promote healthy flower growth and development over time. My favorite African Violet fertilizer is Schultz AV liquid fertilizer.
Propagating African Violets
Propagating African Violets is easier than you think. You can do this multiple ways and everyone has their favorite, you do what works for you. You want to get a leaf from the middle row of leaves and cut the end off at an angle with a clean sterilized knife. I wipe my knife down with alcohol and let it air dry. Then you can dip the leaf in rooting hormone and put it in African Violet potting soil. My Dad always started his in perlite only until they rooted and small new leaves began to show. He then moved them on to a pot of African Violet potting soil.
Propagating African Violets in water.
I start my African Violets in water, I have a wooden holder that holds 4 test tubes and I fill them with purified water and put my leaves in there until I get a long set of roots, this usually takes 2-3 weeks. Then I pot them in a 4″ pot of African Violet soil. You can also use any vase or cup you want by putting saran wrap over them, secure with a rubber band and poke holes so only the stem goes through to the water.
Many African Violets will duplicate as they grow and get what is called suckers or new plants started at the base of the plant.
African Violets can easily be propagated by division. In time, these plants will produce sucker-like shoots around the base of the main plant. These are baby plants that have been produced from asexual propagation and are also known as offsets or plantlets. When enough of these have formed, it is time to divide your African Violet and transplant them into their containers.
Start by removing each baby plant from the main parent plant with a sterile sharp knife or pair of shears (I clean mine with alcohol and let them air dry). Cut as close to the base as possible, making sure to keep some roots attached to each sucker.
Once you have all your offsets, use a potting mix made specifically for African Violets and fill small containers with the soil. Plant each sucker in the container and pack it down gently so that they are secure. Water them well and place them in a sunny spot where they can get some indirect sunlight or artificial light if using grow lights.
With proper care and attention, these offsets will eventually become beautiful African Violets in their own right. Dividing your plant can be a great way to share the beauty of the African Violet with friends and family!
African Violet Soil
African violets need well-drained soil that is rich in organic matter and nutrients. Good quality potting soil mixed with compost is ideal for growing healthy plants. You can also buy a special African violet mix from your local gardening store which contains all the necessary ingredients for optimal growth.
Everyone has their favorites. I started with store bought African Violet potting soil like Miracle Grow African Violet soil or Black Gold African Violet soil that you can purchase at your favorite garden center or online at Amazon. Now with so many African Violets I have come up with my own mixture of 2 parts sphagnum peat moss, 1 part perlite and 1 part vermiculite. You should use the soil that works for you and makes your African Violets happy.
African Violet Water and How Often to water your African Violets
The key to successful watering is consistency – water your plants when they are dry, but be careful not to overwater them as this can lead to root rot and other diseases. The best way to tell if your plant needs watering is by feeling the soil – it should be slightly damp but not wet or saturated with water when touched lightly with your fingertips. I have a blog post written solely for how to water African Violets and you can read it by clicking here.
I water my African Violets weekly with tap water that I let sit for 24 hours first. In one gallon of water I put 1 Tablespoon of hydrogen peroxide (to cut down on algea growth in my glass water wicking pots) and 2-3 droppers of Schultz African Violet food. You want to keep your soil moist but not overly wet. A majority of my African Violets are in water wicking pots and I replace the water weekly. My Violets in Ceramic African Violet pots I just top off the water in the outer pot weekly. And finally those in trays I just add enough water the reach bottom of pot and let them absorb the water from the bottom.
Problems with African Violets
African Violets can be a bit finicky at times but once you find out where they are happy they reward you with year round blooms and beautiful foliage!
Cupping of Leaves – This can be caused by your African Violet being too cold, happens allot when placed in North windows. Especially at night when the temperature drops and the wind blows. Most Violets don’t like temperatures cooler than 65 F. Different cultivars react differently so while one looks fine and the other starts cupping of leaves or has a tight center growth then just move it to a different window. You might want to invest in a temperature monitor like this ThermoPro and it will let you know how warm and cool the plants are in a 24 hour period.
African Violet Leaves Drooping – This happens when the soil is too wet or if it’s not watered enough. Just make sure your soil is moist, not dry to the touch or soggy and saturated with water.
Spotting on Leaves – This can be caused by water damage to the leaf. You should never mist your African Violets. Also try to never get water on the foliage as this will cause permanent leaf spotting.
Happy Gardening!
African Violets come in an impressive variety of shapes and sizes, allowing you to find one that suits both your decorating style and place in the home. With their varying hues of purple, pink, white, and yellow blooms, African Violets are sure to brighten up any room of the home with their delicate beauty.
Please be sure to check out my Gardening Blog Post Page for more tips on all types of gardening. Including Seed Saving, Seed Starting, Orchids, Water Gardening, Coldframe Gardening, Indoor Bulb Gardening, Hydroponics, Container Gardening, Mums, Herbs, African Violets, planting Bulbs, Flower Gardening, Vegetable and Fruit Gardening, Indoor Houseplants of all kinds, Cactus, Succulents, Hanging plants, Deer resistant plants and even Bird, Bee, Butterfly and Hummingbird Gardens!
Below is a list of my favorite and what I consider best African Violet supplies that I use or my fellow African Violet friends use. Most of my items are purchased on Amazon because I am a prime member and returns are free. This way if I don’t like it I simply return and try the next one. I will only recommend what works for me or what my other African Violet loving friends use and work for them.
Please let me know if you have any recommendations. I’m more than happy to buy any new African Violet supplies and try them out. Just don’t tell my husband!
Best African Violet grow lights.
I have a grow light on one of my entertainment center shelves for my miniature Africa Violets. And also one on a wire rack in my kitchen to display some Standard African Violets along with a few miniatures. These Foxgarden full spectrum plant strip are the ones I use and I have had two for over a year with no problems at all. They are both set for 12 hours on and 12 hours off.
Grow light on my group of miniatures!!
Desk Grow light for African Violet
My latest obsession to add to my list of best african violet supplies is this Romsto individual grow light. Since my desk isn’t near a window I wanted a light so I could still enjoy one of my African Violets while at work. The violets can easily be switched out if I want a different color bloom to look at!
Grow light bulbs
If you have a larger area and you can use a Briignite LED grow light bulbin the existing light I recommend these. Have used them in the past, they work great and last for months!
Table Top grow lights
These are all on my list to buy soon, I have a friend who has them all and loves them! My living room has a very dark corner. Since it gets no light at all, I plan on putting this single plant light on a small table in the corner. This double plant lightwould be perfect for a slightly larger table. And finally my dream a triple plant light! This would be great for a sofa table or large table in windowless spot of home that needs some plant life!
African Violets Pots
Personally I use three different types of pots for my African Violets depending on the Violet. A majority are water wicking, some are in ceramic African Violet pots. And finally a few in regular pots with trays below as these are watered from the bottom. Below are just a few examples of what I consider the best African Violet supplies for your African Violet pot needs.
African Violet Self Watering Pots – Specifically Water Wicking Pots
The majority of my African Violets are water wicking and for these I use these 4″ multi-colored plastics pots. Next I put these round screensover the bottom so the soil does not fall through to my water reservoir, they work perfectly.
For the wick I use yarn that is cut to length so it will drop into water reservoir and come up to top or at least middle of pot. I usually cut them to around 6 inches, these are 6 strands so I split them into 3 strands. This way they won’t pull up too much water into the plant, causing root rot.
I like a different look for displaying my violets so I have played around with different ideas. These glass bowl vases work perfectly for the base and the 4″ plastic pots fit perfectly in them. I have even experimented with Alcohol ink to color my glass vases. This alcohol ink set is easy to use and has multiple colors, I have colored over a dozen pots so far and still have enough for probably 30 more!
Here are a couple of my glass bowl vases colored with alcohol ink – love how they turned out and love matching them with the color of the blooms!!
Water Wicking for Miniature and Micro-Miniature African Violets
My new obsession is miniatures and micro miniature African Violets. Mainly because I can have more in a smaller space! These 2″ plastic potswork perfectly for my miniatures. And they fit into a shot glass and you can find pretty shot glasses like these to put your violets in.
Ceramic African Violet Pots
Ceramic pots are great for your moisture loving African Violets. The unglazed inner pot allows water to seep through slowly from the outer pot. Although I have had few that don’t do well in them so like I’ve said before do what works best for your violet. One of the issues with these pots is they tend to get mineral build up in the porous inner pot and no longer absorb water. You can fix this problem by soaking the inner pot in a mixture of 75% white vinegar and 25% water for 30-60 minutes. Rinse thoroughly and then pot as usual.
Just one of my Ceramic AV pots
Best Pots for African Violets with trays or saucers to water from the bottom
These pots are for your really picky African Violets that don’t like the soil to stay moist. I have a few Russian/Ukraine Violets that are extremely picky prefer to dry out between watering. You can put these in any pot with bottom drainage and place them inside a tray or decorative bowl. To the bowl I added some clay beads that retain water I had left over from my hydroponics project! I love this economical eight pack of plastic pots and their various colors. Also these are the clay beads if you would like to use them. I add a single layer to any pretty bowl the pots will sit down inside.
Dutchess in an acrylic bowl with clay beads to hold moisture-I water this one by filling the bowl.
Best African Violet Fertilizer or Best African Violet Plant Food
Some people call it fertilizer and some plant food so I decided to put both in the title. For me the best African Violet Fertilizer/Plant Food is the Schultz African Violet Plus Plant Food. I put 2-3 droppers full in my one gallon of purified water.
Plant Stands
Below are multiple plants stands that can be used to display your African Violets. I have mine on both the wooden plants stands and a metal stand with plant lights.
Metal Plant Stand – these are great for attaching grow lights to the top, set on 12 hours on and 12 hours off and fill up the stand with color in a room where you have no windows!
Another absolutely beautiful large metal plant stand – Potey 6 tier heart shaped metal stand that can be used together or separated-beautiful either way!!
Please be sure to check out my Gardening Blog Post Page for more tips on all types of gardening. Including Seed Saving, Seed Starting, Orchids, Water Gardening, Coldframe Gardening, Indoor Bulb Gardening, Hydroponics, Container Gardening, Mums, Herbs, African Violets, planting Bulbs, Flower Gardening, Vegetable and Fruit Gardening, Indoor Houseplants of all kinds, Cactus, Succulents, Hanging plants, Deer resistant plants and even Bird, Bee, Butterfly and Hummingbird Gardens!