Hydrangeas are among the most beloved flowering shrubs, admired for their large, colorful blooms that bring elegance and charm to any garden. Fall is actually one of the best times to plant hydrangeas because the cooler temperatures and increased rainfall help the roots establish before winter arrives. When planted properly in autumn, hydrangeas will reward you with lush, vibrant blooms the following summer. This guide will walk you through everything you need to know about planting hydrangeas in the fall — including soil preparation, sunlight, watering, fertilizing, and overwintering tips to keep your plants healthy and thriving.
Why Fall Is the Best Time to Plant Hydrangeas
Many gardeners think spring is the ideal time to plant, but fall offers some real advantages. During the cooler autumn months, hydrangeas experience less stress from heat and drought. The soil is still warm enough to promote strong root growth, and the plants have plenty of time to settle in before the ground freezes. This root development during fall ensures that the hydrangea can handle the heat and dryness of the following summer much better than newly planted spring shrubs.
When you plant in the fall, your hydrangeas spend their energy establishing roots instead of producing flowers. This allows them to become stronger and more resilient plants overall.
Choosing the Right Hydrangea Variety
Before you start planting, it’s important to choose the right hydrangea variety for your climate and garden conditions. The most common types include:
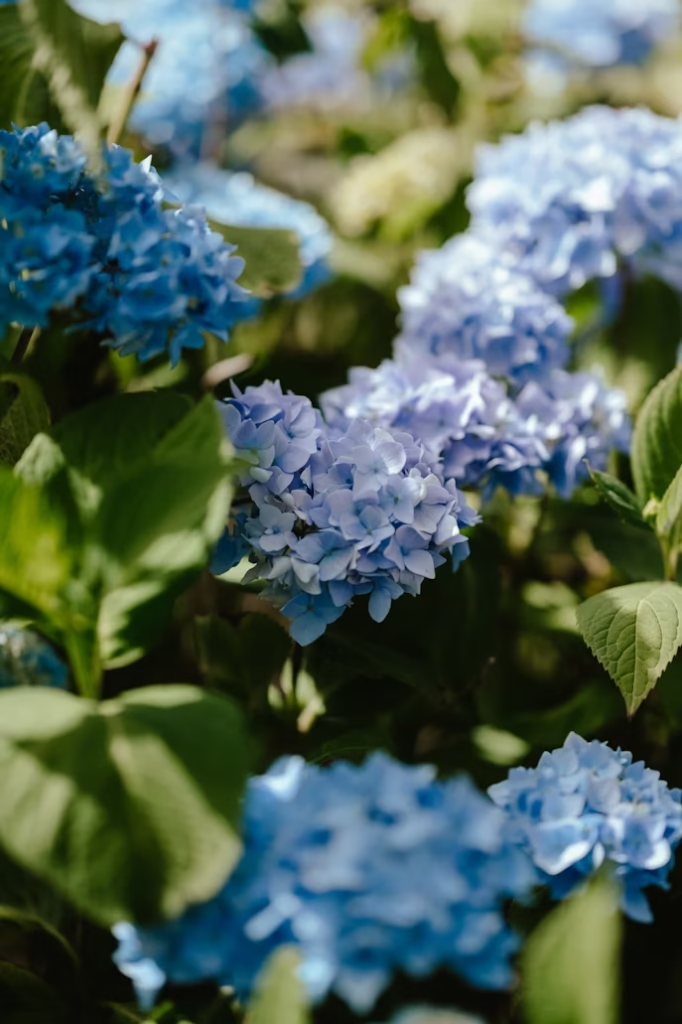
- Bigleaf Hydrangea (Hydrangea macrophylla): Known for their classic blue or pink mophead or lacecap blooms. They thrive in partial shade and need protection from harsh afternoon sun.
- Panicle Hydrangea (Hydrangea paniculata): Extremely hardy and sun-tolerant, producing cone-shaped white flowers that fade to pink or green.
- Smooth Hydrangea (Hydrangea arborescens): Native to North America, these are hardy and reliable bloomers that do well in most soils.
- Oakleaf Hydrangea (Hydrangea quercifolia): Famous for their oak-shaped leaves and stunning fall foliage in shades of red and bronze.
Selecting a variety that fits your sunlight and soil conditions will ensure better growth and more abundant blooms.
Preparing the Soil for Planting
Hydrangeas prefer rich, well-draining soil that holds moisture without becoming soggy. The key to successful planting begins with good soil preparation. Start by loosening the soil about 12–15 inches deep and 2–3 times the width of the root ball. Remove any rocks, weeds, or debris.
Next, mix in organic matter such as compost, aged manure, or peat moss. This improves both drainage and nutrient content. Hydrangeas also thrive in soil with a slightly acidic to neutral pH (around 5.5 to 6.5). You can test your soil with a simple pH test kit available at most garden centers.
If your soil is too alkaline, add sulfur or organic materials like pine needles to lower the pH. For container planting, use a high-quality potting mix formulated for flowering shrubs or acid-loving plants.
Selecting the Perfect Location
Hydrangeas need the right balance of light to produce strong stems and vibrant flowers. Most varieties prefer morning sun and afternoon shade, especially in warmer climates. Too much direct sunlight can cause the leaves to scorch and the flowers to fade quickly.
However, if you’re growing panicle hydrangeas, they can handle full sun better than other types. Oakleaf hydrangeas also tolerate more sunlight once established. In cooler regions, providing a bit more sunlight helps promote fuller blooms.
Choose a spot that offers protection from strong winds and where water drains well after rain. Avoid planting hydrangeas in low-lying areas where water tends to pool, as soggy soil can lead to root rot.
How to Plant Hydrangeas in the Fall
Once you’ve chosen your site and prepared the soil, you’re ready to plant. Begin by digging a hole that’s about twice as wide as the root ball and just as deep. Carefully remove the hydrangea from its container and gently loosen the roots if they appear compacted.
Place the plant in the hole so the top of the root ball sits level with the surrounding soil. Backfill with the soil mixture you prepared earlier, pressing it down gently to remove air pockets. Water thoroughly to help the soil settle around the roots.
Finish by adding a 2–3 inch layer of mulch around the base. Mulch helps conserve moisture, regulate soil temperature, and protect the roots during winter. Keep mulch a few inches away from the stem to prevent rot.
Watering Hydrangeas After Planting
Proper watering is essential, especially during the first few weeks after planting. Newly planted hydrangeas need consistent moisture as they establish their roots. Water deeply once or twice a week, depending on rainfall.
Hydrangeas prefer evenly moist soil but dislike being waterlogged. As a general rule, give them about one inch of water per week. In dry or windy conditions, you may need to water more often. Always water at the base of the plant to keep the foliage dry and prevent fungal diseases.
During fall, monitor the weather and reduce watering gradually as temperatures drop and the plant goes dormant.
Fertilizing Fall-Planted Hydrangeas
Because hydrangeas are entering dormancy in fall, heavy fertilizing isn’t necessary at planting time. Over-fertilizing can stimulate new growth that might be damaged by winter cold. Instead, mix a slow-release, balanced fertilizer (such as 10-10-10) into the soil when planting.
In early spring, once new growth appears, apply a layer of compost or a slow-release fertilizer to encourage strong stems and blooms. For hydrangeas that bloom on old wood, avoid fertilizing after July to prevent late-season growth that could be damaged by frost.
How to Overwinter Hydrangeas
One of the most important parts of fall planting is preparing your hydrangeas for winter. Once the leaves drop and the plant enters dormancy, it’s time to protect it from harsh weather.
For in-ground hydrangeas, add a thick layer of mulch — about 6 inches deep — around the base to insulate the roots. In colder climates, mound leaves or straw around the crown of the plant. You can also wrap the shrub in burlap to shield it from wind and ice.
Pruning Hydrangeas After Fall Planting
Fall-planted hydrangeas typically don’t need pruning their first year. Allow them to focus on root establishment instead of producing new shoots. In late winter or early spring, prune only to remove dead or damaged branches.
For hydrangeas that bloom on old wood, such as bigleaf and oakleaf varieties, prune right after flowering to avoid cutting off next year’s buds. Panicle and smooth hydrangeas bloom on new wood, so they can be pruned in early spring before new growth begins.
Final Tips for Fall-Planted Hydrangeas
Planting hydrangeas in the fall sets them up for long-term success. Remember to:
- Choose the right variety for your climate.
- Prepare rich, well-draining soil with plenty of organic matter.
- Water regularly during the first few weeks.
- Mulch generously to protect the roots.
- Provide winter protection for young or tender plants.
With proper care, your hydrangeas will establish strong roots over the winter and reward you with abundant, colorful blooms the following season. Fall planting isn’t just convenient — it’s the secret to growing resilient, beautiful hydrangeas year after year.
Please be sure to check out my Gardening Blog Post Page for more tips on all types of gardening. Including Seed Saving, Seed Starting, Orchids, Water Gardening, Coldframe Gardening, Indoor Bulb Gardening, Hydroponics, Container Gardening, Mums, Herbs, African Violets, planting Bulbs, Flower Gardening, Vegetable and Fruit Gardening, Indoor Houseplants of all kinds, Bonsai, Cactus, Succulents, Hanging plants, Deer resistant plants and even Bird, Bee, Butterfly and Hummingbird Gardens!