How to Make Concrete Planters Lightweight and Durable

how to make concrete planters lightweight and durable

Gardening enthusiasts who love creating unique planters that stand out from the crowd are always on the lookout for new ideas. For those who are a bit more daring, why not try making your very own concrete/cement planter? Not only are these planters budget-friendly and durable, but they also come in a variety of shapes and sizes. In this blog post, we will explore how to make concrete planters, lightweight and durable. Different idea shapes for your DIY planter, how to make them, and what plants grow best in them.

Materials for Making a DIY Concrete Planter

Before we go into making a cement planter, we should first gather all the materials we need. To make a cement planter, you will need:

Cement

Perlite

Peat moss

A container (preferably made of plastic or silicone)

Tape

Water

Work gloves

Dust mask

Mixing tools (a large spoon or a trowel)

Sandpaper

Step-by-Step Guide to Making a Cement Planter using Two Different Size Plastic Pots

Step 1: Safety First

Before you start, put on your work gloves and dust mask. Working with cement can be messy and it’s essential to protect your skin and lungs.

Step 2: Prepare the Mixture

In a large bucket, mix equal parts of cement, perlite, and peat moss. Gradually add water while stirring until you achieve a consistency similar to cottage cheese.

Step 3: Prepare the Molds

Take your two different sized pots. The larger one will serve as the outside mold, while the smaller one will shape the inside. Ensure the smaller pot sits well within the larger pot leaving adequate space for the thickness of the planter walls. Tape up any holes on the pots. Spray inside of larger pot and outside of smaller pot with vegetable oil so pots release once cement is dry.

Step 4: Create the Planter

Fill the larger pot roughly half way with the cement mixture. Press the smaller pot into the cement mixture until the mixture reaches the desired thickness for the planter walls. Use tape to hold the smaller pot in place, ensuring it doesn’t move while the cement is setting. If you want holes in the bottom of your planter, I like to place straws or small pieces of dowel rods also sprayed with vegetable oil so you can pull them out once dry. Or you can wait until dry and drill holes with a masonry bit.

Step 5: Let it Dry

Allow the cement to dry for at least 24-48 hours. It’s important not to rush this step to ensure your planter is completely solid before you handle it.

Step 6: Remove the Molds

Once the cement is dry, remove the tape and carefully extract the smaller pot. Invert the larger pot and gently ease out your new cement planter.

Step 7: Sand and Seal

Use sandpaper to smooth out any rough edges of your planter. To finish, you can seal the cement planter with a sealant of your choice, this step is optional but highly recommended to prolong the life of your cement planter.

How to Make Plywood Form for making Large Planters

Yet another creative way to design your DIY cement planter is by using a plywood form. This method allows you to create planters of various shapes and sizes, limited only by your imagination and craftsmanship skills.

Step 1: Design the Form

Sketch your design on a piece of plywood. This could be a simple square, a complex geometric shape, or anything in between.

Step 2: Cut the Plywood

Using a saw, cut out your design from the plywood. You’ll need to cut two identical shapes for the sides and then cut strips long enough for the edges.

Step 3: Assemble the Form

Using wood glue and nails, assemble the shape of your planter. Ensure all pieces are secure and there are no gaps where the cement could leak out.

Step 4: Apply Release Agent

Coat the inside of the assembled form with a release agent such as vegetable oil or a commercial mold release product. This will make it easier to remove the plywood once the cement has hardened.

Step 5: Pour the Cement

Follow the cement mixture process as described in the previous sections and pour the mixture into your plywood form. Smooth out the top with a trowel for a neat finish.

Step 6: Let it Dry

Allow the cement to dry for at least 24-48 hours.

Step 7: Remove the Plywood

Once the cement is dry, carefully remove the plywood form.

Step 8: Smooth the Edges

Use sandpaper to smooth out any rough edges or imperfections.

And there you have it, your very own customized plywood form cement planter. Always remember, the beauty of DIY is that you can experiment and create designs that cater to your personal style and taste.

More Unique DIY Concrete/Cement Planter Ideas

Now that we know how to make a DIY cement planter, let’s explore some unique ideas to make them:

Geometric Planter: Cut the sides of a cardboard box to form a geometric shape of your choice. Follow the above steps to mix the cement and pour it into the cardboard cutout. After the cement has set, remove the cardboard planter, sand it, and voila! You have a geometric cement planter.

Animal Planter: Use a small animal plastic figurine as the mold for your cement planter. Follow the above steps and pour the mixture into the animal mold. After it sets, remove the plastic figurine and sand down any rough edges.

Textured Planter: Grab an old dish or bowl, and place various textured items such as leaves, rope, or even a doily onto the bottom of the bowl. Mix the cement and pour it onto the textured items in the bowl. Let it set, remove the bowl, and sand down the edges.

Elephant Ear Cement Planter: The large and broad foliage of Elephant Ear plants can be used to create unique shallow cement planters. To do this, find an Elephant Ear leaf with a shape that you like. Place it on a flat surface with the backside facing up. Mix the cement and pour it onto the leaf, following the natural shape and veining of the leaf for added texture. After the cement sets, gently remove the leaf and sand down any rough edges. This planter is perfect for succulents or other shallow-rooted plants.

What to Plant in Your New Cement Planters

  1. Succulent Garden: Concrete planters offer an ideal environment for succulents, which thrive in well-draining soil. You can create a mini succulent garden by planting a variety of these drought-tolerant plants in different shapes and colors.
  2. Herb Garden: Create a functional and aesthetic herb garden in your concrete planter. Opt for herbs like basil, rosemary, and thyme that thrive in well-drained soil.
  3. Cacti Display: Cacti are another excellent choice for concrete planters, as they prefer the well-draining conditions that the planters provide. Create a southwestern inspired display with a collection of different cacti.
  4. Flower Display: Bright, vibrant flowers can provide a stunning contrast against the subdued, industrial look of concrete planters. Choose flowers that thrive in the planter’s environment and consider adding trailing plants for added visual interest.
  5. Bonsai Trees: Concrete planters are sturdy enough to support the weight of bonsai trees. Bonsai trees paired with concrete planters can create a look that blends the natural and the urban.
  6. Ferns and Mosses: For a concrete planter in a shaded area, consider planting shade-loving ferns and mosses. They provide a lush, green look that can soften the appearance of concrete.
  7. Grasses and Bamboo: For a modern, minimalistic look, consider filling your concrete planter with ornamental grasses or bamboo. They’re easy to care for and can provide a screen or background in your landscape design.
  8. A Combination of Textures: Combine plants with different leaf textures and colors. For example, pair broad-leafed plants with fine, wispy grasses, or glossy leaves with matte ones.

Remember, when choosing plants for your concrete planter, consider the planter’s location, the amount of sunlight it receives, and how much maintenance you’re willing to provide.

Happy Gardening!

Hope you’ve enjoyed our post on how to make concrete planters lightweight and durable. These planters are a great addition to any garden. They are budget-friendly and can be customized to fit any theme. Whether you choose to make a geometric, animal, or textured cement planter, the only limit is your imagination. Cement planters are also versatile for planting different types of plants, such as cacti and succulents, herbs, and small trees. With the right care, your cement planter will be a unique and long-lasting addition to your garden.

Please be sure to check out my Gardening Blog Post page for more growing tips on Container Gardening, Mums, Herbs, African Violets, bulbs and how to plant them, Flower Gardening, Vegetable and Fruit Gardening, Indoor Houseplants of all kinds, Cactus, Succulents, Hanging plants, Deer resistant plants and even Bird, Bee, Butterfly and Hummingbird Gardens!

How to Make Your Own Soilless Mix

how to make your own soilless mix

Are you a home gardener looking for ways to grow plants, herbs, and vegetables in containers? While the idea of container gardening seems simple, the key to success lies in the right soil mixtures. Soilless mixtures are gaining popularity among garden enthusiasts due to their ease of use, nutrient-rich composition, and versatility. In this blog post, we will explore the different types and how to make your own soilless mix for container gardening and help you choose the right one for your gardening needs.

Coir-Based Mixture

Another highly effective soilless mixture for container gardening involves coir, also known as coconut fiber. Coir acts as a sustainable and environmentally friendly alternative to peat moss and boasts impressive water retention capabilities. Here’s how to prepare a coir-based soilless mixture:

  1. Coir: Start with two parts of coir. It serves as the base, ensuring excellent moisture retention and aeration.
  2. Vermiculite: Add one part vermiculite for maintaining moisture balance and providing additional nutrients.
  3. Perlite: Include one part perlite to ensure efficient drainage and prevent waterlogging.
  4. Compost: A handful of compost provides essential nutrients for plant growth and health.

As for what plants thrive in a coir-based mixture, it’s quite versatile. It’s an excellent choice for container gardening of vegetables such as tomatoes and peppers, herbs like basil and parsley, and ornamental plants including geraniums and begonias. Just like the peat moss-based mixture, you can adjust this recipe based on the specific needs of your plants.

Peat Moss-Based Mixture

Peat moss is a popular choice for soilless mixes due to its ability to retain water and slowly release nutrients. Here’s how you can create a peat moss-based mixture:

  1. Peat Moss: Start with two parts of peat moss as the base. It holds moisture and provides a conducive environment for root development.
  2. Perlite: Add one part perlite to facilitate good drainage and prevent the soil from becoming too compact.
  3. Vermiculite: Include one part of vermiculite. It not only retains moisture but also adds essential minerals to the mix.
  4. Bone Meal: A touch of bone meal can provide phosphorus, which aids in root and flower development.

Peat moss-based mixtures are particularly beneficial for acid-loving plants due to the naturally lower pH of peat moss. This makes it ideal for growing blueberries, azaleas, and rhododendrons. Also, many seed starting mixes use peat moss as a base due to its sterility and water-holding capabilities. Remember, you can tweak the ratios based on the specific requirements of the plants you are growing.

Rockwool-Based Mixture

Rockwool, a fibrous material made from basalt rock and chalk, is another effective medium for soilless container gardening. Its high porosity allows for excellent water retention and aeration, making it ideal for plants that require well-drained yet moist conditions. Here’s the recipe to prepare a rockwool-based soilless mixture:

  1. Rockwool: Begin with two parts of rockwool, which acts as the base and ensures a suitable environment for root growth.
  2. Perlite: Add one part perlite to inject air pockets into the medium, ensuring the roots have access to adequate oxygen.
  3. Vermiculite: Include one part vermiculite, which aids in water and nutrient retention, providing a steady supply to the plant roots.
  4. Compost: A handful of compost enriches the medium with organic nutrients, promoting robust plant growth.

As for the types of plants that thrive in a rockwool-based mixture, this medium is especially beneficial for hydroponic systems and is widely used for growing vegetables like lettuce, spinach, and cucumbers. It’s also an excellent choice for growing most herbs and flowering plants. As always, adjust this recipe based on the specific needs of your plants. Remember to manage the pH of your rockwool mixture, as it tends to be alkaline.

Perlite and Vermiculite-Based Mixture

A combination of perlite and vermiculite serves as a highly effective base for a soilless mixture. This mixture provides an ideal environment for plant growth, offering excellent aeration, moisture retention, and a steady supply of essential minerals. Here’s the recipe to prepare a perlite and vermiculite-based soilless mixture:

  1. Perlite: Start with two parts perlite, which introduces sufficient air pockets into the medium, ensuring the roots have access to adequate oxygen.
  2. Vermiculite: Add two parts vermiculite. Its excellent water-holding capacity and ability to slowly release essential minerals make it a valuable addition.
  3. Compost: A handful of compost enhances the mixture with organic nutrients, facilitating robust plant growth and development.

The perlite and vermiculite-based mixture is a versatile medium, suitable for a range of plants. It’s particularly beneficial for plants that require well-drained but consistently moist soil. This includes vegetables like lettuce, zucchini, and cucumbers, herbs such as thyme and oregano, and flowering plants like marigolds and petunias. As always, adapt this recipe to cater to the specific needs of your plants. Manage the pH of your soilless mixture, ensuring it remains within the optimal range for your specific plant types.

Artificial Soil-Based Mixtures

Artificial soil, sometimes called artificial media, is another popular choice for soilless gardening. This option utilizes a blend of inorganic materials to mimic the properties of natural soil and create an effective growing medium. Here’s a simple recipe for an artificial soil-based mixture:

  1. Sand: Begin with two parts sand, which improves drainage and aeration.
  2. Silt: Add one part silt to help retain water and nutrients.
  3. Clay: Include one part clay to enhance the mixture’s water holding capacity.
  4. Compost: A handful of compost adds organic matter, providing essential nutrients for plant growth and development.

Artificial soil mixtures are versatile and can be used to grow a wide range of plants. These mixtures are particularly effective for plants that require well-drained soil, such as cacti, succulents, and a variety of desert-dwelling plants. Furthermore, many gardeners use artificial soil mixtures for container-grown flowers, herbs, and vegetables, as it allows for precise control over soil conditions. As always, adjust the components and pH of your artificial soil mixture based on the specific requirements of your plants.

Happy Gardening!

Soilless mixtures are a fantastic option for container gardening, thanks to their nutrient-rich composition, versatility, and ease of use. Whether you opt for a peat moss-based mixture, coir-based mixture, rock wool-based mixture, perlite and vermiculite-based mixture, or artificial soil-based mixture, always check the label to ensure the mixture is appropriate for the plants you intend to grow.

By choosing the right soilless mixture for your container gardening needs, you can create a thriving garden full of healthy plants, herbs, and vegetables.

Please be sure to check out my Gardening Blog Post page for more growing tips on Container Gardening, Mums, Herbs, African Violets, bulbs and how to plant them, Flower Gardening, Vegetable and Fruit Gardening, Indoor Houseplants of all kinds, Cactus, Succulents, Hanging plants, Deer resistant plants and even Bird, Bee, Butterfly and Hummingbird Gardens!

Pots and Containers for your Garden

pots and containers for your garden

Container gardening is an excellent way to cultivate plants, flowers, and vegetables in limited spaces. The best part of container gardening is that it allows you to be creative with the container selection, which is a crucial aspect of container gardening. Choosing the right container will not only complement your gardening style but also help in the growth of your plants. From plastic pots to metal containers, there are various types of pots and containers for your garden available in the market. In this blog, we will discuss different types of containers that you can use for container gardening and their advantages and disadvantages.

No matter what type of container you choose for your gardening, there are certain features that every container should have to be successful.

Must Have for Containers

  • Drainage Holes: Healthy plant growth requires well-drained soil. Ensure your chosen container has adequate drainage holes to prevent water-logging, which could damage the plant’s roots.
  • Size: The container should be large enough to accommodate the plant’s roots and allow for growth. A too small container can constrict roots and limit plant growth.
  • Quality Material: The container should be made of durable material to withstand varying weather conditions.

Remember, the right container can make a significant difference in the success of your container gardening.

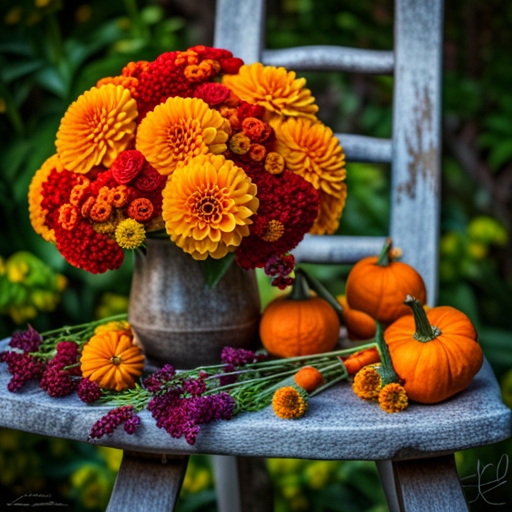
Clay or Plastic Pots

Clay and plastic pots are among the most popular choices for container gardening due to their versatility and availability. Each one comes with its own set of advantages and disadvantages.

Clay Pots: Terra cotta (clay) pots are a classic choice for gardeners. They are often chosen for their natural, earthy aesthetics and their ability to wick moisture away from plant roots, reducing the risk of overwatering. However, their porous nature means they can dry out quickly, requiring more frequent watering. Clay pots can also be more susceptible to temperature changes, and they may crack in freezing weather if not properly cared for.

Plastic Pots: Lightweight, affordable, and available in a vast array of colors and sizes, plastic pots have become a go-to choice for many container gardeners. They retain moisture longer than clay pots, reducing the frequency of watering. They are also more durable and can withstand the elements better than clay pots. However, plastic pots do not offer the same breathability as clay pots, which can potentially lead to overwatering if not monitored closely. They also tend to degrade over time, especially when exposed to sunlight.
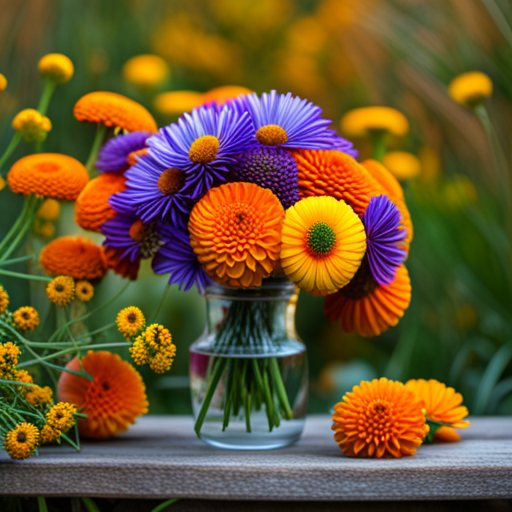
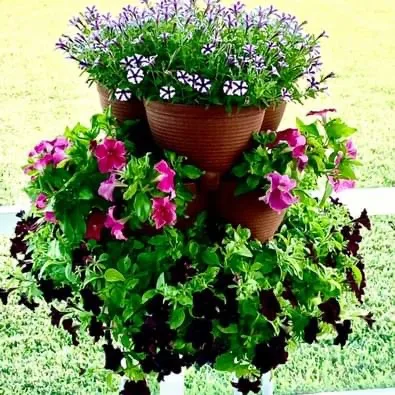
Ceramic Containers

Ceramic containers are another choice that appeals to many gardeners due to their aesthetic charm and sturdiness. Available in a variety of colors, shapes, and designs, they can serve as an artistic statement in your garden besides being functional plant containers.

Ceramic Pots: Ceramic pots are heavier and more durable compared to clay pots. They are glazed, which gives them a glossy look and helps retain moisture, reducing the need for frequent watering. Their weight makes them a good choice for larger plants, as they provide stability and prevent toppling over. However, they can be quite fragile, and care should be taken to prevent them from cracking.

Like clay pots, ceramic pots can also be sensitive to temperature changes. In freezing temperatures, they may crack if not properly insulated or moved indoors. Additionally, they can be more expensive than other types of containers. However, with their beautiful designs and color range, they can add a dash of elegance to your container gardening.

Wooden Containers

Wooden containers lend a natural, rustic charm to your garden setting. Their organic aesthetics blend seamlessly with the outdoor environment, making them a popular choice for gardeners seeking an earthy feel for their container garden.

Wooden Boxes: Wooden boxes, such as barrels, planter boxes, and crates, are great for container gardening. They offer ample space for root growth and excellent insulation from temperature fluctuations, which is beneficial for plant health. The natural texture of wood allows it to breathe, ensuring a good air exchange for the roots.

However, wooden containers do have some downsides. They can rot over time, especially when exposed to moisture, hence the wood used should be treated or naturally rot-resistant. Wood also tends to dry out relatively quickly, which may require more frequent watering of your plants. Additionally, wooden containers can be heavy, particularly when filled with soil, and might not be as easy to move around as plastic or ceramic pots. Despite these challenges, the beauty and charm of wooden containers make them a worthy consideration for your container gardening.

Metal Containers

Metal containers can provide a unique, industrial aesthetic to your container garden. They come in a wide variety of shapes, sizes, and finishes, from sleek stainless steel to rustic galvanized tubs, offering a choice for every gardener’s style preference.

Metal Pots: Metal pots, such as tin, copper, or steel, are durable and long-lasting. They are resistant to cracking and can withstand harsh weather conditions. They’re also lightweight, making them relatively easy to move around your garden. However, metal pots conduct heat, which can lead to overheating of the root zone during hot summer days. Consequently, they may not be the best choice for sensitive plants or those that prefer cooler conditions. To mitigate this, you can consider placing them in the shade during the hottest part of the day or using a plastic liner inside the metal pot.

On the positive side, metal containers often age beautifully, obtaining a patina over time that can add a touch of vintage charm to your garden. Use caution, though, as some metals may rust over time when exposed to the elements. Choose stainless, galvanized, or coated metals if rusting is a concern. Despite these considerations, the unique aesthetic and durability of metal containers make them a popular choice for many container gardeners.
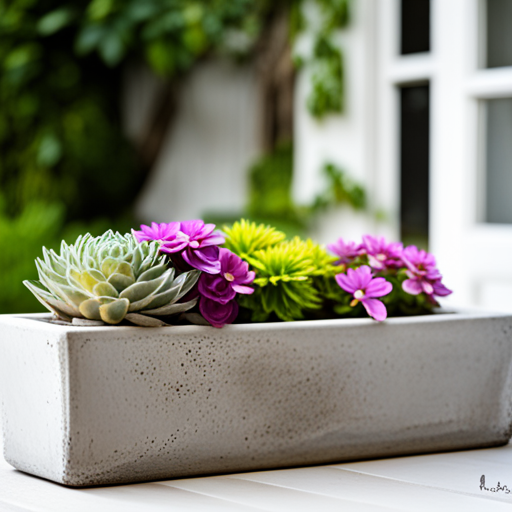
Concrete Containers

Concrete containers are robust and enduring, making them a preferred choice for gardeners looking for long-lasting and sturdy options for their container garden. The heavy-duty nature of concrete makes these containers resistant to varying weather conditions, offering a stable base for larger or top-heavy plants.

Concrete Pots: Concrete pots are available in a variety of shapes, sizes, and styles, serving both functional and decorative purposes in a garden setting. Their heavyweight nature reduces the risk of toppling over due to wind, and their solid construction makes them highly durable. However, they can be rather heavy, making them less mobile than other options.

Concrete containers are excellent at retaining moisture, resulting in less frequent watering needs. However, they may become too cold or hot depending on the weather, which could affect the roots of the plants. If your garden is in a region with extreme temperature fluctuations, it’s worth considering the placement of these pots or choosing plants that can tolerate such conditions.

Despite these considerations, with their modern and stylish aesthetic, concrete containers can be a visually striking addition to your container garden, providing a contemporary contrast to the natural greenery.

Resin Containers

Resin containers offer an appealing blend of durability, versatility, and aesthetic appeal, making them a popular choice in modern container gardening. They are superbly lightweight, making them easier to handle and relocate compared to their ceramic or concrete counterparts.

Resin Pots: Resin pots are created from a type of plastic that mimics the look of natural materials like clay or stone, without the accompanying weight or fragility. These pots resist chipping and cracking, can withstand the elements, and their color doesn’t fade in the sun. They are also excellent at retaining moisture, which means less frequent watering for your plants.

However, it’s worth noting that resin pots can become brittle over time, especially when exposed to extreme cold. Additionally, they do not offer the same breathability as natural materials, which might necessitate careful monitoring to prevent root rot. Despite these considerations, the resilience, lightweight nature, and visual appeal of resin pots make them an excellent choice for any container garden.
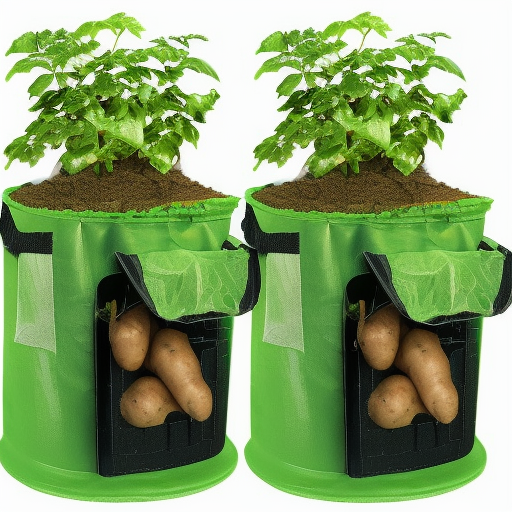
Grow Bags

Grow bags offer a flexible and portable gardening solution ideal for individuals with limited space or those seeking to experiment with different plant placements. They’re an excellent, unconventional choice for container gardening.

Grow Bags: Grow bags, typically made from fabric or breathable plastic, are lightweight and easy to move around your garden. These bags come in a variety of sizes, accommodating a wide range of plants, from small herbs and flowers to larger vegetables and trees. The porosity of the material provides excellent drainage, reducing the risk of overwatering and making them ideal for plants that prefer well-drained soil.

One key advantage of grow bags is their ability to air prune the roots. This means when a root reaches the edge of the bag, the air causes it to split into many smaller roots. This process can lead to healthier, more robust plants, as it prevents the root from circling and becoming root-bound.

However, their lightweight nature means they may be less stable for top-heavy plants, and they may require more frequent watering due to the increased evaporation through the sides of the bag. On the upside, grow bags are reusable and foldable, making them an excellent choice for seasonal gardening and easy storage. Despite their unconventional look, grow bags’ functionality and convenience make them an attractive option for versatile container gardening.

Self-Watering Containers

Self-watering containers offer a convenient and efficient solution for modern gardeners seeking to optimize their watering routine. They are particularly beneficial for those who travel frequently or find it challenging to maintain a regular watering schedule.

Self-Watering Pots: These pots are designed with a built-in reservoir at the bottom, which holds water. This water is then gradually drawn up into the soil through capillary action, ensuring that your plants receive a consistent supply of water. This system not only reduces the frequency of watering but also helps prevent overwatering, a common issue in container gardening that can lead to root rot.

However, while self-watering containers offer convenience, they do require some monitoring. Gardeners must ensure the reservoir does not run dry, and it’s crucial to refill it promptly to avoid interrupting the water supply. Additionally, because these containers retain more moisture, they might not be the best choice for plants that prefer drier conditions.

Despite these considerations, the benefits of self-watering containers – namely, their water efficiency and convenience – make them an increasingly popular choice among gardeners, particularly for those cultivating thirsty plants or living in regions with hot, dry climates.
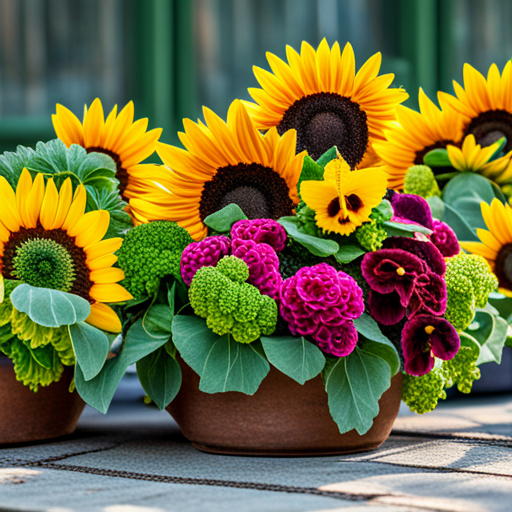
Unique Containers

Unique containers, such as sinks, troughs, buckets, boots, and old wheelbarrows, offer a fun and creative means of adding character to your container garden. This unconventional approach to gardening allows for recycling and upcycling of items, contributing to sustainability while enhancing the aesthetic appeal of your garden.

Sinks and Troughs: Old sinks and troughs can be repurposed as plant containers, offering ample space and depth for plant growth. Their sturdy material makes them durable and weather-resistant, while their unique design adds a vintage touch to your garden.

Buckets and Boots: Buckets and boots, whether made from metal, plastic, or rubber, can be transformed into quirky plant pots. Though they may require additional drainage holes, these containers are lightweight and easy to move around, allowing you to experiment with different garden layouts.

Old Wheelbarrows: Old wheelbarrows make for fantastic movable garden beds. They offer ample space for a variety of plants and their mobility allows for relocation based on sun exposure or aesthetic preference. An old wheelbarrow brimming with colourful flowers can become a stunning focal point in your garden.

However, remember to consider the material and condition of these unique containers as some may not withstand harsh weather conditions or may require additional care to prevent rusting or degradation. Also, ensure adequate drainage to keep your plants healthy. Despite these considerations, the charm and character that these unique containers bring to your garden are sure to make them a talking point among visitors.

Fillers for Large Pots

When dealing with large pots, it can be expensive to fill the entire container with potting soil. Not only does this make the pot extremely heavy, but it also results in a wastage of soil as most plants don’t need such a deep layer to grow.

Pool Noodles: Pool noodles are an excellent filler for large pots. They are lightweight and porous, allowing for good air circulation and water flow. To use pool noodles as a filler, simply cut them into pieces and place them at the bottom of the pot before adding soil. They won’t decompose, they keep the pot lighter for easy relocation.

Styrofoam Peanuts: Another effective filler for large pots are Styrofoam peanuts. Similar to pool noodles, they are light and provide good drainage. However, they can sometimes float up into the soil, so it’s suggested to use a landscape fabric or a piece of mesh between the peanuts and the soil to keep them in place. Be sure to use Styrofoam peanuts and not biodegradable ones, which can decompose over time and alter the soil structure.

Plastic Water Bottles: Empty plastic water bottles can also be used as fillers for large pots. They are light, readily available, and an excellent way to recycle. Simply clean the bottles, remove the caps, and place them at the bottom of the pot. The bottles take up a substantial amount of space, reducing the amount of soil needed, and their hollow nature creates air pockets which aid in the circulation of air and water.

While these pot fillers are incredibly useful, it’s important to ensure that they do not impede the drainage hole in the pot. Also, the use of fillers should not replace the need for high-quality potting soil, which provides the nutrients necessary for plant growth.

Winter Care for Containers

The onset of winter does not spell the end for your container garden. With a few adjustments and a little extra care, you can ensure that your plants survive the colder months.

Relocate Containers: Move your containers to a sheltered location to protect them from harsh winter winds, frost, and heavy rainfall. Ensure they continue to receive sufficient sunlight. For indoor plants, consider using grow lights to supplement natural light.

Wrap Up Plants: Use horticultural fleece, bubble wrap, or a similar insulating material to wrap up your containers. This aids in retaining heat and protecting plants from freezing temperatures. Take care not to cover the plant foliage if it’s not frost-tolerant.

Watering and Feeding: Adjust your watering schedule during winter, as plants generally require less water due to slowed growth. Overwatering can lead to root rot, especially in colder temperatures. Similarly, reduce the frequency of feeding as many plants enter a dormant phase during winter and won’t benefit from excess nutrients.

Choose Winter-Resilient Plants: Opt for plants that are resilient to lower temperatures or are perennial in nature. These plants will not only survive the winter but also add color and warmth to your garden during these grey months.

Consider a Greenhouse or Cold frame: If you have many outdoor container plants, consider investing in a greenhouse or cold frame. These structures provide a controlled environment, protecting plants from frost, wind, and extreme cold.

Though winter care for container plants requires some effort, watching your garden continue to flourish despite the cold is a rewarding sight. Always remember, each plant has unique requirements and what works for one might not work for another. Tailoring your winter care to the needs of individual plants will ensure they thrive throughout the season.

Happy Gardening!

Container gardening is an excellent way to enjoy the beauty and benefits of gardening, even with limited space. Choosing the right container is crucial for the growth and well-being of your plants. In this blog, we have discussed different types of containers and their advantages and disadvantages. Whether you choose plastic, ceramic, metal, wooden, or self-watering containers, you need to ensure that your plants receive adequate sunshine, water, and nutrients to thrive. So, get creative with your container selection and enjoy the beauty of container gardening.

Please be sure to check out my Gardening Blog Post page for more growing tips on Deer Resistant Gardening, Mums, Herbs, African Violets, bulbs and how to plant them, Flower Gardening, Vegetable and Fruit Gardening, Indoor Houseplants of all kinds, Cactus, Succulents, Hanging plants, Container Gardening and even Bird, Bee, Butterfly and Hummingbird Gardens!

How to Care for Mums In Pots

How to care for Mums

Mums are a much-loved flower that adds a pop of color to any garden. They are versatile plants that look great in the ground, in borders, and in pots. However, if you want to enjoy their beauty and vibrancy, you need to take care of them properly. Taking care of mums in pots can be a little tricky, but with the right techniques, you can grow these flowers in containers with stunning results. In this comprehensive guide, we will show you how to care for mums in pots, what size pots to use, soil, light, water, and fertilizer.

How to Grow Mums in Pots

Below I outline step by step from pot to soil, how much sunlight, water and fertilizer Mums require. Also don’t forget the deadheading and pruning to keep your Mums blooming! Hope you enjoy this post on how to care and grow mums in pots.

Picking the Perfect Pot

When it comes to choosing a pot for your mums, size matters. Mums have a strong and expansive root system, so they need enough space to grow and spread. Typically, a 12-15 inch pot is suitable for most varieties of mums. Consider selecting a pot made of clay or ceramic, as these materials breathe better, providing healthy air circulation for the roots. Don’t forget to ensure that your chosen pot has adequate drainage holes. Poor drainage can lead to waterlogging, which is detrimental to mums. Keep in mind that the pot’s aesthetic should complement the beauty of the mums, and add to the overall appeal of your garden or balcony.

Choosing the Ideal Soil for Mums

Mums thrive in well-draining, nutrient-rich soil. Good quality potting mix rich in organic matter is a perfect choice for mums in pots. The soil should retain enough moisture to keep the plant hydrated, but also allow excess water to drain away to prevent waterlogging. Adding compost or well-rotted manure to the potting mix can provide additional nutrients, enhancing the soil’s fertility. It’s also beneficial to include some perlite or vermiculite to improve aeration and drainage. Mums prefer slightly acidic to neutral soil, with a pH between 6.0 and 7.0. Regular testing and adjusting of soil pH, if necessary, is crucial to ensure your mums stay healthy and vibrant.

Positioning the Pots for Optimal Sun Exposure

Mums are sun-loving plants that need a minimum of six hours of direct sunlight each day to bloom robustly. When deciding where to place your potted mums, look for a location that receives ample sunlight, preferably in the morning. East-facing locations often work best as they provide morning light yet protect the mums from the harsher afternoon sun. However, if you are growing mums in hotter climates, they might benefit from a bit of afternoon shade to shield them from intense heat. Remember, the more sun your mums get, the more vibrant their blooms will be. But also make sure not to overdo it as excessive heat and light can cause wilting. Keep an eye on your mums, and if you notice any signs of stress or wilting, consider moving them to a slightly shadier spot.

Watering Mums in Pots

Mums in pots

Watering is a crucial part of caring for mums, especially when they are grown in pots. As a rule of thumb, mums require regular watering, but they don’t like to sit in water. The top inch of soil should be allowed to dry out before watering again. Generally, this means watering your mums every other day during dry spells and less frequently during wet weather. However, the frequency can vary depending on the size of the pot, the weather, and the mum’s growth stage.

During peak bloom period, mums may need watering every day, particularly if the weather is hot and dry. Always water at the base of the plant to prevent leaf diseases and try to water early in the day so excess water can evaporate before night. A well-drained pot is essential to prevent waterlogging, as overwatering can be as detrimental to mums as underwatering. Keep an eye out for signs of overwatering, like yellowing leaves, and adjust your watering schedule as necessary. It’s always better to underwater than overwater mums, as they can recover from a slight wilt, but overwatered plants can suffer from root rot, which is often fatal.

Fertilizing Your Mums

Proper fertilization is key for mums to produce their vibrant, lush blooms. Start fertilizing when new growth begins in the spring and continue until the buds start to show color, usually in late summer. A balanced, slow-release fertilizer with a ratio of 10-10-10 or 15-15-15 is ideal for mums. This provides an even dose of Nitrogen (N), Phosphorus (P) and Potassium (K), all essential nutrients for plant health. Nitrogen promotes leaf growth, Phosphorus is crucial for root development and flowering, while Potassium helps with overall plant vigor. Apply the fertilizer according to the package instructions, usually mixing it into the top layer of soil, and water thoroughly afterward.

Remember, over-fertilization can lead to lush foliage but fewer blooms, so it’s important to stick to the recommended dosage. Also, make sure to stop fertilizing once buds start showing color to allow the plant to focus energy on flowering. Regularly monitor your mums’ health and growth, adjusting your fertilization regimen as necessary to ensure they remain vibrant and healthy.

Deadheading and Pruning for Continued Blooms

Deadheading and pruning are essential practices to ensure continuous blooming of your mums. Deadheading involves removing spent flowers to encourage the plant to produce more blooms. As soon as the flowers start to wilt or brown, snip them off at the base of the flower stem. This not only helps the plant to look neat and tidy but also diverts the plant’s energy towards producing more blooms.

Pruning, on the other hand, helps to maintain the shape of the plant and promote dense growth. Prune your potted mums in early spring or when new growth begins. Pruning involves cutting back the stems to about one-third of their length. This will result in a bushier plant with more branches and, therefore, more flowers. Remember not to prune your mums after midsummer to allow the new buds time to develop before the blooming period.

Regular deadheading and pruning can extend the blooming period of mums and result in a more vibrant and healthy plant. Just remember to use clean, sharp shears to avoid damaging the plant and spreading diseases.

Overwintering Your Potted Mums

Caring for potted mums does not end when the blooming season is over. If you live in a region with harsh winters, it’s crucial to take steps to help your mums survive the cold months. Begin by thoroughly watering your mums before the first hard frost. Then, move the pots to a sheltered location, such as an unheated garage or basement. The goal is to keep the plants dormant but alive during the winter, so the temperature should ideally be below 50 degrees Fahrenheit but above freezing.

In milder climates, you can overwinter your mums outdoors. Cut the stems back to about 3 inches above the ground after the plants go dormant, usually after the first hard frost. Then, cover the plants with a thick layer of mulch, straw, or leaves to protect the roots from freezing temperatures. Be sure to remove this protective layer in early spring before new growth starts.

Once the danger of frost has passed in the spring, gradually reintroduce your mums to outdoor conditions. Start by placing them in a shady location and slowly move them into more sun over the course of a week. This process, known as hardening off, helps to prevent shock from sudden exposure to harsh outdoor conditions. Once your mums are hardened off, you can return them to their usual sunny location and resume regular care.

Remember, mums grown as annuals may not survive the winter, even with protection. But don’t fret! You can always purchase new plants in the spring to enjoy their stunning autumn display once again.

Planting Multiple Mums in One Pot!

Yes, planting multiple mums in one pot is possible, but there are considerations to bear in mind. If you decide to plant more than one mum in a pot, ensure that there is sufficient space for each plant to grow and thrive. Overcrowding can lead to competition for nutrients, water, and light, resulting in stunted growth or health issues for the plants. A good rule of thumb is to allow at least 2 to 3 feet of space between each plant. This will give them enough room to grow and bloom without hindrance. Additionally, if you’re planting multiple mums in one pot, you’ll need to monitor the soil and moisture levels more closely. Multiple plants mean more water and nutrient needs, so regular feeding and watering will be critical to their success.

Happy Gardening!

Growing mums in pots is a rewarding experience that can brighten up any space. To care for your potted mums properly, choose the right pot size, provide adequate light, use a well-draining soil mix, water the plant properly and fertilize regularly. Follow these tips, and you can enjoy fragrant, colorful blooms throughout the season.

Please be sure to check out my Gardening Blog Post page for more growing tips on growing Herbs, African Violets, bulbs and how to plant them, Flower Gardening, Vegetable and Fruit Gardening, Indoor Houseplants of all kinds, Cactus, Succulents, Hanging plants, Container Gardening and even Bird, Bee, Butterfly and Hummingbird Gardens!

how to care for mums in pots

Fall Porch – Pot and Planter Ideas

Fall porch pot and planter ideas

With the arrival of fall, the weather shifts from warm to chilly, and the leaves on trees start to change color. Why not bring those fall vibes to your front porch with a gorgeous collection of container plants? Your porch is the first thing people see when they visit your home, so adding some fall-themed container plants will create a welcoming entrance for guests and add a refreshing look to your home. In this blog post, I will share some ideas for fall porch – pot and planter ideas for your porch, highlighting the best flowers and greenery that will create a picturesque view.

When to Plant Your Fall Planters

Timing is everything when it comes to planting your fall container plants. The best period to start is when the summer heat begins to dwindle, and the mild fall weather starts to set in. This is typically around late August to early September, depending on your local climate. Starting early allows your plants to establish their roots in the planter before the first frost. It also enables some early fall bloomers to showcase their beauty right from the start of the season. However, ensure to keep an eye on your plants and provide them with appropriate care, such as adequate watering and sunlight, as the fall progresses. Remember that the goal is to create a colorful and lush fall display on your porch right through to the advent of winter.

Mums: Ideal Pairings and Care Tips in Planters

Chrysanthemums, commonly known as mums, are a classic fall favorite that work beautifully in porch planters. Their dense, colorful blooms create a cheerful atmosphere that lasts well into the colder months. 

For an attractive, balanced display, consider pairing mums with other fall plants that offer contrasting shapes and textures. Ornamental grasses can provide an elegant backdrop for mums, while flowering kale or cabbage will add a unique, textural element to your planter. For a burst of greenery, consider incorporating trailing ivy or creeping Jenny.

Caring for mums in planters requires some attention but is relatively straightforward. Mums prefer well-drained soil, so be sure to choose a planter with drainage holes to prevent waterlogging. Plant your mums in a location that receives at least six hours of sunlight each day. Regular watering is essential for mums, especially if they are in a windy location or if the weather has been dry. During the fall, check the soil daily; if the top inch of soil is dry, it’s time to water. Lastly, deadheading spent blooms will promote new growth and keep your mums looking their best all season long.

Ornamental Kale: Care Tips and Pairing Suggestions for Planters

Ornamental kale, with its rosette form and vibrant, colorful leaves, is a standout addition to any fall planter. It provides a stunning contrast to other plants and flowers, and its hardiness allows it to withstand cooler temperatures, making it a perfect choice for your fall porch display.

Caring for ornamental kale in a planter is a relatively simple task. Like mums, ornamental kale prefers well-drained soil, so choose a planter with good drainage to prevent waterlogging. Place your planter in a location that receives plenty of sunlight, as kale grows best in full sun. Although it can manage in partial shade, sufficient sunlight will ensure the most vibrant leaf colors. Water your kale regularly, but be careful not to overwater. The soil should be kept moderately moist, and not soggy. Fertilize the kale once a month with a water-soluble fertilizer to promote optimal growth.

For a visually appealing display, consider pairing the ornamental kale with plants that offer different textures and forms. Pansies, with their delicate blooms and variety of colors, can create a delightful contrast to the boldness of the kale. Decorative grasses or trailing plants, such as creeping Jenny or ivy, can add an appealing touch of greenery and provide a cascading effect in your planter. Another smart pairing can be with spring-blooming bulbs, such as tulips or daffodils. By planting these bulbs underneath the kale in your fall planter, you’re setting up a surprise burst of color for the upcoming spring, ensuring your porch display transitions seamlessly from one season to the next.

Pansies: Pairing Ideas and Care Tips for Planters

A wonderful addition to any fall planter, pansies are admired for their diverse palette of colors and their delicate, cheerful blooms. They can flawlessly match the vibrant tones of autumn, and their ability to withstand frost makes them a reliable choice for your fall porch display.

When it comes to pairing, pansies work beautifully with other cool weather plants. Consider partnering them with ornamental kale or cabbage for a striking contrast. They also pair well with chrysanthemums, offering a softer texture against the rigid blooms of the mums. For a visually appealing height difference, consider adding taller plants such as ornamental grasses or even small evergreen shrubs.

For pansy care, they prefer a sunny or partially shaded location. Ensure your planter has good drainage to prevent waterlogging, as pansies do not do well in overly wet soil. Regular watering is essential, but be careful not to overwater. Fertilizing every 4-6 weeks with a balanced, water-soluble fertilizer will help your pansies thrive. Also, remember to deadhead spent blooms to encourage continued flowering throughout the season.

Marigolds: Ideal Companions and Care Instructions in Planters

Marigolds, with their splendid golden and orange hues, are an excellent choice for a fall porch planter. They invoke the warm colors of fall and their robust blooms last well into the season. 

Marigolds can be paired with a variety of plants to create a vibrant fall display. They pair superbly with other fall favorites such as mums and pansies. Ornamental grasses can provide a lovely contrast to the bold marigolds, and trailing plants like creeping Jenny or ivy can add a touch of greenery to your display.

Marigolds are relatively easy to care for. They prefer full sun, and well-drained soil is crucial to prevent waterlogging. Regular watering is necessary, but avoid getting the foliage wet, as this can lead to mildew. Fertilize your marigolds every month with a water-soluble fertilizer to encourage robust growth. Also, regularly removing spent blooms will ensure your marigolds remain vibrant and blooming throughout the fall.

Ornamental Grasses: Selection and Care Tips for Pots

Ornamental grasses are an excellent choice to add height, texture, and movement to your fall planter display. They come in a variety of sizes, colors, and types such as Fountain Grass, Blue Fescue, and Japanese Blood Grass, each bringing a unique appeal to your arrangement.

Fountain Grass, known for its arching sprays of delicate, feathery blooms, is a popular choice. Blue Fescue, with its compact size and striking blue foliage, can be a spectacular addition. Japanese Blood Grass, on the other hand, is an eye-catching grass with red-tipped leaves that turn a vibrant crimson color in the fall.

Caring for ornamental grasses in pots is relatively straightforward. Most ornamental grasses thrive in full sun, but some can tolerate part shade. Check specific care instructions for the type of grass you choose. Well-drained soil is crucial to prevent waterlogging, so ensure your pot has adequate drainage holes. Water your grasses regularly, ensuring the soil is moist, but not soggy. During the active growth period, typically spring and summer, fertilize your grasses monthly with a balanced, water-soluble fertilizer. Prune your grasses in early spring before new growth begins to keep them looking their best. As with other plants, removing spent or dead foliage will also help promote new growth and maintain the attractive appearance of your grasses throughout the season.

Parsley and Oregano: Adding a Touch of Edible Greenery to Your Pots

Incorporating herbs into your fall planter display is not only practical but also visually pleasing. Parsley and oregano are two such herbs that can enhance the beauty of your porch display while also providing fresh, homegrown ingredients for your culinary adventures.

Parsley, with its rich green, feathery leaves, can provide an attractive contrast to the vibrant hues of fall plants. Pair it with marigolds or pansies for a visually striking combination. Similarly, oregano, known for its robust, trailing growth and aromatic leaves, pairs well with ornamental grasses or flowers like mums. It adds depth to your display and can create a beautiful cascading effect if planted at the edge of the pot.

When it comes to caring for parsley and oregano in pots, both herbs prefer full sun to partial shade and well-drained soil. Make sure your container has good drainage to prevent waterlogging. Water regularly, but ensure the soil isn’t overly soggy. For optimal growth, fertilize with a water-soluble fertilizer roughly once a month. Prune regularly to encourage bushier growth and to keep your plants looking their best. Even in fall, these herbs continue to produce fresh leaves, making them a wonderful, functional addition to your fall porch display.

Happy Gardening!

Fall porch planter and pot ideas

Adding fall container plants to your porch will bring life to your home and add warmth to your front entrance. With the ideas we have shared, you can create an inviting and picturesque porch. Always remember to choose the right container for the plants you want to grow, provide the right soil for them, and ensure they receive enough water. By creating a beautiful fall porch, you will not only enjoy the view but also impress your guests.

Please be sure to check out my Gardening Blog Post Page for more tips on all types of gardening. Including Seed Saving, Seed Starting, Orchids, Water Gardening, Coldframe Gardening, Indoor Bulb Gardening, Hydroponics, Container Gardening, Mums, Herbs, African Violets, planting Bulbs, Flower Gardening, Vegetable and Fruit Gardening, Indoor Houseplants of all kinds, Cactus, Succulents, Hanging plants, Deer resistant plants and even Bird, Bee, Butterfly and Hummingbird Gardens!

How to Care for Wave Petunias

how to care for wave petunias

Petunias are one of the most popular annual flowers because of their wide array of vibrant colors, ease of growing, and the long blooming period. Wave petunias, in particular, are a favorite among gardeners because of their spreading and cascading growth habit. However, to ensure your wave petunias bloom to their full potential, it’s important to care for them properly. In this post, we will be discussing the various factors that affect the growth of wave petunias: soil type, water, light, and fertilizer. By the end of this article, you’ll have all the necessary knowledge and skills to know how to care for your wave petunias like a pro.

Best Pot for Wave Petunias

When it comes to choosing the best pot for your wave petunias, there are a few key factors to consider. Firstly, size: Wave petunias thrive in larger containers because their spreading habit requires plenty of space to grow. A pot that’s at least 12 inches in diameter is a good starting point. Secondly, material: Ceramic or plastic pots are preferable as they retain moisture well and help to prevent the soil from drying out too quickly. Lastly, drainage: Make sure your chosen pot has sufficient drainage holes to avoid waterlogging the roots, as this can lead to root rot and other diseases. Ultimately, a well-chosen pot can make a huge difference in the health and blooming of your wave petunias.

The first step in caring for wave petunias is to choose the right soil type. Wave petunias thrive in well-draining soil conditions that are slightly acidic. Soil that is too compact or clayey will lead to poor growth, so it’s important to loosen the soil by mixing in some organic matter, such as compost or peat moss. This will create a more porous soil texture that’s suitable for the wave petunias’ root systems. It’s also important to ensure that the planting site is exposed to at least six hours of sunlight every day. With proper soil preparation and sun exposure, your wave petunias will flourish.

Water and Light Requirements for Wave Petunias

After planting, keep your wave petunias moist but avoid over-watering. Too much water will lead to fungal diseases that can cause your flowers to wilt, lose color and eventually die. Conversely, underwatered wave petunias will lose their flower buds prematurely. However, take care not to overwater, which will lead to root rot and decreased blooming performance. A good rule of thumb is to water petunias when the soil is dry to the touch, but not when the soil is completely dry.

Next, let’s explore light requirements for wave petunias. As previously mentioned, they require at least six hours of sunlight a day to thrive. When grown in shady or overcrowded areas, wave petunias will also exhibit poor growth and bloom poorly. If the planting area receives too much light, consider providing some shade cloth to limit the amount of direct sunlight reaching the wave petunias. This will also help to reduce water evaporation from the soil, thus saving you time and water.

Fertilizer for Wave Petunias

Fertilizing is essential for the proper growth of wave petunias. When planting, use a slow-release granular fertilizer with balanced nutrients that will retain nitrogen, potassium, and phosphorus. This will help to feed your wave petunias gradually throughout the growing season. Do not use excessive amounts of fertilizer, as it can lead to increased growth, reduced blooming, and wilting. Consider using a balanced feed every two weeks to keep the blooms at their peak. You can also spray diluted fertilizer on the leaves of the wave petunias for a quick boost of nutrients.

Deadheading Wave Petunias for Continued Blooms

Deadheading is a crucial practice for maintaining the blooming performance of your wave petunias. This process involves the removal of spent or faded flowers to encourage the plant to produce more blooms. For Wave Petunias, deadheading not only helps to prolong the flowering period but also keeps the plants looking tidy and vibrant.

To deadhead your wave petunias, follow these steps:

  1. Identify the spent flowers: These are the flowers that have completed their blooming cycle and started to wilt or discolor. They will no longer contribute to the plant’s aesthetics and might even divert energy away from the production of new blooms.
  2. Use a pair of clean, sharp pruners or scissors: Sterilize the tool before use to prevent the spread of diseases. Cut the flower stem right below the base of the spent bloom. 
  3. Dispose of the spent blooms: Do not leave the dead flowers on the ground as they can attract pests or cause diseases. 
  4. Repeat this process regularly: Deadheading should be an ongoing practice throughout the season to ensure continuous blooms.

By deadheading your wave petunias regularly, you not only stimulate new growth but also maintain an attractive appearance for your garden all season long. Remember, the goal is to keep the plant focused on producing fresh, vibrant blooms and less on seed production.

Different Types of Wave Petunias and Their Features

Wave petunias come in a wide variety of types, each with their own unique features and characteristics. Here, we’ll explore some of the most popular types of wave petunias:

  1. Easy Wave Petunias: Known for their quick spreading habit, Easy Wave petunias are a great choice for gardeners wanting a fast-growing, vibrant display. They’re low maintenance, with a continuous bloom from spring to frost, and they come in a variety of colors, including pink, coral, blue, and burgundy.
  2. Shock Wave Petunias: If you’re looking for a dramatic floral display, Shock Wave petunias are your best bet. These plants are renowned for their ability to recover quickly after rain, and they produce small, vibrant flowers that bloom prolifically across the plant.
  3. Tidal Wave Petunias: As the tallest variety of wave petunias, Tidal Wave petunias create an impressive display. They’re known for their ability to form large mounds or hedges when grown in full sun, and they come in a range of colors, from silver to hot pink.
  4. Avalanche Petunias: Avalanche petunias stand out for their distinctive trailing habit, making them perfect for hanging baskets or containers. These petunias produce large, trumpet-shaped flowers in an array of colors and are particularly resistant to diseases.

Each type of wave petunia offers its own unique aesthetic appeal and growth characteristics. Choose the type that best suits your garden’s conditions and personal preferences to ensure a beautiful and healthy display of wave petunias.

Happy Gardening!

In conclusion, by applying the above techniques, you can care for your wave petunias effectively. Choosing the right soil type, keeping your flowers moist, providing enough sunlight and fertilizing regularly are guaranteed to allow your wave petunias to grow with healthy roots, leaves, and blooms. With appropriate care, wave petunias will provide you with a gorgeous array of blooms all summer long and will be the envy of all your gardening friends. So, go ahead and give it a try!

Please be sure to check out my Gardening Blog Post Page for more tips on all types of gardening. Including Seed Saving, Seed Starting, Orchids, Water Gardening, Coldframe Gardening, Indoor Bulb Gardening, Hydroponics, Container Gardening, Mums, Herbs, African Violets, planting Bulbs, Flower Gardening, Vegetable and Fruit Gardening, Indoor Houseplants of all kinds, Cactus, Succulents, Hanging plants, Deer resistant plants and even Bird, Bee, Butterfly and Hummingbird Gardens!

Fall Pot Ideas

fall pot

Fall is a wonderful time to add a touch of seasonal cheer to your home, both inside and out. While many people focus on indoor decor, yard beautification is just as important. A great way to begin your fall home beautification effort is by investing in some potted flowers and greenery. When you plant your favorite fall colors, such as pumpkins and gourds, with the right flowers and greenery, you’ll get an array of eye-catching colors and textures that few other decorating ideas can match. In this blog post, we’ll share a few ideas to help you choose the perfect fall pot ideas with flowers and greenery to plant in a pot on your porch this fall.

Fall Pot Ideas-Flowers and Greenery

Sunflowers – Few plants scream “autumn” like sunflowers do. Not only will you get an array of warm yellows and oranges, but the super bold flowers provide an excellent backdrop for nearly any other fall plant variety you want to add. Add some magenta asters or some deep purple salvias, and you’ll have a breathtaking seasonal display.

Pansies – While people typically think of pansies as a springtime plant, these hearty little flowers can thrive all year round with just a bit of TLC. They come in an array of fall ready colors such as burgundy, orange, and gold. What’s great about these little flowers is you can start them off small and then let them flourish into full-grown plants in no time.

Ornamental Cabbage/Kale – While these plants don’t convey the same vibrancy as traditional flowers, ornamental cabbage and kale come in shades of pink, white, and purple. These low-maintenance plants can survive rapid temperature drops, require little maintenance, but will give your porch a texture change that other plants just can’t offer for the fall season.

Mums – Hardy and reliable, mums are the go-to potted flower for many gardeners this season. They come in a wide range of stunning shades, from deep burgundy and pink to bright yellow and soft white. Place them in small pots as a centerpiece or in large pots to add much-needed height to your porch.

Heucheras – Looking for some greenery to add to your fall pots? Look no further than Heucheras. These plants offer vibrant colors with deep purple, greens and even silvers. These leafy green plants will serve as an excellent contrast to the bright flowers.

Caring for Your Fall Pots

To ensure your fall pots thrive throughout the season, here are some essential care tips:

  1. Watering: Fall plants do not require as much water as summer plants, but it’s still key to keep the soil moist. Be careful not to overwater, as this can lead to root rot. 
  2. Sunlight: Most fall plants require a good amount of sunlight, so place your pots where they can get a minimum of 6 hours of direct sunlight. 
  3. Fertilizing: To help your plants bloom, use a slow-release fertilizer at the beginning of the season. 
  4. Protection from Frost: Some plants may need to be brought indoors or covered during the first few heavy frosts. 
  5. Pruning: Deadheading spent blooms can encourage new growth and keep your plants looking fresh and healthy. 

Remember, each plant has its own specific care needs, so it’s always a good idea to check the care instructions for each plant you choose. Happy fall planting!

Happy Gardening!

fall pot ideas

By choosing the right flowers and greenery, you can create a beautiful fall display on your porch. Choose plants that offer a diverse array of rich textures, colors, and height. From sunflowers and mums to ornamental kale and cabbage, every plant offers something special for your fall porch pots. Try incorporating multiple seasonal plants for the biggest splash of color and texture to your home this season. 

Please be sure to check out my Gardening Blog Post Page for more tips on all types of gardening. Including Seed Saving, Seed Starting, Orchids, Water Gardening, Coldframe Gardening, Indoor Bulb Gardening, Hydroponics, Container Gardening, Mums, Herbs, African Violets, planting Bulbs, Flower Gardening, Vegetable and Fruit Gardening, Indoor Houseplants of all kinds, Cactus, Succulents, Hanging plants, Deer resistant plants and even Bird, Bee, Butterfly and Hummingbird Gardens!

How to Grow Potatoes in a Bag

Are you a gardener with limited space or looking to try something new this gardening season? Have you ever considered growing potatoes in a grow bag? Potatoes are one of the most popular vegetables around the world and they can be grown easily at home, no matter how small space you have. With just a few simple steps, you can grow your own potatoes in a bag with minimal effort and no need for a traditional garden. In this blog post, we share some tips on how to grow potatoes in a bag effectively.

Best Zones for Growing Potatoes

Potatoes are quite versatile and can grow in a variety of climates, suitable for USDA Hardiness Zones 3-10. However, they perform best in Zones 4-7. The ideal timing to plant your potatoes depends on your region’s climate. For cooler regions, you can start planting as soon as the risk of frost has passed, which is usually early to mid-spring. In warmer regions, potatoes can be planted in late winter for a spring harvest, or late summer for a fall harvest. Always remember, potatoes prefer cooler weather and well-drained soil to thrive.

Best Size and Type of Grow Bag

Now that we’ve covered when to plant your potatoes, let’s talk about the types of grow bags and the gallon size needed. Grow bags are typically made of breathable fabric which helps to air prune the plant’s roots, promoting healthy growth. They come in a range of sizes, generally from 1 to 30 gallons. For growing potatoes, you’ll want to choose a bag that’s at least 10 gallons, but an even larger size of 15-20 gallons would be more ideal. I really love these Grow Bags specifically for vegetables that grow under the soil and come with a convenient window to watch your veggies grow! This will provide ample space for your potatoes to grow and yield a good harvest. Some popular types of grow bags include those made from non-woven, polypropylene fabric, or even recycled materials. No matter the type you choose, ensure that it has good drainage to prevent waterlogging your potato plants.

Best Soil Mixture for your Grow Bag

The soil mixture is a crucial component in ensuring the healthy growth of your potatoes. Opt for a well-draining soil mix specifically formulated for container gardening or make your own blend. A good mixture would be 1/3 peat moss, 1/3 compost, and 1/3 well-rotted manure or vegetable garden soil. This mixture provides a balance of nutrients while ensuring good drainage. Additionally, incorporating a slow-release organic fertilizer into the soil mix will provide continuous nutrition throughout the growing season. Remember, a light, fluffy, and nutrient-rich soil will promote the development of larger, healthier potatoes. Always ensure the soil is loose and not compacted, as hard soil can hinder the growth of the tubers.

Sunlight Requirements

Potatoes need a lot of sunlight to grow properly. Choose a location that receives at least six to eight hours of sunlight daily. If you don’t have a spot that gets this much sun, don’t worry, you can still grow potatoes, they just might not be as productive.

Watering and Fertilizing your Potatoes

Potatoes need regular watering to keep the soil moist but not too wet. You should water them at least once a week, or more often in hot weather. Be sure to water deeply so that the water reaches the bottom of the bag, this will encourage the roots to grow deeper.

When growing potatoes in a bag, you need to fertilize them regularly. A slow-release fertilizer that is high in potassium is ideal for potatoes. You should apply the fertilizer once a month, or as directed on the package label.

When and How to Harvest your Potatoes

When it comes to harvesting your potatoes in a bag, patience is key. The best time to harvest depends on the type of potato you’re growing – early potatoes are usually ready to harvest around 10 weeks after planting, while maincrop types need a bit more time, generally about 20 weeks. However, a reliable indicator is the change in the plant’s foliage. When the leaves start to turn yellow and wilt, it’s a sign that your potatoes are ready for harvesting.

To harvest your potatoes, gently lay the bag on its side and cautiously open it, taking care not to damage the potatoes. You can then sift through the soil and collect your bounty. Remember to handle your potatoes gently to avoid bruising them, as this can make them more susceptible to rot. After harvesting, make sure to let the potatoes dry for a few hours before storing them in a cool, dark place to prolong their shelf life.

Types of Potatoes to Grow in your Grow Bag

Choosing the right type of potato for your grow bag can significantly impact your yield. Here are a few varieties that are well-suited to this method of cultivation:

  1. Russet Potatoes: Known for their brown skin and starchy white flesh, Russet potatoes are excellent for baking, frying, and mashing. They require a longer growing season compared to other varieties and are best suited for larger grow bags due to their size.
  2. Yukon Gold Potatoes: A favorite among many gardeners, Yukon Gold potatoes boast buttery-yellow flesh and a delicious flavor. They mature early to mid-season, making them a good choice if you want to enjoy your harvest sooner.
  3. Red Potatoes: Red potatoes are a delightful addition to any garden with their vibrant skin and waxy flesh. They are great for roasting and boiling and mature mid to late season.
  4. Fingerlings: These small, elongated potatoes come in a range of colors from yellow to purple. They mature late in the season and are perfect for roasting whole, adding gourmet flair to your meals.
  5. Adirondack Blue Potatoes: A truly eye-catching variety, Adirondack Blue potatoes have deep blue skin and flesh. They’re rich in antioxidants and make a visually striking addition to dishes.

Remember, each variety of potato can have different care requirements and growing times, so always check the specific needs of your chosen variety.

Happy Gardening!

Growing potatoes in a bag is quick and easy and doesn’t require much space. With just a few simple steps, you can grow your own potatoes in a bag and enjoy fresh, healthy, and delicious potatoes all season long. Remember to choose a well-drained soil, a sunny location and water your potatoes regularly. Also, don’t forget to fertilize them every month and start harvesting them once they begin to flower. We hope these tips help you have a successful potato harvest this season. 

Please be sure to check out my Gardening Blog Post Page for more tips on all types of gardening. Including Seed Saving, Seed Starting, Orchids, Water Gardening, Coldframe Gardening, Indoor Bulb Gardening, Hydroponics, Container Gardening, Mums, Herbs, African Violets, planting Bulbs, Flower Gardening, Vegetable and Fruit Gardening, Indoor Houseplants of all kinds, Cactus, Succulents, Hanging plants, Deer resistant plants and even Bird, Bee, Butterfly and Hummingbird Gardens!

How to Grow Plumeria

Plumeria Blooms
My Plumeria Blooms!

How to Grow Plumeria – Are you a gardener looking to add some tropical flair to your collection? Plumerias, also known as frangipani, are popular for their vibrant colors and sweet fragrance. But did you know that you can easily grow them from cuttings? In this post, we will cover everything you need to know about how to grow plumerias, including pot type, soil type, watering and light requirements, fertilizer, propagation methods, and growing in pots or soil. So, let’s get started!

Pot and Soil Type for Plumeria

When it comes to how to grow plumeria the pot and soil type are important factors. You’ll want to choose a well-draining pot that is at least 12 inches deep and wide. Use a mixture of perlite, sand, and potting soil to create and maintain excellent drainage. A great soil mix consists of 50% perlite, 20% sand, and 30% potting soil. This can be adjusted to allow for your climate and environment. Plumerias do not want to be sitting in water, which can cause problems such as root rot. Therefore, providing adequate drainage is essential for your plumerias’ success.

Plumeria Light Requirements

Plumerias require full-sun – a minimum of 6 hours per day. Excess shade can produce a weak plant with few blooms. Therefore, optimum exposure to sunlight is necessary to promote flowering and healthy plant growth.

How Often to Water Plumeria in Pots

These tropics loving plants like moist soil but not flooded. In the summer months, water two to three times a week and reduce watering to once or twice a week in winter. Water the plants deeply so that the root ball is saturated, but allow the soil to dry out slightly before watering again. Let the top inch of soil dry out before watering your plumerias again.

How Often to Fertilize Plumeria

When it comes to fertilizer needs in how to grow plumeria it’s important to give plumerias a fertilizer mix that is high in potassium. Potassium in the fertilizer will promote strong root growth and phosphorus will help stimulate blooms and boost the flower’s color. Feed your planting once a month with a 2:1:3 ratio fertilizer of nitrogen, phosphorus, and potassium. On the other hand, during colder months, you’ll hold back on fertilizer. Avoid using organic ammonia-based fertilizers and cow manure, as it can cause burns, or even worse, death.

Plumeria How to Propagate

Plumerias can be grown from seeds, cuttings, and grafting. Growers have achieved greater success with the cutting method, especially since they are easy to propagate. When planting in the ground, they will easily root and develop. Take a 12 to 18 inch cutting from a fresh stem and pinch off the leaves. Insert the cut end into a pot filled with soil and perlite. Leave the cutting to settle for a few days, then slowly start watering. Keep the pot in warm, bright, and humid conditions until the plant is established.

Growing Plumeria in Pots

Plumerias can grow in pots, making them ideal for gardeners with small yards or patios. In areas colder than Zone 9, plumerias need to be overwintered indoors or in a greenhouse. Pots can be moved inside to a bright location in fall, and returned outside after the danger of frost has passed in the spring.

Plumeria in a Pot
My Huge Plumeria in a Pot on my Patio

Plumeria Care Outdoors

In Zone 9B or warmer, they will grow outdoors all year round when planted in well-drained soil. If growing in soil, select a location with well-drained soil and plant in the warmest part of your garden. A sunny spot is a must. These conditions will aid in encouraging healthy growth and optimal blooming.

Happy Gardening!

Plumerias can add a touch of the tropics to your garden and home with ease. With a little bit of knowledge and the right care, they can flourish and bloom year after year. Growing plumerias doesn’t have to be complicated or overly difficult. Just remember that they love sun, don’t like wet feet, and require periodic fertilization and keep in a moderate temperature. With the right information in your arsenal, you can have a beautiful collection of plumerias in your yard, patio, or home in no time.

Please be sure to check out my Gardening Blog Post Page for more tips on all types of gardening. Including Seed Saving, Seed Starting, Orchids, Water Gardening, Coldframe Gardening, Indoor Bulb Gardening, Hydroponics, Container Gardening, Mums, Herbs, African Violets, planting Bulbs, Flower Gardening, Vegetable and Fruit Gardening, Indoor Houseplants of all kinds, Cactus, Succulents, Hanging plants, Deer resistant plants and even Bird, Bee, Butterfly and Hummingbird Gardens!

How to Grow Portulaca in Pots

Portulaca, also known as moss rose, is a lovely flowering plant that you can grow in pots and add an instant splash of bright colors to your garden. The plant is easy to care for and adapts well to container gardening, provided you follow a few essential steps. In this blog post, we will guide you through the process of growing portulaca in pots: from choosing the right pot type and soil mix, to watering and lighting requirements, pruning, and propagating tips. By the end of the article, you will have all the information you need to create a beautiful portulaca display in your garden.

Portulaca
My beautiful striped Portulaca!

Pot Types

When selecting pots for portulaca, you should prioritize those with drainage holes as it helps the soil to avoid getting water-logged. It is recommended that you use shallow pots with a diameter of at least six inches. You can choose between terracotta, plastic, hanging baskets or window boxes. However, terracotta pots are recommended due to their porous nature, which helps in proper aeration and moisture regulation.

Soil mix for Portulaca

Portulaca needs a well-draining soil mix to thrive. So, it would be best to mix regular garden soil with perlite or sand in equal parts. You can also use half organic compost and half sand or vermiculite for growing your portulaca. Make sure you don’t fill the pot with soil to the brim, leaving an inch or two for watering. For my Portulaca I used half Miracle Grow moisture control potting mix, 1/4 perlite and 1/4 peat moss.

Watering your Portulaca in Pots

When watering portulaca, it’s best to wait for the soil to dry out completely before watering again. Overwatering can lead to root rot, which is devastating to the plant. It is better to under water than to over water your portulaca. A good trick is to stick your finger into the soil, if it comes out dry, it’s time to water.

Light Requirements for Portulaca

Light requirements: Portulaca thrives in full sunlight; the plants require at least six hours of direct sunlight a day to grow correctly. If you live in a hot area, there’s no harm in providing shade for your plant during the hottest part of the day. If you grow your portulaca indoors, a south-facing window can provide enough light to help the plant grow. You can supplement with an LED grow lights if you don’t have a south facing window.

Pruning and Propagating Portulaca

Portulaca doesn’t require much pruning: you can use a sharp pair of scissors to remove dead flowers and leaves. This practice promotes more blooms and keeps the plant healthy. To propagate portulaca, you can take cuttings from the plant’s tips and place them in a pot with well-draining soil mix. Ensure the soil is moist and let the cuttings remain in a shaded spot till the new roots develop.

Happy Gardening!

In essence, portulaca is a lovely plant that can bring joy and color to your garden. However, it’s important to grow it appropriately using the right pot type, soil mix, water requirements, and light requirements. With this guide, you now have all the information you need to make your portulaca thrive in pots. By following these simple steps, you can create a beautiful display of moss roses in your garden, and we can promise you’ll love it!

Please be sure to check out my Gardening Blog Post Page for more tips on all types of gardening. Including Seed Saving, Seed Starting, Orchids, Water Gardening, Coldframe Gardening, Indoor Bulb Gardening, Hydroponics, Container Gardening, Mums, Herbs, African Violets, planting Bulbs, Flower Gardening, Vegetable and Fruit Gardening, Indoor Houseplants of all kinds, Cactus, Succulents, Hanging plants, Deer resistant plants and even Bird, Bee, Butterfly and Hummingbird Gardens!