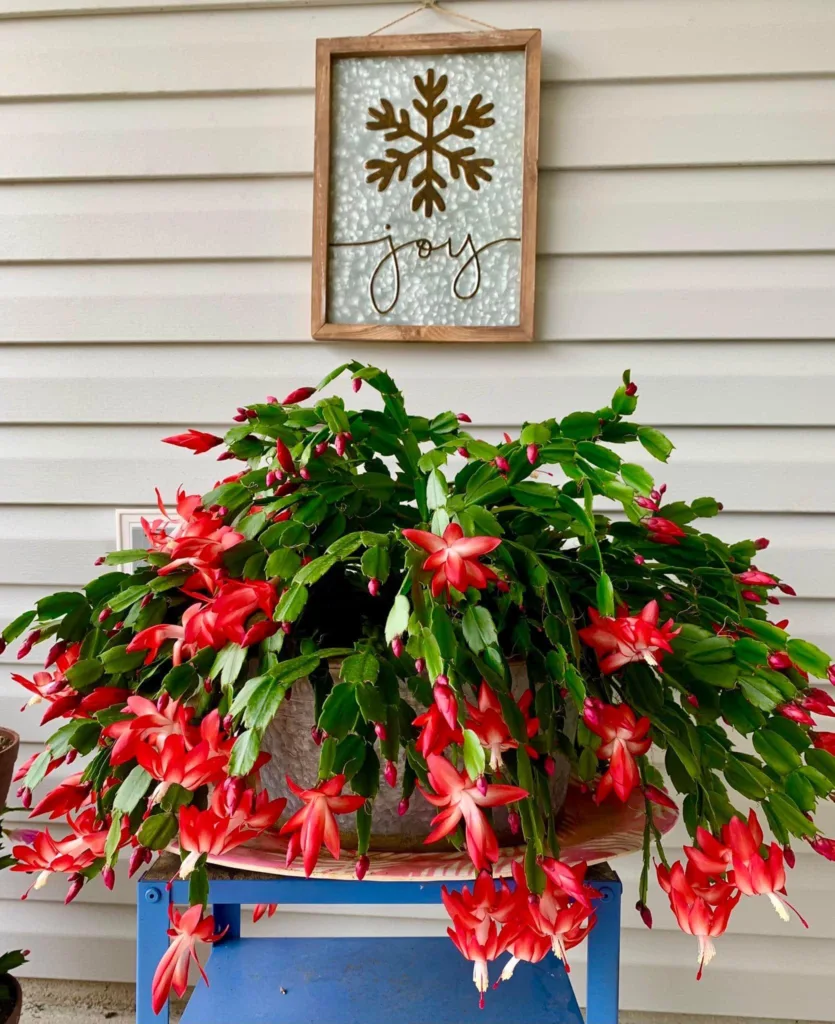
Christmas Cactus from Seed

Step 1: Gathering Seeds
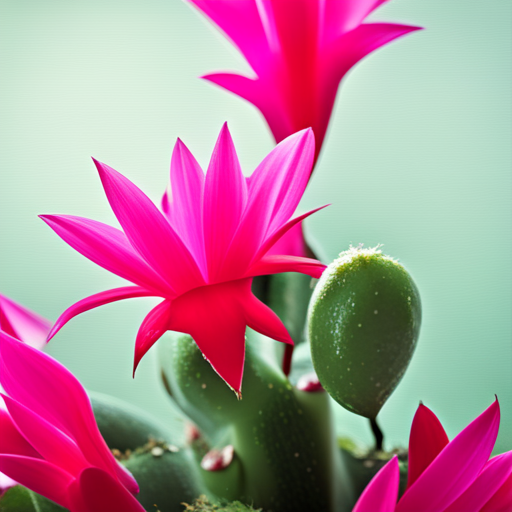
Step 2: Preparing the Soil and Pot

Step 3: Sowing the Seeds

Step 4: Providing Proper Light and Temperature

Step 5: Watering and Germination

Step 6: Transplanting Seedlings

Step 7: Providing Proper Light and Water for Growth

Step 8: Fertilizing the Young Plants

Step 9: Encouraging Blooms

Caring for a Christmas Cactus Year-Round

Please be sure to check out my Gardening Blog Post Page for more tips on all types of gardening. Including Seed Starting, Orchids, Water Gardening, Coldframe Gardening, Indoor Bulb Gardening, Hydroponics, Container Gardening, Mums, Herbs, African Violets, planting Bulbs, Flower Gardening, Vegetable and Fruit Gardening, Indoor Houseplants of all kinds, Cactus, Succulents, Hanging plants, Deer resistant plants and even Bird, Bee, Butterfly and Hummingbird Gardens!

Thanksgiving Cactus Plant Care

Thanksgiving Cactus Plant Care

Choosing the Right Pot for Thanksgiving Cactus

Ideal Soil Mix for Thanksgiving Cactus

How to Pot Your Thanksgiving Cactus

Watering Your Thanksgiving Cactus

Light Requirements for Thanksgiving Cactus

Fertilizing Your Thanksgiving Cactus

Encouraging Blooms

Year-Round Care for Thanksgiving Cactus

  • Spring: Resume regular watering and start feeding lightly. Spring is also a good time for repotting if necessary.
  • Summer: Keep the cactus in a bright, indirect light area and water regularly, making sure the soil doesn’t stay wet. Fertilize once a month to support its growth.
  • Fall: Prepare the plant for blooming by reducing light exposure and dropping nighttime temperatures. Decrease watering slightly to allow it to enter its blooming phase.
  • Winter: Enjoy the flowers! Reduce watering after the plant finishes blooming, and allow it a rest period before starting the next growing cycle.

Happy Gardening!

How to Make a Christmas Cactus Bloom

How to make a christmas cactus bloom

Right Amount of Light

Maintain the Right Temperatures

Watering Schedule

Fertilization

Pruning

Happy Gardening!

3 Types of Holiday Cactus

Holiday Cactus

Looking for a no-fuss house plant to display during the holidays? Look no further than the holiday cactus! There are actually three types of holiday cactus: Thanksgiving, Christmas, and Easter. While they each have their own unique characteristics and care needs, they all have one thing in common: beautiful blooms in shades of pink and red. Here is everything you need to know about successfully caring for all 3 types of holiday cactus. Thanksgiving, Christmas and Easter, planting and caring for as well as how to get them to bloom.

Thanksgiving Cactus

The Thanksgiving Cactus thrives best in fast-draining soil. A mixture of 3 parts potting soil, 2 parts coarse sand, and 1 part perlite or pumice is recommended. Select a pot with good drainage holes and ensure it’s not overly large, as too much soil can retain water and lead to root rot.

When planting, place the plant in the pot and cover the root ball with the soil mixture, then compact lightly. Position your Thanksgiving Cactus near a north or east-facing window where it receives bright but indirect light. Too much direct sunlight can scorch the leaves and inhibit blooming.

Watering is crucial for the Thanksgiving Cactus. It prefers to be kept moist but not waterlogged. During the growing season (April to September), water thoroughly when the top inch of soil feels dry to the touch. In the dormant season (October to March), reduce watering to once a month.

Fertilize your Thanksgiving Cactus with a balanced houseplant fertilizer diluted to half strength, from spring through late summer, and cease fertilization in the fall and winter. With the right care, your Thanksgiving Cactus will reward you with a spectacular display of blooms around the festive season.

Getting Your Thanksgiving Cactus to Bloom

Encouraging your Thanksgiving Cactus to bloom can be achieved by manipulating its environment to mimic its natural habitat’s conditions.

Firstly, set a consistent light-dark cycle for your plant. Starting in mid-September, ensure your cactus has at least 12-14 hours of darkness each night for six weeks. This simulates the shorter days of fall and encourages the plant to set buds. Cover your plant with a box or place it in a closet if necessary to achieve the extended dark period.

Secondly, manage the temperature. Cooler temperatures can trigger blooming in your Thanksgiving Cactus. Try to keep your plant in an area where temperatures stay between 55°F and 60°F during the night.

Finally, remember to reduce watering during the fall and winter months. Overwatering in this period can cause the buds to drop before they’ve had a chance to open. With these steps, you should see your Thanksgiving Cactus burst into a vibrant display of blooms, adding holiday cheer to your home decor.

Christmas Cactus

The Christmas Cactus offers a captivating spectacle with its radiant blooms, and with the right care, it can be a long-lasting addition to your indoor plant collection. This cactus prefers a well-draining soil mixture, much like its Thanksgiving sibling. A blend of 2 parts potting soil, 1 part perlite, and 1 part coarse sand can create an ideal environment for your plant’s roots. Choose a pot with efficient drainage capabilities to prevent water logging and consequent root rot.

To plant, carefully position your Christmas Cactus in the pot and cover its roots with the prepared soil mixture. Gently press down the soil to remove air pockets without overly compacting it. Your Christmas Cactus enjoys bright but indirect light. Position it near a north or east-facing window to shield it from harsh afternoon sun that could scorch its leaves and hinder blooming.

Watering needs for the Christmas Cactus vary with the seasons. During the growth phase (April to September), wait for the top inch of the soil to dry out before watering thoroughly, ensuring the water drains freely from the bottom. In the dormant phase (October to March), minimize watering to keep the soil barely moist.

Fertilization is key to promoting the vibrant blooms of the Christmas Cactus. From spring through late summer, feed your plant with a balanced houseplant fertilizer, diluted to half strength. Cease fertilization in the fall and winter to allow your Christmas Cactus a period of rest. With the right conditions and care, your Christmas Cactus can blossom into a mesmerizing sight around the holiday season.

Getting Your Christmas Cactus to Bloom

To encourage your Christmas Cactus to bloom, it’s essential to recreate the natural environment where it thrives.

Firstly, establish a consistent light-dark cycle for your cactus. Around mid-September, make sure your plant experiences 12-14 hours of darkness each night for 6 weeks. This simulates the shorter daylight hours of autumn and encourages the cactus to form buds. You can achieve this by covering your plant with a box or placing it in a dark room.

Secondly, regulate the temperature. Your Christmas Cactus is more likely to bloom when exposed to cooler temperatures. Consider keeping your plant in a location where the nighttime temperatures range between 50°F and 55°F.

Lastly, reduce watering during this period. Overwatering during the fall and winter months can cause the buds to drop prematurely, preventing them from opening into full blooms.

Following these steps should stimulate your Christmas Cactus to produce its vibrant, festive blooms, enhancing your holiday decoration.

Easter Cactus

The Easter Cactus is another holiday favorite that can add a pop of color to your home around the spring season.

For the optimal growth of your Easter Cactus, choose a fast-draining soil mix, similar to its holiday counterparts. A mixture of 2 parts potting soil, 1 part perlite, and 1 part coarse sand provides an ideal growing medium. A well-draining pot is crucial to prevent water stagnation and the potential onset of root rot.

When planting, carefully place the cactus in the pot and cover the roots with the soil mixture, lightly compacting to eliminate air pockets. The Easter Cactus thrives best with bright but indirect light, so position it near a north or east-facing window to protect it from intense afternoon sun, which can potentially damage its leaves and hinder blooming.

The watering requirements for the Easter Cactus depend on the season. During the growth phase (April to September), water thoroughly when the top inch of soil feels dry to the touch, and ensure the water drains freely from the bottom. In the dormant phase (October to March), reduce watering to keep the soil just barely moist.

Fertilization plays a key role in promoting the beautiful blooms of the Easter Cactus. From spring through late summer, feed your plant a balanced houseplant fertilizer, diluted to half strength. Refrain from fertilizing in the fall and winter to give your Easter Cactus a period of rest. With appropriate care, your Easter Cactus will reward you with vibrant blossoms around the Easter season.

Getting Your Easter Cactus to Bloom

To encourage your Easter Cactus to bloom, it’s important to replicate its natural environment as closely as possible.

Firstly, maintain a consistent light-dark cycle for your cactus. Starting around mid-February, ensure your plant receives 12-14 hours of darkness each night for 6 weeks. This simulates the shorter days of late winter and encourages the cactus to form buds. Achieve this by covering your plant with a box or placing it in a dark room.

Secondly, manage the temperature. Your Easter Cactus is more likely to bloom when exposed to cooler temperatures. Try to keep your cactus in a location where night temperatures stay between 50°F and 55°F.

Lastly, limit watering during the late winter and early spring. Overwatering during this period may cause the buds to drop prematurely, hindering them from fully blossoming. These steps should lead your Easter Cactus to burst into a vivid display of blooms, adding a spring flair to your home decor.

Happy Gardening!

Overall, the holiday cactus is an easy-to-care-for, low maintenance plant that can add some festive cheer to your home during the holidays. Each type of holiday cactus can be cared for in the same way as other cacti. Ensure that they are planted in well-draining soil, receive the right amount of light, and are watered only when their soil has dried out. With a little bit of attention and care, these beautiful plants will bring joy to your holiday season for years to come!

Please be sure to check out my Gardening Blog Post page for more growing tips on Hydroponic Gardening, Container Gardening, Mums, Herbs, African Violets, bulbs and how to plant them, Flower Gardening, Vegetable and Fruit Gardening, Indoor Houseplants of all kinds, Cactus, Succulents, Hanging plants, Deer resistant plants and even Bird, Bee, Butterfly and Hummingbird Gardens!

Blue Torch Cactus

If you are looking for a unique and low-maintenance cactus to add to your collection, the Blue Torch Cactus (Pilosocereus pachycladus) is an excellent choice. Also known as the Blue Columnar Cactus, this beautiful plant originates from Brazil and is characterized by its blue-green stems, which grow tall and straight, with prominent ribs and small yellow spines. The Blue Torch Cactus is not only a stunning addition to any garden but is also relatively easy to care for. This blog post will guide you on how to grow and care for this beautiful cactus including the best pot type, soil type, light and water requirements, fertilizer, and how to propagate.

Best Pot type for Blue Torch Cactus

When selecting a pot for your Blue Torch, you need to ensure that it is wider and deeper than the size of the plant’s root ball. This provides enough room for the cactus to grow in the future and prevents the plant from becoming root-bound. Additionally, select a pot with a drainage hole to prevent waterlogging, and always use cactus soil mix, which is well-draining.

Soil Type

Blue Torch Cactus prefers well-draining, sandy soil. You can make your own soil mix by combining equal parts of sand, pumice/perlite, and cactus soil mix. This soil mix allows for sufficient drainage and prevents waterlogging.

Light Requirements

The Blue Torch Cacti thrives in bright light, including direct sunlight. Therefore, it is essential to place the cactus in an area with at least 6 hours of sunlight per day. However, avoid exposing it to intense rays during the hottest part of the day. You can always supplement with an LED grow light.

Watering the Blue Torch

Regarding water, the Blue Torch Cactus is a drought-tolerant plant and only requires watering when the soil feels completely dry. During winter, reduce watering and allow the soil to dry for longer periods.

Fertilizer Needs

The Blue Torch requires little or no fertilizer but can benefit from a balanced liquid cactus fertilizer once every month during the growing season (spring and summer). Overfertilizing can lead to overgrowth or damage to the roots, and it’s essential to follow the manufacturer’s instructions while applying any fertilizer.

Propagating the Blue Torch Cactus

Propagating the Blue Torch Cactus is a straightforward process. All you need to do is cut a section of the stem and leave it in a shady place for a few days to dry. After that, plant the stem cutting in a cactus soil mix, and water sparingly. Ensure that the soil is well-draining and keep it moist until you see new growth, indicating that the cuttings have successfully rooted.

Happy Gardening!

In conclusion, the Blue Torch Cactus is a stunning and easy-to-care-for plant that can add a unique touch to any garden. When cultivating this Cactus, always ensure that you select the right pot type, soil type, light and water requirements, fertilizer, and propagation techniques. With proper care, the Blue Torch can grow into a beautiful towering plant and make a statement in any garden.

Please be sure to check out my Gardening Blog Post Page for more tips on all types of gardening. Including Seed Saving, Seed Starting, Orchids, Water Gardening, Coldframe Gardening, Indoor Bulb Gardening, Hydroponics, Container Gardening, Mums, Herbs, African Violets, planting Bulbs, Flower Gardening, Vegetable and Fruit Gardening, Indoor Houseplants of all kinds, Cactus, Succulents, Hanging plants, Deer resistant plants and even Bird, Bee, Butterfly and Hummingbird Gardens!

Fern Leaf Cactus

As a beginner gardener, you’re probably looking for plants that are easy to grow, low-maintenance, and add a touch of green to your living space. The fern leaf cactus is one such plant that ticks all the boxes. Also known as the fern leaf orchid cactus, this plant is a low-growing cactus that is perfect for hanging baskets or desktop gardens. In this blog post, we will tell you everything you need to know to grow and care for this beautiful plant.

Choosing best pot type for Fern Leaf Cactus

The fern leaf cactus can be grown in a variety of pots such as plastic, clay, or ceramic pots. However, it is best to choose a pot with good drainage holes to ensure excess water doesn’t stay in the pot. This can lead to root rot, which can be fatal for the plant. A hanging basket is also a great option for this plant as it can add a touch of green to any space while also keeping the plant out of reach of pets or children.

Best Soil for Fern Leaf Cactus

The fern leaf is not picky when it comes to soil types. A well-draining, sandy soil mix is ideal for this plant. You can make your own mix by combining potting soil, perlite or sand, and peat moss. Make sure the soil is not too compacted as this can hinder the plant’s growth.

Light Requirements

The fern leaf cactus loves bright, indirect light, so it is best to keep it near a window that receives plenty of sunlight. However, avoid keeping it in direct sunlight as this can cause the leaves to scorch. If your plant is not getting enough light, it may become leggy and start to lose its characteristic shape. If growing indoors and you don’t have the perfect window you always use LED grow lights.

Watering your Fern Leaf

Like most cacti, the fern leaf cactus does not need much water. It is best to water the plant only when the soil is completely dry. Overwatering can lead to root rot, which can be deadly for this plant. During hot, dry weather, you may need to water the plant more frequently than during cooler months.

Propagating Fern Leaf Cactus

Propagating the fern leaf cactus is relatively easy. You can propagate it from stem cuttings taken during spring or summer. Let the cuttings dry out for a few days before planting them in a pot with well-draining soil. Keep the soil moist but not wet and the cuttings should start to grow in a few weeks.

Happy Gardening!

The fern leaf is a low-maintenance plant that is perfect for beginner gardeners. With the right pot, soil, light, and water requirements, you can have a healthy plant that adds a touch of green to your living space. Propagating this plant is also relatively easy, so you can share it with your friends or family. With a little bit of care, you can enjoy this beautiful plant for years to come.

Please be sure to check out my Gardening Blog Post Page for more tips on all types of gardening. Including Seed Saving, Seed Starting, Orchids, Water Gardening, Coldframe Gardening, Indoor Bulb Gardening, Hydroponics, Container Gardening, Mums, Herbs, African Violets, planting Bulbs, Flower Gardening, Vegetable and Fruit Gardening, Indoor Houseplants of all kinds, Cactus, Succulents, Hanging plants, Deer resistant plants and even Bird, Bee, Butterfly and Hummingbird Gardens!

Mexican Fence Post Cactus

Cacti have always been a popular choice for succulent enthusiasts, but the Mexican fence post cactus is one of the most visually striking and unique options available. Native to Mexico and southern Arizona, this columnar cactus can be grown both indoors and outdoors with proper care. In this ultimate guide, we will explore the best ways to grow and care for Mexican fence post cactus- from potting to propagation.

Best grown Inside or Out?

The Mexican fence post cacti thrives in full sun, making it an ideal outdoor plant in regions with a mild climate. It can handle temperatures as low as 20 degrees Fahrenheit, but it should still be protected from frost. When grown indoors, it still requires plenty of bright, direct sunlight to thrive.

Best Pot for Mexican Fence Post Cactus

Choosing the right pot is essential for the happiness and survival of the Mexican fence post cactus. The pot should have adequate drainage holes to prevent water from sitting in the soil and causing root rot. Terracotta pots are a great option because they tend to provide better drainage than other materials, and the porous nature of the clay allows for water and air to move freely throughout the soil.

Soil

A well-draining soil mix is the best choice for Mexican fence post cactus. A combination of sand, perlite, peat moss, and regular potting soil in equal parts will create the perfect medium to plant your cactus in. The soil mixture should be porous enough to ensure proper drainage while still retaining enough moisture to keep the cactus happy.

Water Requirements

Overwatering is the most common mistake many gardeners make with cacti, and the Mexican fence post is no exception. Allow the soil to dry out completely between waterings, and then water deeply. Water sparingly during the winter months when the cactus is in its dormant phase. Be sure to use room temperature water to avoid shocking the roots.

Light Requirements for Fence Post Cactus

The Mexican fence post requires plenty of direct sunlight to thrive, no matter where it is housed. Outdoors, position the plant near a window that receives at least four hours of direct sunlight each day. Indoors, place the pot in a south-facing window with a blind or sheer curtain to provide filtered light during the hottest parts of the day. If you don’t have the perfect window you always use an LED grow light.

Fertilizing the Fence Post Cactus

Mexican fence post cacti is a slow grower, so it doesn’t require much fertilizer. In fact, over-fertilizing can cause problems for this species. A balanced, water-soluble fertilizer at quarter-strength that incorporates in the water supply every 4-6 weeks during its active growing season is enough to provide its required nutrients.

Propagating the Fence Post Cactus

Steps for propagation include taking a cutting from a mature plant and allowing it to callus for a few days before planting it in well-draining soil.

Happy Gardening!!

If you’re looking to add a unique and interesting cactus to your collection, the Mexican fence post cactus is an excellent choice. Its regal appearance, coupled with its relative ease of care, makes it a great option for novice and expert gardeners alike. By following the tips outlined in this ultimate guide, your Mexican fence post cactus is sure to thrive.

Please be sure to check out my Gardening Blog Post Page for more tips on all types of gardening. Including Seed Saving, Seed Starting, Orchids, Water Gardening, Coldframe Gardening, Indoor Bulb Gardening, Hydroponics, Container Gardening, Mums, Herbs, African Violets, planting Bulbs, Flower Gardening, Vegetable and Fruit Gardening, Indoor Houseplants of all kinds, Cactus, Succulents, Hanging plants, Deer resistant plants and even Bird, Bee, Butterfly and Hummingbird Gardens!

Blue Myrtle Cactus

When it comes to having unique and beautiful plants in your garden, the Blue Myrtle Cactus is definitely one of the top choices. This stunning plant is known for its vibrant blue-gray coloring and its resilient nature. It is a great plant for gardeners who want something easy to grow and care for, yet still striking and beautiful. In this blog post, we will walk you through everything you need to know in order to successfully grow and care for a Blue Myrtle, including the best pot type, soil type, light and water requirements, fertilizer, and how to propagate.

Best Pot type for Blue Myrtle Cactus

When it comes to choosing a pot for your Blue Myrtle Cactus, it’s important to select a container with adequate drainage. Drainage is crucial for cacti in general because they are susceptible to root rot if left sitting in water. A good rule of thumb is to select a pot that is a little larger than the plant’s root ball. Terracotta pots are great for cacti because they allow for air exchange around the roots, which can help to prevent overwatering and root rot.

Soil type for Blue Myrtle

The Blue Myrtle Cactus prefers well-draining soil that is slightly acidic and nitrogen-poor. A good soil mix for cacti contains a mixture of sand, perlite, and peat moss. Avoid using regular potting soil as this can hold too much moisture which can lead to root rot. Also, avoid using heavy clay-based soils as these will not drain well enough and may lead to root rot.

Light and Water Requirements for Blue Myrtle Cactus

The Blue Myrtle Cactus thrives in bright sunlight, ideally direct sun for several hours per day. However, it can also tolerate partial shade. As for watering, allow the soil to completely dry out between waterings. During the growing season (spring and summer), water more frequently, every 7-10 days. In the winter months, water less often, only when the soil is bone dry.

Fertilizer

Fertilizing your Blue Myrtle is not necessary, but can be beneficial for promoting growth and overall health. Feed the plant in the spring and summer months with a cacti-specific fertilizer. Follow the instructions on the package as over-fertilizing can harm the plant.

Propagating your Blue Myrtle Cactus

The Blue Myrtle Cactus can be propagated through stem cuttings. First, select a healthy stem and make a clean cut above a leaf node. Allow the cut end to dry for a few days before planting it in a well-draining cacti soil mix. Keep the new cutting moist but not waterlogged and place it in a bright, indirect light. After a few weeks, the cutting should begin to root and new growth should appear.

Happy Gardening!

Growing and caring for a Blue Myrtle Cactus is not difficult. With the right soil, pot, and light conditions, it can thrive and become a beautiful addition to any garden. Remember to let the soil completely dry out between waterings and only fertilize during the growing season. With proper care, you can enjoy the unique beauty of this stunning plant for years to come.

Please be sure to check out my Gardening Blog Post Page for more tips on all types of gardening. Including Seed Saving, Seed Starting, Orchids, Water Gardening, Coldframe Gardening, Indoor Bulb Gardening, Hydroponics, Container Gardening, Mums, Herbs, African Violets, planting Bulbs, Flower Gardening, Vegetable and Fruit Gardening, Indoor Houseplants of all kinds, Cactus, Succulents, Hanging plants, Deer resistant plants and even Bird, Bee, Butterfly and Hummingbird Gardens!

Turbinicarpus

Are you looking for a unique and fascinating addition to your succulent garden? Look no further than the Turbinicarpus. This small, globular cactus is prized among collectors for its striking appearance and delicate flowers. While it may seem intimidating to care for such a unique species of plant, with the right knowledge and care, you too can successfully grow and propagate Turbinicarpus. In this guide, I will cover the basics of potting, soil, light, water, and propagation.

Best Pot type for Turbinicarpus

When choosing a pot for your Turbinicarpus, seek out a shallow container with adequate drainage. Terracotta pots are often preferred, as they allow for breathability and moisture absorption. Be sure to use a pot that is just slightly larger than the cactus itself, as excess soil can lead to root rot. I also love potting my succulents and cactus in the pot head planters-watch out they become addictive!

Soil Type

Turbinicarpus prefer a well-draining, sandy soil. In their natural habitat, these cacti grow in rocky, limestone slopes. When planting, be sure to amend your soil with additional sand or perlite to help with drainage. Avoid using heavy soils that hold onto moisture for extended periods of time, as this can lead to rot.

Light and Water Requirements for your Turbinicarpus

Like most cacti, Turbinicarpus prefer bright, indirect light. Place them near a south-facing window or under a grow light for maximum exposure. While Turbinicarpus are drought-tolerant, they still require regular watering. When watering, allow the soil to dry out completely before watering again. During the winter, decrease watering to once a month.

Propagating Turbinicarpus

Turbinicarpus can be propagated by both seed and offsets. When starting from seed, be sure to sterilize your soil and containers to prevent any fungal diseases. Sow seeds in a well-draining mix of soil and sand, and spritz with water to avoid overwatering. During the germination process, keep soil temperatures consistent, ideally around 70-75 degrees Fahrenheit. To propagate from offsets, gently detach the pup from the parent cactus and plant separately.

Happy Gardening!

Growing and caring for a Turbinicarpus can be a rewarding and enjoyable addition to your succulent collection. With well-draining soil, proper light exposure, and regular watering, your cactus can thrive in a shallow terracotta pot. And should you wish to propagate your cactus, remember to start from seed or carefully detach offsets from the parent plant. With these tips and a little patience, you can successfully care for your Turbinicarpus for years to come.

Please be sure to check out my Gardening Blog Post Page for more tips on all types of gardening. Including Seed Saving, Seed Starting, Orchids, Water Gardening, Coldframe Gardening, Indoor Bulb Gardening, Hydroponics, Container Gardening, Mums, Herbs, African Violets, planting Bulbs, Flower Gardening, Vegetable and Fruit Gardening, Indoor Houseplants of all kinds, Cactus, Succulents, Hanging plants, Deer resistant plants and even Bird, Bee, Butterfly and Hummingbird Gardens!

Cactus with Yellow Flowers

Cacti are an extremely popular plant choice for many people, and for good reason. They are beautiful, low-maintenance plants that come in a range of different shapes, sizes, and colors. One of the most striking colors is the Cactus with Yellow Flowers. In this blog post, we are going to explore the top ten cactus with yellow blooms and how to grow and care for them. You will learn about the best pot type, soil type, light and water requirements, and how to propagate these stunning plants.

Top Ten Cactus with Yellow Flowers

Below are ten Yellow flowering Cactus along with how to care for them.

Echinocactus Grunsonii

Commonly known as the golden barrel cactus, this stunning cacti has bright yellow flowers that bloom in the summer. It is a slow-growing plant that prefers well-draining soil and plenty of sunshine.

Ferocactus Glaucescens

Also known as the blue barrel cactus, these cacti have yellow flowers that bloom in late spring. It prefers a sandy soil mix and full sun exposure.

Gymnocalycium Mihanovichii

This cactus has beautiful, yellow blooms and is popularly known as the “moon cactus”. It thrives in a well-draining soil mix and requires bright, indirect sunlight.

Mammillaria Elongata

Also known as the ladyfinger cactus, this plant has yellow flowers that bloom in the summer. It prefers sandy, well-draining soil and full sun.

Opuntia Basilari

Commonly known as the beavertail cactus, this plant produces stunning yellow flowers in the spring. It requires a sandy soil mix and plenty of sunlight.

Stenocereus Marginatus

Also known as the organ pipe cactus, this plant has beautiful yellow flowers that bloom in the summer. It prefers a well-draining soil mix and plenty of sunlight.

Thelocactus Bicolor

This unique cacti has brightly colored yellow flowers that bloom in early summer. It prefers a gritty, well-draining soil mix and full sun exposure.

Trichocereus Grandifloras

Commonly known as the Argentine saguaro, this cactus produces stunning yellow flowers that bloom in the spring. It prefers sandy, well-draining soil and full sun exposure.

Turbinicarpus Alonsoi

This beautiful cactus has striking yellow flowers that bloom in the summer. It requires a well-draining soil mix, bright, indirect sunlight, and occasional waterings.

Coryphantha Vivipara

Commonly known as the pincushion cactus, this plant produces beautiful yellow blooms in the spring. It prefers a gritty, well-draining soil mix and full sun exposure.

Caring for your Cactus with Yellow Flowers

To care for these cacti properly, it’s essential to choose a pot that allows for proper drainage. Terracotta is an excellent pot material since it allows the soil to dry out between waterings. A well-draining soil mix should be used, such as a cactus potting mix, which can be enriched with perlite or sand. Cacti need plenty of sunlight, so be sure to place them in a bright, sunny location in your garden or home or supplement with LED grow lights. For watering, it’s essential to allow the soil to dry out completely before watering again, as overwatering can be fatal to cacti.

Propagating your Cactus with Yellow Flowers

Propagating cacti is relatively simple, with most species being propagated by offsets or cutting. To propagate, gently remove the offset or cutting and allow it to dry out for a few days before planting in fresh, well-draining soil. It’s important to be gentle when propagating, as cacti are delicate plants that can break easily.

Happy Gardening!

Cacti are stunning plants, and their yellow flowers make them even more eye-catching. When growing and caring for these plants, it’s important to choose a well-draining soil mix, provide plenty of bright sunlight, and water them sparingly. With these simple steps, you can enjoy growing these beautiful plants and their stunning yellow blossoms for years to come.

Please be sure to check out my Gardening Blog Post Page for more tips on all types of gardening. Including Seed Saving, Seed Starting, Orchids, Water Gardening, Coldframe Gardening, Indoor Bulb Gardening, Hydroponics, Container Gardening, Mums, Herbs, African Violets, planting Bulbs, Flower Gardening, Vegetable and Fruit Gardening, Indoor Houseplants of all kinds, Cactus, Succulents, Hanging plants, Deer resistant plants and even Bird, Bee, Butterfly and Hummingbird Gardens!