African Violet Care and Grooming

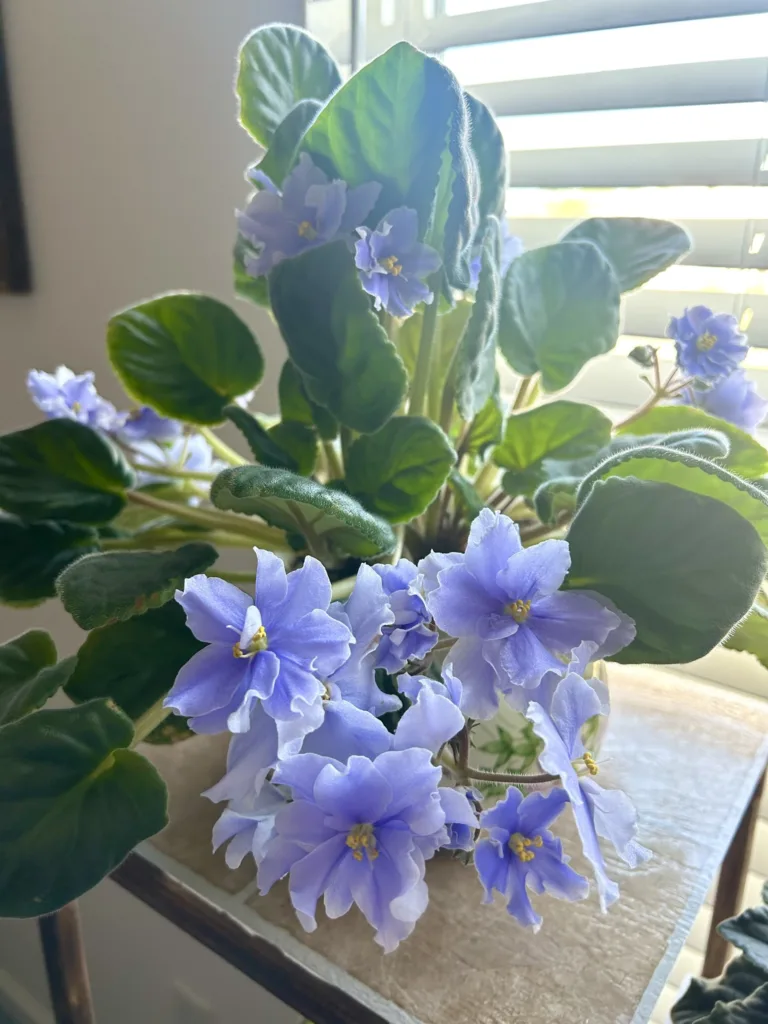
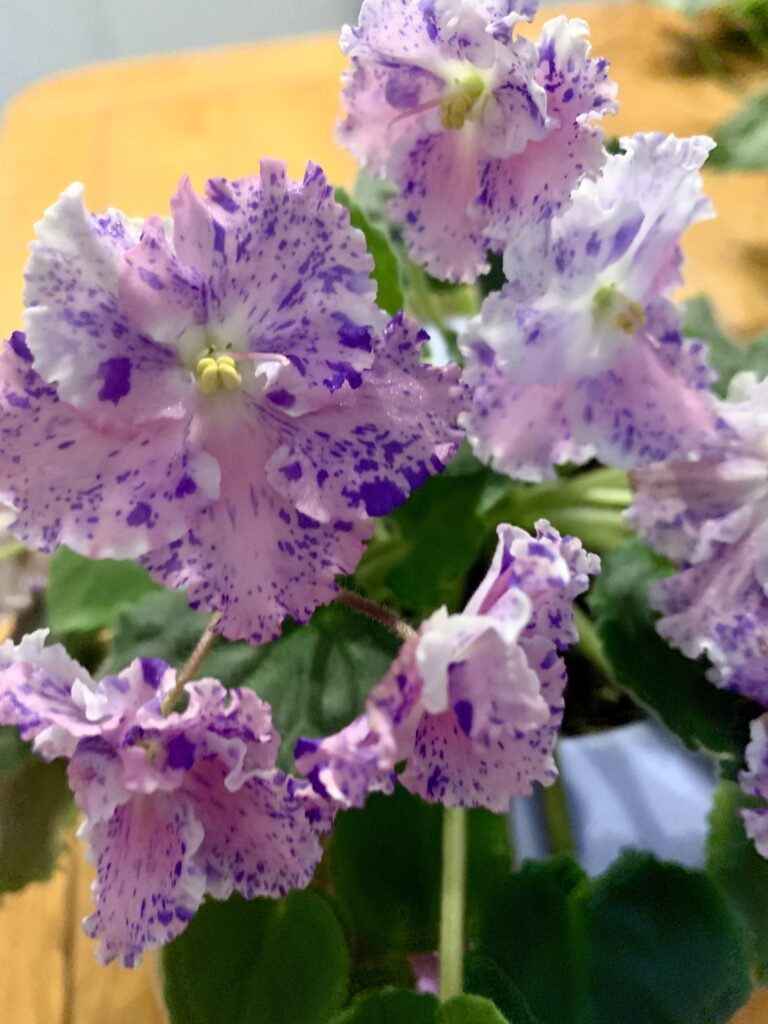
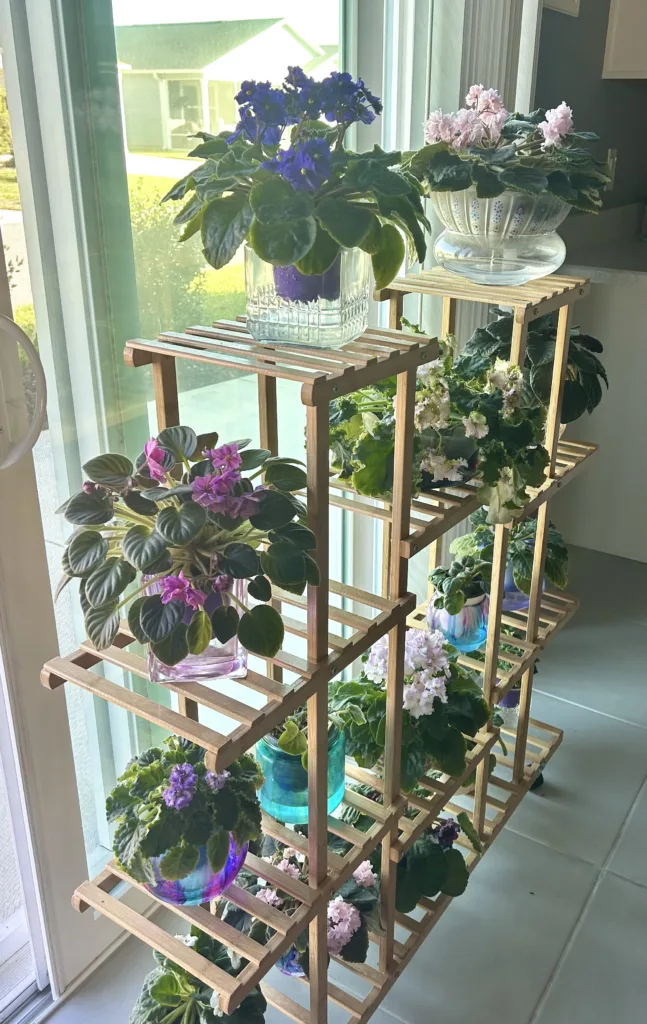
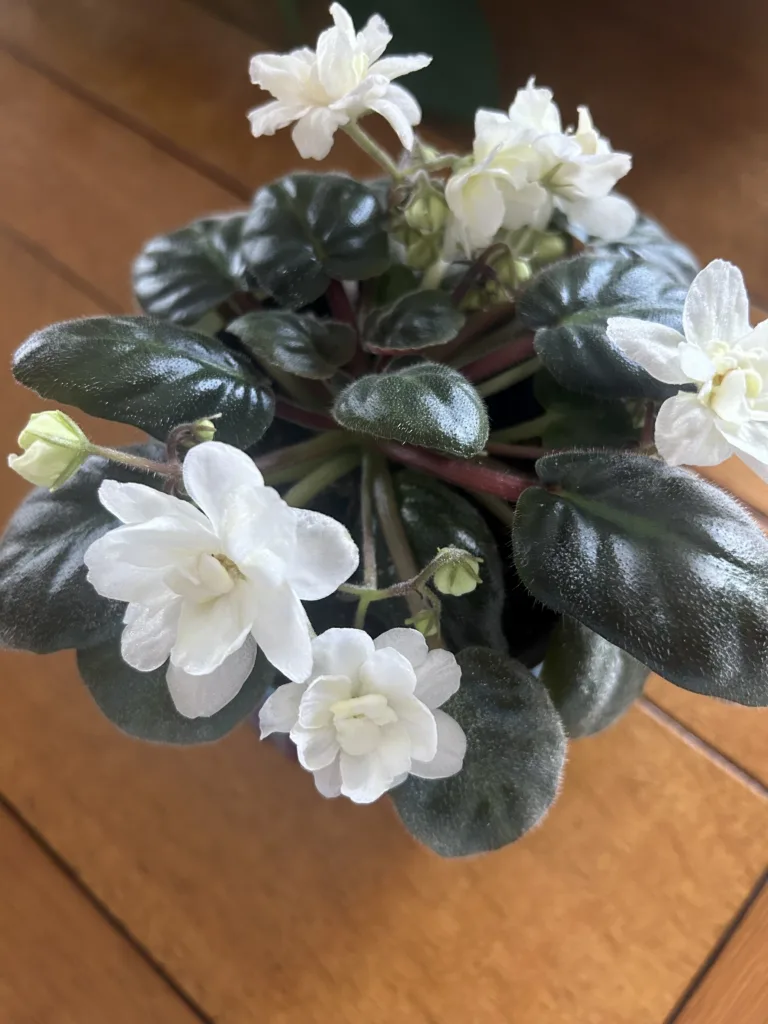
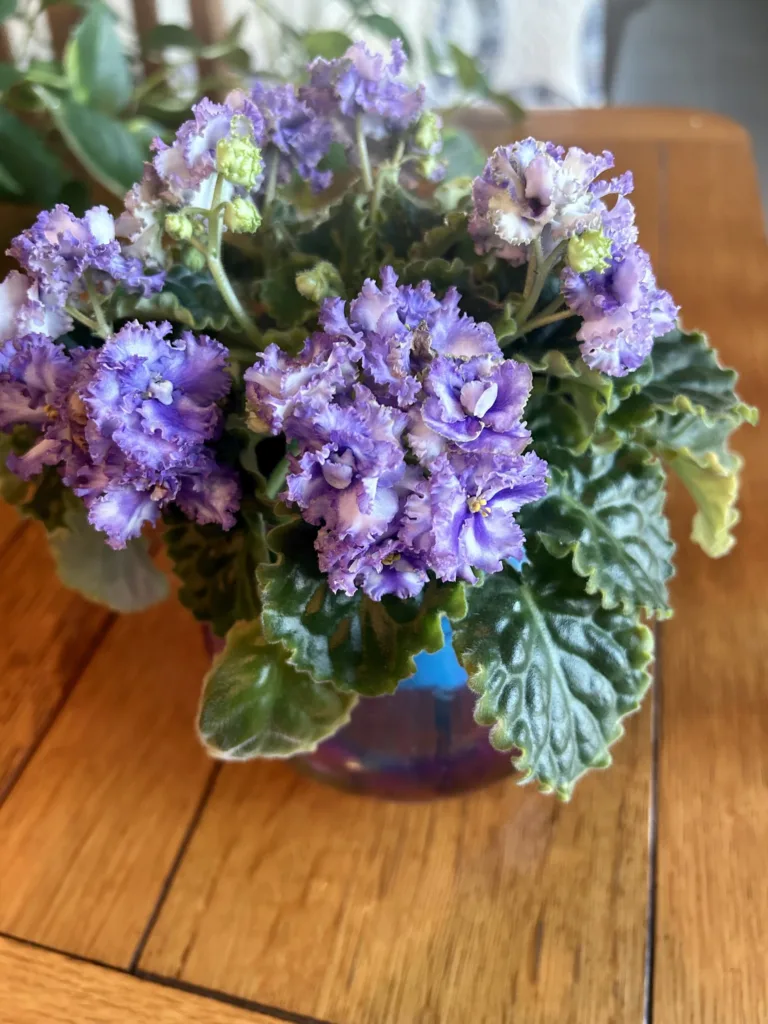
African violets are one of the most popular indoor plants available today. They’re relatively easy to maintain, they bloom all year round, and they come in a wide array of colors. Keeping these plants healthy and happy won’t take up too much of your time, but it does require some basic knowledge, especially when it comes to AV housekeeping. In this post, we’ll share some tips and tricks on African Violet Care and Grooming, so you can enjoy their beauty for years to come.

African Violet Care and Grooming-Deadheading and Leaf Clean Up

Deadheading is the process of removing spent blooms from your African violets. This not only helps to enhance the plant’s appearance but also encourages more blooms. To deadhead an African violet, simply pinch off the wilted blooms at their stems. Be careful not to damage any new buds or leaves in the process.

In addition to deadheading, it’s also crucial to regularly remove old leaves from your African violets to make room for new growth. Old leaves are usually the lowermost ones that appear yellowish or brown. To remove them, hold the leaf stem near the base and gently twist it off. Remember, never force a leaf off, as this could cause damage to the plant. Regular deadheading and leaf removal will keep your African violets looking vibrant and healthy.

AV Care – Removing Suckers

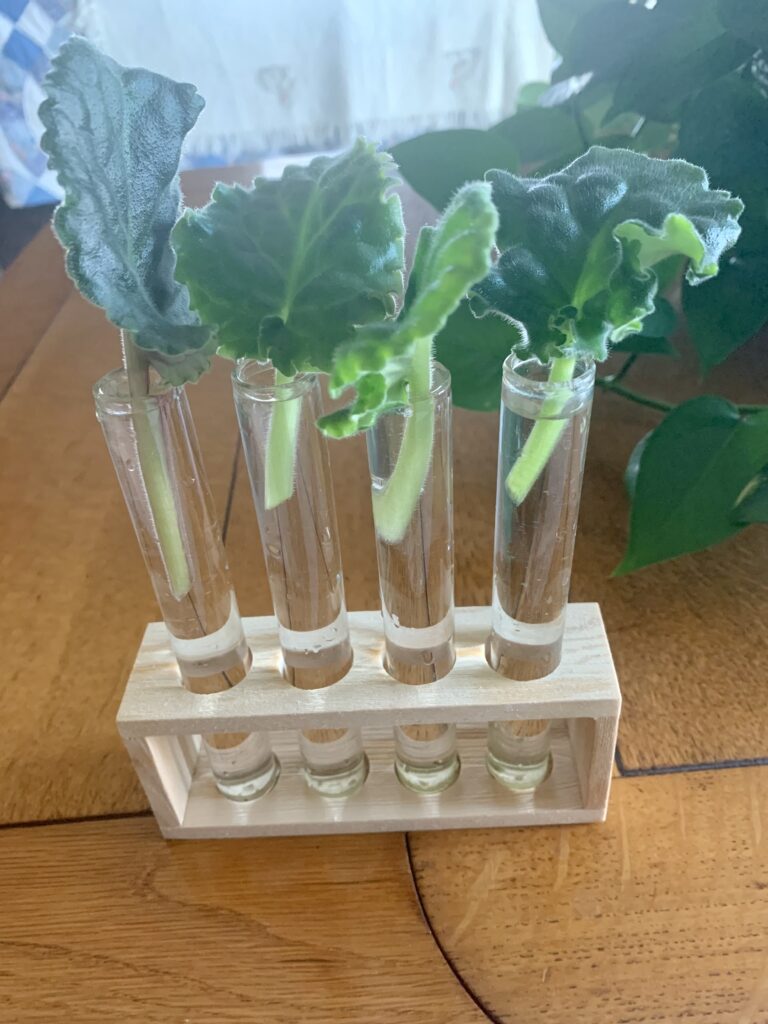
Just as important as deadheading is the task of removing suckers from your African violets. Suckers are offshoots that form at the base of the plant; whilst they may seem harmless, they can detract energy and resources from the main plant, potentially hindering its growth and blooming potential. To identify a sucker, look for a small plant forming from the stem of your main African violet. Make sure to remove these suckers as soon as you notice them, using a sharp and clean knife or scissors. Cut the sucker off at its base where it meets the main stem, taking care not to damage the main plant. Regularly checking for and removing suckers will ensure your African violets remain vibrant and healthy, with all their energy focused on producing those beautiful blooms.

African Violet Care and Grooming – Repotting

Repotting is an essential part of African violet care. As your plant grows, it may outgrow its current pot, and it will require more space. This usually happens every 6 to 12 months, but you should always be on the lookout for signs that your plant needs repotting, such as roots growing out of the drainage holes or the plant toppling over because of its size. To repot, carefully remove the plant from its current pot, make sure to knock off any old soil from the roots, and place it in a new pot that is one size larger with fresh soil. 

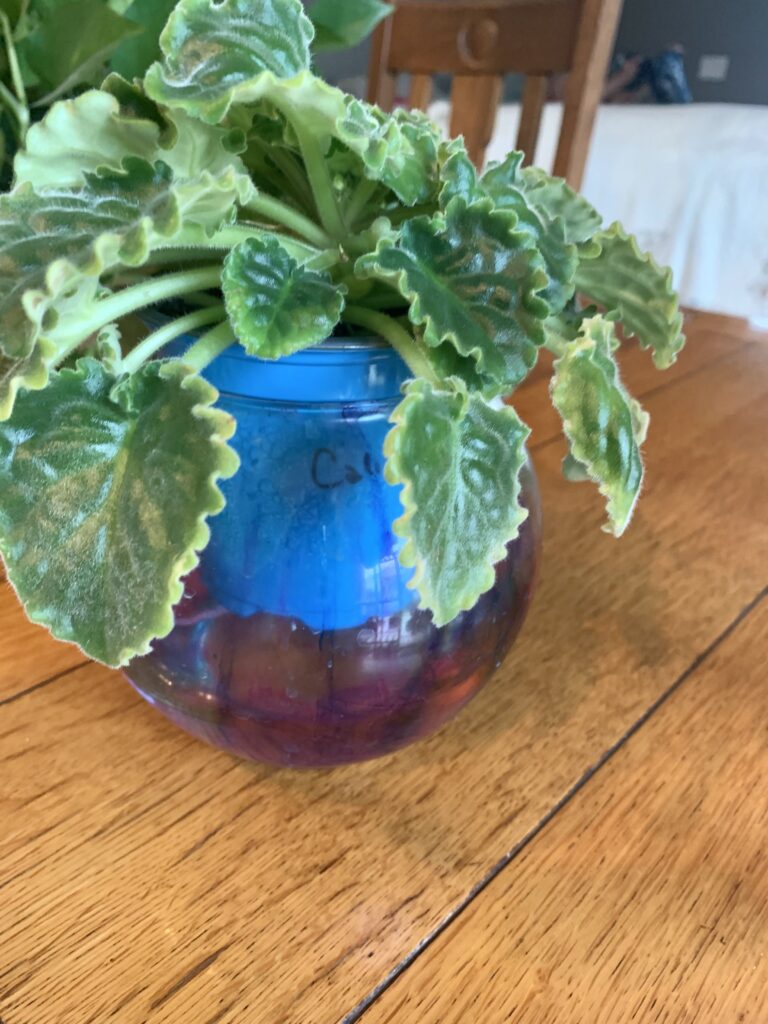
An African violet’s stem or ‘neck’ tends to lengthen as the plant grows. If left unchecked, this ‘long neck’ can affect the plant’s stability and overall appearance. To bury the long neck, gently remove the plant from its pot. Add more soil to the pot and reposition the plant so that the ‘neck’ is buried to the level of the bottom leaves. This step can usually be combined with the repotting process. The buried stem will eventually grow roots, helping to stabilize the plant, and maintaining a compact, attractive appearance. Proper repotting and burying the long neck will give your African violets a boost, allowing them to thrive and bloom beautifully.

AV Care – Keeping your Plants Clean

Keeping your African violets clean is another key aspect of their care and maintenance. Dust and grime can accumulate on the leaves over time, making them less efficient at photosynthesis and potentially harboring pests. To clean the leaves of your African violets, you can use a soft brush or even a paintbrush to gently brush off the dust. Avoid using water to clean the leaves as African violets dislike getting their leaves wet.

For more stubborn grime, you may need to use a leaf shine product specifically designed for African violets. These products not only clean the leaves but also enhance their natural shine, making them look more vibrant. Always follow the manufacturer’s instructions when using such products.

Remember, cleanliness isn’t just about the leaves. Ensure the area around your African violets is free from dead leaves and spent flowers to prevent the spread of pests and diseases. A clean environment contributes to healthier, more robust plants that are more likely to produce those delightful blooms year-round.

Happy Gardening!

In summary, taking care of your African violets doesn’t have to be a daunting task. By following these simple grooming and housekeeping tips, you can maintain a healthy and beautiful plant that will bloom all year round. Remember to deadhead, prune, repot, clean, and maintain consistent temperature and humidity levels, and you’ll be rewarded with gorgeous blooms and vibrant foliage. 

Please be sure to check out my Gardening Blog Post Page for more tips on all types of gardening. Including Seed Saving, Seed Starting, Orchids, Water Gardening, Coldframe Gardening, Indoor Bulb Gardening, Hydroponics, Container Gardening, Mums, Herbs, African Violets, planting Bulbs, Flower Gardening, Vegetable and Fruit Gardening, Indoor Houseplants of all kinds, Cactus, Succulents, Hanging plants, Deer resistant plants and even Bird, Bee, Butterfly and Hummingbird Gardens!

How to Get African Violets to Bloom

African violets are one of the most beloved houseplants in the world. Their soft, velvety leaves and vibrant colors make them a popular choice for indoor gardening. However, it can be frustrating when your African violets refuse to bloom, despite your best efforts. This post will provide tips and tricks on how to get African violets to bloom, covering topics such as light, water, fertilizer, humidity, soil type, pests, and the type of violet.

The Role of Light in African Violet Blooming

When it comes to encouraging your African violets to bloom, light plays a crucial role. Many people assume that, like most plants, African violets require a lot of sunlight. However, these delicate plants prefer a more moderated “right light” than the intense “bright light”. 

African violets do well under LED grow lights or in a north-facing window where they can receive indirect sunlight. Too much direct sunlight can cause the leaves to yellow and can prevent blooming. Therefore, finding the right balance of light for your African violets is essential. Experiment with different locations in your home to find the sweet spot where your African violets receive sufficient light without getting scorched. 

Remember, the goal isn’t to provide the most light possible, but the right amount of light that encourages blooming. Your African violets will thank you with a vibrant display of flowers when they get the light balance just right.

Watering: Finding the Perfect Balance for African Violets

Just like the balance of light, watering your African violets requires a certain equilibrium. Both over-watering and under-watering can prevent your African violets from blooming. These plants prefer their soil to be kept slightly moist, but never soggy. 

Over-watering can lead to root rot, a condition that can damage the plant’s root system and inhibit blooming. On the other hand, under-watering can lead to drought stress, causing the plant to conserve its resources instead of using them for blooming. 

To avoid these issues, water your African violets when the top of the soil feels dry to the touch. Use room-temperature water, as cold water can shock the plant’s roots and cause leaf spots. Also, consider using a watering can with a long, thin spout to apply water directly to the soil, avoiding the leaves. 

Remember, the goal isn’t to drown your African violets or leave them parched. Instead, strive for a balance that keeps the soil consistently moist and promotes blooming. With a little attention to their watering needs, your African violets will flourish, rewarding you with a beautiful display of blooms.

Also I have some AVs that love water wicking pots and others that absolutely hate it. So watch and listen to what your African Violets are telling you.

Fertilizing African Violets: The Right Amount and Frequency

Just as with light and water, the proper application of fertilizer plays a key role in getting your African violets to bloom. These charming plants are not heavy feeders, but they do appreciate a consistent, light dose of nutrients. 

A balanced, water-soluble fertilizer designed for blooming houseplants is generally a good choice. Look for a fertilizer specific for African Violets. They contain the appropriate nutrients are essential to promote healthy growth and blooming in African violets.

As for the frequency of application, a common rule of thumb is to “feed weakly, weekly.” This means diluting the fertilizer to a quarter of the strength recommended on the package, and applying it every time you water. This approach provides a steady supply of nutrients without the risk of burning the roots with a more concentrated feed.

Remember, the goal isn’t to saturate your African violets with nutrients but to provide a consistent, light feed that supports blooming. With a bit of diligence in providing the right amount and frequency of fertilizer, your African violets can thrive and produce an enchanting display of flowers.

Humidity: Essential for Healthy, Blooming African Violets

Humidity plays a vital role in the overall health and blooming of African violets. These tropical plants originate from East Africa, an environment known for its high humidity levels. Therefore, creating a similar humid environment in your home is critical to the well-being of your African violets. 

A lack of adequate humidity can lead to shriveled, dry leaves and hinders the plant’s ability to bloom. To keep your African violets happy and blooming, aim for a humidity level of around 40-60%. This can be achieved by placing a humidity tray under your plant, clustering your plants together, or using a room humidifier.

However, avoid misting the leaves directly as the water droplets can cause unsightly spots on the leaves. Instead, focus on maintaining a consistent, ambient humidity level in your plant’s environment. 

Remember, the goal isn’t to create a rainforest in your living room, but to maintain a steady level of humidity that mimics your African violets’ natural habitat. By doing so, you’ll have a healthy, vibrant plant that rewards you with beautiful blooms. You can use this small inexpensive hygrometer to monitor humidity levels.

Monitoring and Controlling Pests: Keeping Your African Violets Healthy and Blooming

Pests can pose a significant threat to the health and blooming of your African violets. Pests such as mealybugs, spider mites, and thrips are especially common, and can wreak havoc on your African violets if left unchecked.

The first step in pest control is regular monitoring. This involves visually inspecting your plants on a regular basis for any signs of pests or damage. Look out for distorted growth, discoloration, or the presence of tiny insects or webs. 

Next, focus on prevention. Healthy, robust plants are less susceptible to pest infestations. Regular feeding, watering, providing the right light and humidity are all integral to maintaining the overall health of your African violets. 

In case of an infestation, start by isolating the affected plant to prevent the spread of pests to other plants. Use a soft brush or cotton swab dipped in alcohol to remove pests. For severe infestations, you may need to resort to insecticidal soap or a systemic insecticide specifically designed for houseplants. 

Remember, the goal isn’t just to eradicate the pests, but to keep your African violets healthy overall so that they can resist future infestations. Regular monitoring, maintaining plant health, and prompt action at the first sign of pests can help ensure that your African violets continue to thrive and bloom beautifully.

The Right Pot and Potting Soil: Crucial for African Violets’ Health and Blooming 

Choosing the right pot and potting soil for your African violets can significantly affect their overall health and blooming. These plants prefer being slightly root-bound and thrive best in small pots that are about one-third the diameter of their leaf spread. 

When selecting a pot, consider materials like plastic or glazed ceramic AV planters that help retain moisture. Drainage is also essential, so ensure your chosen pot has one or more holes to allow excess water to escape and prevent root rot.

As for potting soil, African violets prefer a light, well-draining mix that maintains moisture while allowing roots to breathe. A good potting mix for African violets should contain peat moss for moisture retention, perlite and vermiculite for drainage. Some growers also add charcoal to the mix to help sweeten the soil and improve its structure.

Remember, the goal isn’t just to provide a container for your African violets, but to create an optimal environment for root growth and nutrient absorption. The right pot and soil can make a big difference in the health and blooming of your African violets. Paying careful attention to these factors can contribute to a vibrant, flowering plant that is a joy to behold.

Choosing the Right African Violets: Some Bloom More Proficiently Than Others

African Violet

The choice of your African violet variety can significantly influence the blooming proficiency of the plant. Not all African violets are created equal; some varieties are known for their prolific blooming while others are more reserved. 

African violets come in a range of colors, sizes, and blooming habits. Some popular blooming varieties include the Rhapsodie series, Optimara violets, and the EverFloris series, which are renowned for their abundant and continuous blooms. These varieties have been bred for their blooming prowess and can provide an almost year-round display if given the right care.

I love my Blue Denim pictured above, it never disappoints and NEVER stops blooming!! Plus these blooms are huge!

However, it’s not just about the variety. The individual plant’s health and vitality also play a significant role in its blooming proficiency. Even the most prolific bloomer won’t perform well if it’s not given the right care. 

Happy Gardening!

With the right conditions, African violets are relatively easy to care for and will provide a beautiful display of blooms. By following these tips and tricks, you’ll be well on your way to nurturing healthy, flowering plants. Remember to give your plants adequate light, water them consistently, fertilize them properly, increase humidity, use well-draining soil, and keep an eye out for pests. By doing so, your African violets will be in full bloom in no time!

Please be sure to check out my Gardening Blog Post Page for more tips on all types of gardening. Including Seed Saving, Seed Starting, Orchids, Water Gardening, Coldframe Gardening, Indoor Bulb Gardening, Hydroponics, Container Gardening, Mums, Herbs, African Violets, planting Bulbs, Flower Gardening, Vegetable and Fruit Gardening, Indoor Houseplants of all kinds, Cactus, Succulents, Hanging plants, Deer resistant plants and even Bird, Bee, Butterfly and Hummingbird Gardens!

African Violet Pest

African violets are notoriously known as finicky plants, but their beauty is simply unmatched. These plants are beloved by gardeners worldwide for their stunning foliage, vibrant colors, and easy-to-grow nature. However, despite their beauty, African violets are no stranger to pesky pests. In this blog post, we’ll discuss some of the most common African violet pest and how to treat each one.

Thrips on African Violets

Thrips are one of the most common African violet pest. They are tiny, thin insects that range in color from light brown to black and are as tiny as a this – printed dash. Due to their small size, they are often overlooked until the damage becomes evident. They feed on the plant’s pollen sac (the yellow center of the blossoms). In the adult flying stage they enter through flying in from an open window or door. Or can be brought in by an infected new plant. Therefore it’s best to isolate new African Violets until you know they are free of disease.

To treat an infestation of thrips, begin by isolating the affected plant to prevent the spread to other plants. Remove any flower buds as this is where the thrips feed and will drastically reduce the infestation. One effective method to eliminate thrips is the use of insecticidal soap. Spray it directly onto the plant, making sure to cover both the tops and undersides of leaves. Repeat this treatment once a week until no signs of infestation remain. In severe cases, sadly it may be necessary to dispose of the infected violets. As many strains of thrips have become resistant to insecticides.

African Violet Pest – Cyclamen Mites

Cyclamen Mites present another significant threat to African violets. They are microscopic creatures that are virtually invisible to the naked eye, making detection extremely difficult. The first signs of their presence are usually distorted growth of the leaves, buds, and flowers. The plant’s foliage may also develop a greasy appearance and the flowers seem twisted and deformed.

To treat a Cyclamen Mite infestation, initially isolate the affected plant to prevent the mites from spreading to other plants. Prune the distorted parts of the plant, as these are the areas where mites are often concentrated. Thereafter, spray the entire plant – paying special attention to the undersides of the leaves – with a miticide that is safe for African violets. Repeat this treatment every seven days until the plant shows no further signs of infestation. For severe infestations, you might have to make the tough decision to discard the affected plant to protect the rest of your collection.

African Violet Pest – Broad Mites

Broad mites are another common pest that can cause significant harm to African violets. These pests are extremely small and often require a magnifying glass or microscopic examination for identification. The most common symptoms that indicate a broad mite infestation are distorted leaf growth, bronzing of the leaves, and a reduction in the plant’s overall vigor. 

In order to treat a broad mite infestation, isolate the affected plant immediately. This action will prevent the mites from spreading to other plants in your collection. It is recommended to prune the affected areas of the plant where mites are likely to be concentrated. Then, apply a miticide that is specifically designed to treat broad mites directly onto the plant, taking care to cover all areas of the plant including the undersides of the leaves. It is important to repeat this treatment every seven days until the plant shows no further signs of infestation. In severe cases, it might be necessary to discard the infested plant to safeguard your other plants from potential infestation. Remember, prevention is always better than cure, so it is advisable to regularly inspect your plants for any signs of pests.

Mealy Bugs on African Violets

Soil mealy bugs are a common menace to African violets, posing a significant threat to the health of these beautiful plants. They are small, white, soft-bodied insects that can be found in the soil surrounding the plant’s roots. Often mistaken for fungus due to their cotton-like appearance, soil mealy bugs can be hard to identify until a significant infestation. The tell-tale signs of their presence include stunted plant growth and a general decline in the health and vibrancy of the African violet.

To treat a soil mealy bug infestation, start by removing the plant from the pot and gently shaking off as much soil as you can from the root system. Dispose of the contaminated soil and wash the pot thoroughly to make sure no mealy bugs remain. It’s recommended to soak the roots of the plant in a solution of water and insecticidal soap for a few minutes, then rinse with clear water to remove any remaining soap and mealy bugs. Repot the plant in fresh, sterile potting mix and isolate it from your other plants to prevent the spread of the pests. Continue to monitor the plant closely for signs of recurring infestation. Remember, as with any pest, early detection and treatment is key to saving your African violets from soil mealy bugs.

Foliar Mealy Bugs: Identification and Treatment

Foliar mealy bugs are another pest that can wreak havoc on your African violets. Unlike their soil-dwelling counterparts, these pests tend to attack the leaves and stems of your plant. They are tiny, soft-bodied insects that are usually covered with a white, waxy substance. The most common symptoms of a foliar mealy bug infestation include a sticky residue on the leaves (due to their sugary excrement), a steady decline in the plant’s health, and if you look closely, you might be able to spot the actual bugs on your plant.

To treat a foliar mealy bug infestation, start by isolating the affected African violet from your other plants to prevent the spread of the pests. Remove any heavily infested leaves or stems from the plant. Spray the plant with a solution of water and insecticidal soap, making sure to cover all parts of the plant, especially the undersides of the leaves where the bugs often hide. Wipe down the leaves with a soft cloth to remove any remaining bugs and residue. Repeat this treatment every seven days, or until the plant shows no signs of infestation. If the infestation is severe, you may need to consider discarding the plant to protect the rest of your collection. As with all pests, the key to controlling foliar mealy bugs is through regular inspection and early detection.

Fungus Gnats – African Violet Nuisance Pest

Fungus gnats, while primarily a nuisance, can also pose a threat to your African violets if their population becomes too large. These small, dark, mosquito-like bugs are usually found flying around the plant or running on the soil and leaves. They lay their eggs in the soil, and their larvae feed on plant roots and organic matter, potentially damaging the plant’s health.

To treat a fungus gnat infestation, start by reducing the moisture in the plant’s environment, as these pests thrive in humid conditions. Remove the top layer of the soil where the gnats’ eggs are commonly laid. Applying a product containing Bacillus thuringiensis var. israelensis (Bti), a naturally occurring bacterium that kills larvae, can be effective in controlling fungus gnats. Insecticidal soaps or neem oil can also be used to treat the adults. Remember to isolate the affected plant from your other plants to prevent the spread of the pests.

In case of a severe infestation, it might be necessary to replace the infested soil entirely with fresh, sterile potting mix. Regular inspection of your plants will allow early detection and treatment, minimizing the impact of a fungus gnat infestation on your African violets.

Springtails in the Water Reservoir

Springtails are tiny, soft-bodied insects often found in the water reservoirs of your potted African violets. Due to their preference for damp conditions, they are attracted to the moisture and organic matter found in the water reservoirs. They are not directly harmful to your plants but can become a nuisance if their population increases substantially. One of the main signs that indicate the presence of springtails is the sight of these tiny white or gray bugs jumping around in the water reservoir.

In order to treat a springtail infestation, start by emptying and thoroughly cleaning the water reservoir to remove any springtails and their eggs. Once cleaned, make sure to let it dry completely before refilling it. This disrupts the damp conditions that springtails thrive in. It is advisable to repeat this process regularly to discourage springtail infestations. For severe infestations, consider using an insecticidal soap or diatomaceous earth. Diatomaceous earth is a non-toxic powder that kills insects by dehydrating them but is safe for your plants. Always remember to inspect your water reservoirs regularly for any signs of pests. As with all pests, prevention and early detection are key to maintaining healthy African violets.

Powdery Mildew: Identification and Treatment

Powdery Mildew is a common fungal disease that can afflict African violets, characterized by the appearance of a distinctive white or gray powdery coating on the leaves, stems, and flowers of the plant. These powdery spots are the spores of the mildew and can easily spread to other plants.

Remember African violets love humidity at around 60% although if this rises to 80% then fungal disease like powdery mildew moves in quickly. With warm days and cooler nights the powdery mildew will spread rapdily.

To treat Powdery Mildew, start by isolating the infected plant to prevent the spread of the fungus to other plants. Remove and dispose of any heavily infected leaves. Apply a fungicide designed for use on African violets, making sure to thoroughly cover all parts of the plant, especially the undersides of the leaves where the fungus tends to thrive.

I had a major outbreak of this although instead of insecticide I used a solution of 50/50 water and dawn dish detergent. I wiped down the top and bottom of each leaf along with dousing the stems. Sadly I had to dispose of 12 of my plants, it spread so quickly and was only able to save 5. The 5 I saved I repotted with fresh AV soil, clean pots and put diatomaceous earth in the soil. I did save some leaves from the plants I disposed of, cleaned them well and then put them in water until roots formed and started all over again.

Regularly clean up any fallen leaves or debris as these could harbor the fungus. Always remember, the key to controlling Powdery Mildew, like all plant diseases, is through regular inspection and early detection.

Diatomaceous Earth Added to the Soil: How it Works and Application Method

Diatomaceous earth is a powerful tool in the arsenal of any gardener dealing with African Violet pest infestations. It is a non-toxic, naturally occurring substance made up of the fossilized remains of tiny, aquatic organisms called diatoms. The sharp edges of diatomaceous earth can puncture the exoskeletons of many types of pests, causing them to dehydrate and die.

To apply diatomaceous earth to the soil of your African Violets, start by ensuring that the soil is dry. Sprinkle a thin layer of the powder over the surface of the soil, being careful to avoid the plant’s leaves. If you need to treat the entire pot, including the sides and bottom, remove the plant and set it aside temporarily. Then, dust the entire pot with diatomaceous earth before replanting.

Remember, diatomaceous earth’s effectiveness is diminished when it’s wet, so it’s best used in dry conditions. After watering your plant, you may need to reapply. Always use food-grade diatomaceous earth, as other forms may contain harmful additives. Regular use of diatomaceous earth in your potting soil can help deter many types of pests, contributing to the overall health and vitality of your African violets.

Happy Gardening!

African violets are a must-have addition to any gardener’s collection, but they can be vulnerable to pests. Regularly inspecting your plant and keeping a watchful eye for signs of infestation is the best way to prevent and treat any pest problems. If your African violet is showing signs of pest problems, the methods mentioned above can help you identify and treat them accordingly. With proper care and attention, your African violet will thrive and continue to bloom for years to come.

Please be sure to check out my Gardening Blog Post Page for more tips on all types of gardening. Including Seed Saving, Seed Starting, Orchids, Water Gardening, Coldframe Gardening, Indoor Bulb Gardening, Hydroponics, Container Gardening, Mums, Herbs, African Violets, planting Bulbs, Flower Gardening, Vegetable and Fruit Gardening, Indoor Houseplants of all kinds, Cactus, Succulents, Hanging plants, Deer resistant plants and even Bird, Bee, Butterfly and Hummingbird Gardens!

African Violet
Amour Elite

Repotting Your African Violets

African Violets

African Violets are very popular houseplants, and for a good reason! They are beautiful, easy to care for, and consistently bloom year-round. However, African Violets need to be properly maintained including needed to repotted every once in a while to stay healthy and vibrant. In this blog post, we will discuss repotting African Violets, when it needs to be done, supplies needed and how to repot.

How Do You Know When to Repot?

Recognizing when to repot your African Violets is crucial for their health and growth. There are several signs that your plant may need a new home. If you notice that the leaves are wilting, even though the plant is well-watered, it might be time for a repot. Another sign is when the roots have taken up all the space in the pot and started growing out of the drainage holes. You may also observe that the violet is no longer blooming as it used to, or the growth seems stunted in comparison to its regular growth rate. Also the plant becomes top heavy and leans to one side. These symptoms indicate that either the current pot has become too small for your plant, the stem has become leggy or it’s just time for some fresh soil.

Repotting African Violets – Assembling Your Supplies

Before you start the repotting process, it’s important to prepare all the necessary supplies. First, you’ll need a new pot. The pot should be about one third the diameter of the plant and have drainage holes. It’s best to use a small pot as African Violets prefer to be root-bound. For soil, use a well-draining, light potting mix, preferably one that is specifically designed for African Violets. You can also check out my African Violet Soil Recipe here. Do not use garden soil as it can contain pathogens and isn’t aerated enough.

You’ll also need some porous material, I prefer small screen disc (I purchase in packs of 50-100 on Amazon), to place at the bottom of the pot to avoid soil loss. Lastly, gather a clean knife or scissors for trimming the roots and old leaves, and a watering can to thoroughly water the plant after repotting. Keeping these supplies at hand will ensure a smooth and efficient repotting process.

African Violet with a Neck: What It Is and How It Happens

An African Violet with a neck is a plant that has developed a visible, long, and bare stem, causing the rosette of leaves to be lifted above the pot. This condition is more commonly known as ‘Necking’ in African Violets. Unlike most plants, African Violets grow from the center outwards. Over time, as the plant grows and old leaves die off, they can leave behind a bare stem or ‘neck’.

This phenomenon typically happens because of age, or because the plant was not replanted deeply enough the last time it was repotted. Necking is not beneficial for the plant, as the bare neck can be weak, which might cause the plant to lean or even break, and can also make water absorption less efficient. Moreover, an African Violet with a neck is not aesthetically pleasing for most people. Therefore, identifying and properly treating this condition is vital for the well-being, longevity, and visual appeal of your African Violets.

How to Repot an African Violet with a Neck

If your African Violet has developed a neck, it will need a special repotting process. Follow these steps to give your plant a fresh start:

  1. Prepare the New Pot: Place a small screen disc at the bottom of the new pot to prevent soil loss. Fill the pot halfway with a well-draining, light potting mix specifically designed for African Violets.
  2. Remove the Plant: Gently remove the African Violet from its current pot. Be careful not to damage the roots in the process.
  3. Trim The Neck: If the neck has become too long, you can trim it down to a more manageable size using a clean knife or scissors. Remove any old or dead leaves that are still attached to the neck.
  4. Plant Deeply: Place your African Violet in the new pot, making sure to plant it deeply enough that the neck is covered with potting soil. This will provide the stem with more support and encourage new root growth.
  5. Water Thoroughly: Once the plant is securely in the new pot, water it thoroughly. Be careful not to overwater, as this can lead to root rot.

This repotting process will not only improve the look of your African Violet but will also promote healthier growth and ensure the longevity of the plant. Make sure to check on it regularly and adjust its care as needed.

Repotting African Violets for a Fresh Soil Change

Even if your African Violet doesn’t show signs of necking or root overcrowding, it’s important to occasionally change the soil. I like to do this yearly. Fresh soil provides renewed nutrients and can significantly improve the health and growth of your plant. Here’s how to do it:

  1. Preparation: Gather all your supplies including a new pot similar in size to the current one, fresh potting mix designed for African Violets, small screen disc, clean knife or scissors, and a watering can. 
  2. Extraction: Carefully remove the African Violet from its current pot. Remember to be gentle to avoid damaging the roots.
  3. Root Care: Using your clean knife or scissors, trim off any dead or excess roots. This will ensure the plant can effectively absorb nutrients from the new soil.
  4. New Pot Preparation: Place a small screen disc at the bottom of the new pot to prevent soil loss and fill it halfway with the fresh potting mix. 
  5. Planting: Place the African Violet into the new pot, ensuring the roots are well covered with the soil. 
  6. Watering: Once the plant is securely in the new pot, water it thoroughly. Be careful not to overwater as this can cause root rot.

Repotting for soil change can give your African Violet a fresh start, promoting robust growth and vibrant blossoms. Remember to check the plant regularly and adjust its care as needed.

Repotting African Violets Due to Root Rot

Root rot is a common issue faced by many African Violet enthusiasts. It’s usually caused by overwatering or poor drainage, which leads to soggy soil and ultimately, root decay. Root rot can seriously damage the health of your plant, but with proper intervention, it’s possible to save your African Violet. Here’s how:

  1. Identify Root Rot: The first step is to identify if your African Violet has root rot. Symptoms include wilting, yellowing or browning leaves, a foul smell emanating from the soil, and black, mushy roots.
  2. Remove the Plant: Carefully remove the African Violet from its current pot. Be gentle to avoid causing any further damage to the roots.
  3. Inspect and Trim the Roots: Rinse the roots under lukewarm water to remove the soil and clearly see the extent of the rot. Using a clean knife or scissors, trim away the rotted roots. It’s important to remove all affected areas to prevent the rot from spreading.
  4. Prepare the New Pot: Place a small screen disc at the bottom of a new pot to prevent soil loss. Fill the pot halfway with a fresh, well-draining potting mix that’s suitable for African Violets.
  5. Replant the African Violet: Place the plant in the new pot, ensuring the healthy roots are covered with soil.
  6. Water Sparingly: Until the plant has recovered, it’s crucial to be cautious not to overwater. Water your African Violet only when the top layer of soil feels dry to the touch.

By repotting due to root rot, you’re giving your African Violet a chance to recover and thrive. Always remember that prevention is better than cure, so aim to create an environment that discourages root rot in the first place – one with well-draining soil and an appropriate watering routine.

Repotting African Violets – Potting Up

Sometimes, your African Violet may need to be moved to a larger pot to accommodate its growth and ensure it’s getting the nutrients it needs. This process is known as ‘potting up’. Here’s how you do it:

  1. Choose the Right Size Pot: The new pot should be slightly larger than the current one. A pot too large can lead to overwatering problems as the soil will stay damp for too long. The best is a pot 1/3 the diameter of the leaf spread of your African Violet.
  2. Prepare the New Pot: Place a small screen disc at the bottom of the new pot to prevent soil loss. Fill it about one-third full with fresh, well-draining potting mix specifically designed for African Violets.
  3. Remove the Plant: Gently remove the African Violet from its current pot, being careful not to damage the roots.
  4. Position the Plant: Place your African Violet in the new pot, situating it in the center. Fill the rest of the pot with potting mix, ensuring that all roots are covered and the plant sits at the same depth as in the previous pot.
  5. Water Thoroughly: After planting, water your African Violet thoroughly. Moving forward, be cautious to avoid overwatering. 
  6. Placement: Place your newly potted African Violet in a location with bright, indirect sunlight and keep a close eye on it in the coming weeks.

Potting up can provide your African Violet with the environment it needs to maintain vigorous growth and produce a stunning display of blooms. Just remember, more space means more nutrients and more room for roots to grow.

Happy Gardening!

Repotting African Violets is a simple process that can help keep your plants healthy and thriving. By following these simple steps, you can ensure that your African Violets will continue to bloom beautifully year after year. Remember to be patient and only repot when your plant is root-bound, choose the right container and soil, and maintain proper care after repotting. With a little bit of effort, you can enjoy the stunning beauty of this exquisite houseplant!

Please be sure to check out my Gardening Blog Post Page for more tips on all types of gardening. Including Seed Saving, Seed Starting, Orchids, Water Gardening, Coldframe Gardening, Indoor Bulb Gardening, Hydroponics, Container Gardening, Mums, Herbs, African Violets, planting Bulbs, Flower Gardening, Vegetable and Fruit Gardening, Indoor Houseplants of all kinds, Cactus, Succulents, Hanging plants, Deer resistant plants and even Bird, Bee, Butterfly and Hummingbird Gardens!

African Violet Suckers

African violets are an excellent choice for indoor gardening enthusiasts. Known for their beautiful flowers, they are hardy plants that require minimal maintenance. However, if you want your African violet to thrive, you need to pay attention to the suckers. Suckers are the small plants that sprout out of the base of the African violet, and they can rob the main plant of valuable nutrients. In this blog, we will discuss African violet suckers to help you learn what they are, what is a single crown, and how to remove suckers to ensure your plant grows strong and healthy.

Before we discuss how to remove suckers from African violets, it’s essential to know what they are. Suckers are small offshoots that grow out of the base of the plant. They are technically new plants and will compete with the mother plant for nutrients. If left unattended, they can weaken the primary plant, cause stunted growth, and inhibit the production of flowers. As a result, it is essential to remove these suckers to keep your African violet healthy and blooming.

What are Single Crown African Violets

african violet

Now that we understand what suckers are, let’s delve into what a single crown in African violets means. A single crown refers to the main growth center of the African violet plant. It’s from here that the leaves, stems, and flowers originate. Ensuring that your African violet remains a single crown plant is crucial to its health and aesthetic appeal. 

Why is this so? A single crown allows the plant to focus its energy into producing vibrant flowers and lush foliage from one central point, giving it a compact, symmetrical and appealing look. When suckers grow, they develop into multiple crowns, diverting the plant’s energy away from the main crown. This diversion can lead to a bushy, unkempt appearance and less vigorous flowering. Therefore, maintaining a single crown in your African violet not only ensures it looks good but also promotes a healthier and more abundant bloom.

Undesirable Crown-The Sucker

An undesirable crown in African violets is referred to as a sucker. The sucker, as we’ve established, is a small plant that starts growing from the base of the parent plant. It may seem harmless at first, but it has the potential to become a serious issue. 

A sucker is undesirable because it diverts nutrients and energy from the main crown, which should ideally be the only crown in your African violet for optimal health and aesthetics. The sucker acts as a competitor to the main crown, drawing away resources that could otherwise be used to produce vibrant flowers and lush leaves. It can adversely affect the overall growth and bloom of your African violet. The presence of a sucker can cause the plant to take on a bushy appearance, which is contrary to the desired compact and symmetrical look of a healthy African violet. Therefore, it’s crucial to remove suckers promptly and correctly to maintain the health and beauty of your African violet plant.

Keeping and Repotting Suckers

Despite their potential to harm the parent plant, suckers are not entirely undesirable. In fact, they present a valuable opportunity for propagation. A sucker is a new plant in and of itself, and with proper care, it can be nurtured into a healthy and beautiful African violet. 

To repot a sucker, you will first need to carefully remove it from the parent plant. Use clean, sharp scissors to cut as close to the base of the sucker as possible, ensuring not to damage the main plant. Once removed, prepare a small pot with well-draining, African violet-friendly soil. Place your freshly cut sucker into the soil, burying the stem up to the first set of leaves. 

After repotting, place the sucker in a warm, brightly lit area, avoiding direct sunlight. Water it carefully, ensuring the soil is damp but not soaked. With consistent care, your new African violet plant will take root and begin to grow, providing you with an additional vibrant and flowering companion in your indoor garden. Remember, propagation through suckers is an easy and cost-effective way to expand your African violet collection and bring more beauty into your home.

Removing Suckers without Repotting Them

If you’re not interested in propagating your African violets but rather want to focus on maintaining a single, robust plant, you can remove suckers without repotting them. Here’s how to do it:

  1. Identify the sucker: The first step is to identify the sucker, which is usually a small offshoot growing from the base of the parent plant. 
  2. Prepare your tools: Sterilize a pair of sharp scissors or a razor blade. Sterilization is necessary to prevent any infection from spreading to the plant.
  3. Cut the sucker: Carefully cut the sucker as close to the base as possible, being careful not to damage the main plant. Try to remove as much of the sucker’s stem as you can.
  4. Monitor the area: Over the next few days, monitor the area where the sucker was removed. If an additional sucker begins to grow in the same place, repeat the process. 

By removing suckers without repotting them, you help to ensure that your African violet remains a single crown plant, which is vital for its health and aesthetic appearance. Remember, the goal is to keep the energy focused on the main growth center for a compact, symmetrical look and abundant bloom.

Discouraging Suckers from Forming

While removing suckers is essential for the well-being of your African violet, it’s even better if you can prevent them from forming in the first place. Here are some steps you can take to discourage suckers:

  1. Proper watering: Overwatering is one of the main causes of sucker formation. Water your African violets only when the top inch of the soil feels dry to the touch. 
  2. Adequate lighting: Maintain a bright but indirect light environment for your plant. Too much or too little light can stress the plant, leading to sucker growth.
  3. Right temperature: African violets prefer a constant temperature of 70°F – 80°F during the day and slightly cooler at night. Extremes of temperature can trigger sucker formation.
  4. Prune regularly: Regular pruning helps to maintain a single crown and discourage suckers. Be sure to remove any dead or yellowing leaves to keep your plant in top condition.
  5. Proper feeding: Use a balanced, soluble fertilizer designed specifically for African violets. Over or underfeeding can result in suckers.

By providing the right conditions and care for your African violet, you can reduce the likelihood of suckers forming and help your plant stay healthy and beautiful.

Happy Gardening!

African violet suckers are a natural occurrence and are essential to a plant’s propagation. However, it is vital to keep the suckers in check and remove them when necessary. By removing suckers, your African violet will grow more robustly with stronger stems and abundant flowers. Remember, removing suckers is a quick and easy task that will ensure your African violet remains healthy and blooming throughout the year.

Please be sure to check out my Gardening Blog Post Page for more tips on all types of gardening. Including Seed Saving, Seed Starting, Orchids, Water Gardening, Coldframe Gardening, Indoor Bulb Gardening, Hydroponics, Container Gardening, Mums, Herbs, African Violets, planting Bulbs, Flower Gardening, Vegetable and Fruit Gardening, Indoor Houseplants of all kinds, Cactus, Succulents, Hanging plants, Deer resistant plants and even Bird, Bee, Butterfly and Hummingbird Gardens!

African violet

African Violet Leaf Propagation

African Violets (Saintpaulia) are a popular indoor plant because of their stunning blooms and unique leaves. When you know how all the tips and tricks to care for them properly they are easy to grow. Many gardeners want to propagate their African violets to create more plants inexpensively and share them with family and friends. In this blog post, we will discuss African Violet propagation, specifically leaf propagation and step-by-step guide.

Propagating by Leaf Cutting in Soil

Leaf cutting is one of the most common methods for propagating African violet plants. To do this, you’ll need a healthy leaf and a sterile cutting tool. Follow these steps for successful propagation:

  1. Choose a healthy leaf: Select a mature leaf from your African violet plant, preferably one that is sturdy and lush green. Avoid leaves that show signs of disease or stress.
  2. Make a clean cut: Using a sterile knife or pair of scissors, cut the leaf stem at a 45-degree angle. This increases the surface area for roots to develop.
  3. Prepare the growing medium: Fill a small pot with a sterile, well-draining potting mix, such as an African violet mix or perlite.
  4. Plant the cutting: Push the cut end of the leaf stem, dip in rooting hormone powder and plant about 1 inch into the soil. Position the leaf to stand upright.
  5. Provide the right conditions: Place the pot in a warm, bright spot but out of direct sunlight. Keep the soil consistently moist but not waterlogged.

Within a few weeks, you should see new plantlets emerging from the soil. This method may require some patience, but it’s an effective way to multiply your African violet collection. Remember, the healthier the parent leaf, the more successful the propagation will be.

Propagating by Leaf Cutting in Water

Another method for propagating African Violets is through water propagation. This method is especially beneficial for those who wish to visually monitor the root development. Here’s how to do it:

  1. Choose a healthy leaf: Much like the soil method, select a mature, healthy leaf from your African Violet. A good leaf will increase the chance of successful propagation.
  2. Make a clean cut: With a sterile cutting tool, cut the leaf stem at a 45-degree angle. This will provide a larger surface area for root development.
  3. Prepare a water container: Find a small glass vase or propagation station for multiple leaves and fill it with filtered or distilled water. 
  4. Position the leaf: Place the cut end of the leaf stem into the water, making sure the leaf itself does not touch the water.
  5. Provide the right conditions: Position the container in a warm, bright area but away from direct sunlight. Change the water every one to two weeks to keep it fresh.

In a few weeks, you should notice roots starting to form. Once the roots are about an inch long, you can transfer the new plant to a pot filled with African Violet potting mix. Like the soil propagation method, the water method also requires patience, but it provides the joy of watching the root development process.

Propagating African Violet leaves in water
Propagating my leaves in water!

Rooting Hormones: Pros and Cons

Rooting hormones can be an advantageous tool when propagating African Violets, but they also come with some considerations. 

Pros

  1. Increased Success Rate: Rooting hormones can significantly improve the chances of successful propagation. They contain auxins, a type of plant hormone that stimulates root growth. This can be particularly beneficial when propagating a difficult or finicky plant.
  2. Faster Root Development: Rooting hormones can expedite the process of root formation. This could mean a shorter wait time before you can repot your new African Violet plant.
  3. Stronger Plants: The plants propagated with rooting hormones often develop a robust root system, which can lead to healthier, more resilient African Violets.

Cons

  1. Possible Health Risks: Some rooting hormones contain synthetic chemicals that can be harmful if not used properly. It’s important to follow the product instructions closely and to keep the product out of reach of children and pets.
  2. Unnecessary for Some Plants: Not all plants require rooting hormones for successful propagation. African Violets, in particular, are often able to root well on their own.
  3. Additional Cost: Although relatively inexpensive, rooting hormones do represent an additional cost. Depending on how often you propagate plants, this can add up.

In conclusion, while rooting hormones can increase the success rate and speed of African Violet propagation, they are not always necessary. It’s a personal decision whether to use them, based on your own propagation needs and preferences.

Removing the Mother Leaf: When and How

Once you start seeing a clump of leaves forming on the new plant, it signifies successful propagation. This usually happens after several weeks but can vary based on conditions. However, don’t be in a rush to remove the mother leaf. This leaf is still providing the new plantlets with much-needed nutrients. 

The best time to remove the mother leaf is when the new plantlets have established their own strong root system. This usually happens when they’ve grown three to five leaves of their own. At this point, the new African Violet is capable of sustaining itself, and the mother leaf can be cut off. 

To remove the mother leaf, use a sharp, sterile knife or pair of scissors. Make a clean cut as close to the base of the stem as possible, taking care not to damage the new plant. Remember to handle your new African Violet delicately to avoid causing any trauma. This is an exciting time in the propagation process and a sign that you are close to having a fully independent new plant.

Choosing the Right Pot Size for New Leaf Start and When to Upsize

When it comes to planting your new African Violet leaf start, choosing the right pot size is crucial. Ideally, the initial pot should be relatively small – usually around 2 to 3 inches in diameter. Smaller pots help maintain a favorable root-to-soil ratio and encourage the development of a robust root system.

As the new plant grows, it will eventually require a larger pot. Typically, the time to move up in size is when the width of the plant reaches approximately one-third the diameter of the current pot. Alternatively, you can observe the root system; if the roots are becoming crowded and starting to circle the bottom or sides of the pot, it’s a clear sign that repotting is needed.

When upsizing, don’t go too big too soon. A common mistake is to move the plant to a significantly larger pot, thinking it will allow the plant to grow bigger and faster. However, a pot that is too large can lead to waterlogging and root rot, as the soil will stay wet longer than necessary. A good rule of thumb is to move up to a pot that is 1 to 2 inches larger in diameter than the current one.

Remember, every plant is unique and may grow at a different pace. Always monitor your African Violet’s growth and adjust accordingly. Regular repotting not only prevents the plant from becoming root-bound but also provides fresh soil and nutrients, contributing to a healthier, more vibrant African Violet.

Happy Gardening!

African violets are a perfect plant for those who want to propagate and increase their collection. With the different methods of propagation available, you can easily produce new plants from the parent plant. Whether you prefer leaf cutting or crown division, these methods are easy to do, and with a little patience, you can grow healthy and beautiful African violets. 

Please be sure to check out my Gardening Blog Post Page for more tips on all types of gardening. Including Seed Saving, Seed Starting, Orchids, Water Gardening, Coldframe Gardening, Indoor Bulb Gardening, Hydroponics, Container Gardening, Mums, Herbs, African Violets, planting Bulbs, Flower Gardening, Vegetable and Fruit Gardening, Indoor Houseplants of all kinds, Cactus, Succulents, Hanging plants, Deer resistant plants and even Bird, Bee, Butterfly and Hummingbird Gardens!

African Violet Care

Fertilizer, Temperature and Humidity Levels

African Violet
Cosmic Art African Violet

African Violets are beautiful, delicate plants that can be a challenge to care for. Adequate fertilizers, humidity, and temperature are essential. While many people love the look of African Violets, few are aware of their specific needs. But with the right care and attention, your African Violets can thrive and bloom for years to come. In this blog, we will share tips on African Violet Care including fertilizers and the perfect temperature and humidity levels for their growth.

African Violet Care – Liquid Fertilizer

When feeding your African Violets, liquid fertilizer is often the best choice. Liquid fertilizers are easily absorbed by the plant, providing essential nutrients needed for optimum growth. Fertilizers specifically designed for African Violets usually contain the right balance of nitrogen, phosphorous, and potassium, which are critical for plant health. I use the Schultz Brand of liquid African Violet fertilizer, have tried a few others but seem to get the best results with Schultz. You should try them all and do what works best for you and your African Violets.

To use liquid fertilizer, start by diluting it according to the package instructions. Over-fertilizing can be harmful, so it’s important to get the concentration right. I use AV fertilizer with my weekly watering, I use it full strength one week and half strength the next week. This has kept my African Violets happy and healthy and blooming continuously. Remember to do what works best for your violets. 

African Violet Care – Temperature and How to Regulate

African Violets thrive in a relatively warm environment, with the ideal temperature range being between 70 to 80 degrees Fahrenheit during the day, and slightly cooler at night, between 65 to 70 degrees. They are sensitive to extreme temperature variations, so maintaining a stable temperature is crucial for their health and blooming. I like this small hygrometer-measure both humidity and temperature.

To control the temperature, firstly, keep your African Violets away from drafty windows or doors and avoid placing them near heating or cooling vents. Direct contact with cold or hot air can lead to leaf damage and inhibit blooming. Secondly, use a thermostat to monitor the room temperature where your African Violets are. If you live in a cooler climate, you might consider a heating mat for plants, which can be placed under the pot to provide a consistent warmth. Remember, consistency is key when it comes to temperature control for your African Violets.

African Violet Care – Humidity Levels and How to Adjust

African Violets do well in moderate to high humidity levels, ideally around 40% to 60%. Low humidity can lead to wilting and dry soil, while high humidity might encourage the growth of mold or other diseases. It’s a delicate balance that needs to be maintained. 

To control the humidity levels for your African Violets, investing in a good quality humidifier can be a great help, specifically in dry climates or during the winter months when indoor air tends to be drier. Also, placing your pot on a tray of water with pebbles can increase the surrounding humidity as the water evaporates. It’s important to note that the pot should sit on the pebbles, not in the water, to avoid waterlogging the roots. 

Furthermore, a hygrometer, a device used to measure humidity, can be used to monitor the humidity levels in the room where your African Violets are placed. Regular monitoring and adjustments will help ensure your African Violets enjoy the perfect level of humidity and stay vibrant and healthy. Remember, consistency is crucial when it comes to maintaining the right humidity conditions for your African Violets.

Happy Gardening!

African Violets are beautiful and rewarding to care for, but they require some specific care to thrive. Fertilizer with balanced nutrient ratios, the right temperature and humidity, lighting, and proper watering and repotting techniques will help keep your African Violets happy and healthy. By following these suggestions, you will enjoy the beauty of African Violets in your home and garden for years to come.

Please be sure to check out my Gardening Blog Post Page for more tips on all types of gardening. Including Seed Saving, Seed Starting, Orchids, Water Gardening, Coldframe Gardening, Indoor Bulb Gardening, Hydroponics, Container Gardening, Mums, Herbs, African Violets, planting Bulbs, Flower Gardening, Vegetable and Fruit Gardening, Indoor Houseplants of all kinds, Cactus, Succulents, Hanging plants, Deer resistant plants and even Bird, Bee, Butterfly and Hummingbird Gardens!

African Violet Potting Soil Recipe

African violet
One of my favorites-Green Rose!!

As a gardener, you know that finding the right potting soil for your plants is crucial to their growth and survival. African violets, with their delicate blooms and unique soil requirements, are no exception. In this blog post, we will explore the best potting soils for African Violets. The components of soil that nature uses, why airiness is necessary in a potting mix. And lastly the African Violet potting soil recipe that I have used for years.

Commercial African Violet Potting Soil: Advantages and Disadvantages

When it comes to convenience, commercial African Violet potting soils are hard to beat. Packaged, ready-to-use, and specifically formulated for the needs of these particular plants, they take the guesswork out of soil preparation. These soils are often enriched with nutrients essential for the growth and blooming of African violets, such as nitrogen, phosphorus, and potassium.

However, there are a few potential drawbacks to consider. Commercial soils can be more expensive than creating your own mix, especially if you have a large collection of African violets like I do. Additionally, the quality of commercial soils can vary widely. Some mixes may retain too much moisture, leading to root rot, while others might not hold enough. Lastly, commercial mixtures may contain unnecessary additives or lack specific nutrients that your African violets may need for optimal growth.

Remember, every African Violet is unique and may have different soil preferences. Finding the right soil often involves a bit of trial and error, whether you choose to use a commercial mix or make your own.

Mimicking the Natural Soil of African Violets

In their native habitat of Tanzania and Kenya, African violets flourish in the crevices of highland mountains, where the soil is light, porous, and rich in organic matter. To replicate this environment at home, consider creating a potting mix that simulates these conditions.

Start with a base of 2 parts of high-quality peat moss. Peat moss is light and airy, which mimics the loose soil structure African violets are used to. It also retains moisture well, ensuring your plants have a consistent water supply. To this, add 1 part perlite and 1 part vermiculite. These elements help improve drainage and prevent the soil from compacting, which can hinder root growth. 

Remember, while this recipe aims to replicate the natural conditions of African violets, it’s essential to monitor your plants and make adjustments as needed. After all, each African violet is unique and may have specific requirements that need to be met for it to thrive. As you gain experience, you’ll learn what works best for your plants and be able to create the perfect potting soil mix.

Air is a vital component of a potting mix for African violets because it allows excess water to drain quickly and ensure the roots can breathe. Without sufficient air, the roots may suffocate and eventually die. When potting African violets, it is important to combine soil and perlite to create a loose and well-draining soil structure. Vermiculite is another option you can use as part of the potting mix to improve soil drainage for healthy root growth.

Maintaining Soil pH for African Violets 

African violets prefer slightly acidic soil, with a pH in the range of 6.5 to 7.0. A pH that falls within this range encourages the plant to effectively absorb nutrients from the soil. If the pH is too high (alkaline) or too low (acidic), it can lock nutrients within the soil, making it difficult for the African violet to access them. 

Peat moss is famous for becoming more acid as time passes and vermiculite can vary in pH. Also the water you use and the build of salt and minerals in soil can alter the pH over times. This is why yearly repotting is an easy fix to maintain proper pH levels and continue growing healthy, happy African Violets.

Pasteurizing Your Soil Mix: How To Do It and The Pros and Cons

Pasteurizing your soil mix is one method used by gardeners to kill harmful pathogens, weed seeds, and pests. It involves heating the soil to a temperature that is high enough to kill these harmful elements, but not so high that beneficial microorganisms are destroyed.

To pasteurize your soil at home, preheat your oven to 180-200°F (82-93°C). Place your soil mix in a baking dish or oven-safe pot, and insert a thermometer into the center of the soil. Monitor the temperature closely. Once it reaches 180°F, maintain this temperature for at least 30 minutes. Allow the soil to cool before using it.

The primary advantage of pasteurizing your soil is that it can help ensure a clean, disease-free environment for your African Violets. It can be particularly beneficial if you’re reusing old potting mix or if you suspect your mix may be contaminated. 

However, there are some downsides to consider. Pasteurizing your soil can be a time-consuming process, and it requires careful monitoring to prevent overheating, which can cause the soil to become hard and compacted. Also while this method kills off harmful organisms, it also eliminates beneficial ones, which are important for maintaining soil health and fertility. 

If you are adding organic material to your potting mix then pasteurizing is a good choice. Although when your mixture contains only inorganic sterile ingredients like perlite, vermiculite and peat moss then pasteurization is not needed.

Remember to weigh these pros and cons and consider the specific needs and health of your plants before deciding to pasteurize your soil mix.

I personally do not pasteurize my soil as I use only sterile ingredients and have never had an issue in all my 30+ years of growing.

African Violet Potting Soil Recipe

Creating the ideal soil mix for your African violets can have a significant impact on their health and vitality. Here’s the simple African Violet potting soil recipe I use and have for years. I actually got it from my Father who got it from his Mother and believe me they both had the most beautiful African Violets!!

  1. Peat Moss: Start with a base of high-quality peat moss. It should make up 50% of your soil mix. This component is light and airy, mimicking the loose soil structure African violets are accustomed to in their natural habitat. It also retains moisture well, providing a consistent water supply for your plants.
  2. Perlite: Add perlite to the mix, accounting for 25% of the total. Perlite will enhance the drainage capabilities of the soil and prevent it from compacting, which could hinder root growth.
  3. Vermiculite: The remaining 25% of your soil mix should be vermiculite. This component further improves soil drainage and helps to maintain a light, well-aerated soil structure conducive to healthy root development.

Mix these ingredients thoroughly to ensure a uniform blend. This mix will provide a light, well-draining soil that mimics the natural growing conditions of African violets. Remember to observe your plants and adjust the recipe as needed. Your African violets are unique and may have specific soil requirements that need to be met for them to thrive.

Happy Gardening!

Creating the right potting soil for African violets requires attention to detail and the proper components. Knowing what potting soil African violets need is essential along with knowing the components of soil nature uses to grow these plants. A well-draining, nutrient-rich soil mixture is essential to promote healthy plant growth. With these tips, you can create a potting mix that your African violets will love and bloom for years to come.

Please be sure to check out my Gardening Blog Post Page for more tips on all types of gardening. Including Seed Saving, Seed Starting, Orchids, Water Gardening, Coldframe Gardening, Indoor Bulb Gardening, Hydroponics, Container Gardening, Mums, Herbs, African Violets, planting Bulbs, Flower Gardening, Vegetable and Fruit Gardening, Indoor Houseplants of all kinds, Cactus, Succulents, Hanging plants, Deer resistant plants and even Bird, Bee, Butterfly and Hummingbird Gardens!

Miniature African Violet
Love this one and so easy to start new ones!

How to Water African Violets

African Violets
Amour Elite

African violets are beautiful and delicate houseplants that can be a bit finicky when it comes to watering. Overwatering, underwatering, or using the wrong type of water can easily cause damage to these plants. Therefore, learning how to water African Violets the proper way is one of the most crucial aspects of caring for your African Violets. In this blog post, we will explore the different ways of watering your African violets and discuss the pros and cons of each method.

Although always remember not every African Violet prefers the same method of watering. I have many that thrive in my choice of watering the water-wicking method. But I also have some that do better with the Ceramic self-watering pots. And one lone stand out that just prefers the bottom watering method. So be sure to monitor your violets and if they are not happy choose a different watering method.

Top Watering-How and When to Water

Watering from the top involves pouring water onto the soil surface around the base of your African violet. It’s best to do this early in the morning, allowing the plant enough time to absorb the water throughout the day. Be sure to pour slowly and evenly, ensuring the soil is thoroughly soaked but not waterlogged. Keep the water away from the leaves to avoid water spots, a common issue with top watering.

Advantages and Disadvantages of Top Watering

One of the main advantages of top watering is that it’s straightforward and requires no special equipment. It also ensures that the water directly reaches the root system, which can promote healthier growth. Also top watering will leach the excess salts from the soil into the run off water in the saucer below. Make sure you empty the saucer after 5 minutes to avoid saturating the roots. However, the method does come with some drawbacks. The risk of overwatering is higher with top watering. Additionally, water can easily splash onto the leaves causing unsightly water spots. Moreover, if the water is too hot or too cold-more than 10 degrees different than soil temperature which is room temp, then it can shock the plant leading to wilting or discoloration. Therefore, it’s crucial to use room-temperature water and be careful to avoid the leaves when top watering your African violets.

Bottom Watering – How and When to Water

Bottom watering is another method you can use to hydrate your African violets. To bottom water, place your potted plant in a saucer filled with room-temperature water. The plant will absorb water through the drainage holes at the bottom of the pot. The process should be done in the morning, as with top watering, and typically takes about 30 minutes to an hour for the plant to absorb enough water. Once the top of the soil feels moist, remove the plant from the water-filled saucer and let it drain.

Advantages and Disadvantages of Bottom Watering

Bottom watering offers several advantages. It greatly reduces the risk of water spots on the leaves since the water is only touching the pot’s base. It also minimizes the dangers of fungus and other diseases that thrive in overly moist environments. This method encourages the roots to grow downwards, promoting healthier, sturdier plants. However, bottom watering also has its drawbacks. It’s a slower process compared to top watering, and it can lead to salt build-up in the soil over time, as excess salts are not flushed out. Additionally, if left too long in the water, the plant could become waterlogged and root rot may set in. Therefore, it’s vital to monitor the watering process closely and remove the plant once the soil feels moist on top.

How to Set Up and Water Wicking Pots

African violets
My DIY water wicking pot!

Wicking pots utilize a system where water is absorbed through a wick from a reservoir and delivered to the plant’s roots. To set up a wicking pot, you’ll need a pot with a drainage hole, a reservoir for water, and I use 2 strands of yarn for a wick. Thread one end of the wick through the drainage hole, ensuring it reaches the bottom of the reservoir when the pot is put in place. I also cover the drainage hole with a piece of screen wire (you can purchase packs of these on Amazon) this keeps the soil from falling into your water reservoir. Fill the pot with potting soil and plant your African violet as you would normally. You can then fill the reservoir with water. The wick will draw water up into the pot as required, keeping the soil consistently moist.

Advantages and Disadvantages of Wicking Pots

Wicking pots offer a number of advantages. They provide a consistent moisture level, reducing the risk of overwatering or underwatering. This system also prevents water from contacting the leaves, avoiding water spots. Another benefit is the convenience; with a sufficiently large reservoir, your plant can be left unattended for several days without needing a refill. However, wicking pots also come with disadvantages. They often require more initial setup and potentially more maintenance than other watering methods. Wicking pots also risk salt and mineral build up, as these are not flushed out during the watering process. It’s also crucial to monitor the reservoir water closely to prevent it from becoming stagnant, which could lead to root rot and other diseases. Therefore, it’s important to regularly replace the water and clean the reservoir and wicking system.

This is my preferred method, I have between 30-50 AV plants at any given time. Every Saturday morning is watering day, I have AVs in my living room, bedroom and office and I alternate top watering and cleaning the reservoirs doing the office and bedroom on one Saturday and the living room-my largest collection on the next Saturday. One Saturday I just top water my violets and let the water run into the reservoir below, flushing out the excess salt in the soil. The follow Saturday I empty and clean all the reservoirs, this removes any built up salt in the reservoir or any algae growth that may have started. I also use water from the tap, I fill 3 one gallon containers 24 hours before and then before watering I add a couple tablespoons of hydrogen peroxide and AV fertilizer to each gallon container.

How to Set Up Capillary Matting

Capillary matting is another effective watering system utilized for African violets. To set up capillary matting, start by placing the mat on a flat, waterproof surface like a tray. The mat should be large enough that it can reach into a reservoir filled with water. Place your potted African violets directly onto the capillary matting. The mat will absorb water from the reservoir and deliver it to the pots sitting on it. You’ll need to ensure that the mat is always wet and the reservoir is consistently filled with water. The wicking action of the mat will provide a continuous supply of water to your plants.

Advantages and Disadvantages of Capillary Matting

Capillary matting offers a number of advantages. It provides a consistent supply of water to the plants, reducing the risk of both underwatering and overwatering. Similar to wicking pots, this method prevents water from directly touching the leaves, thus avoiding water spots. Capillary matting is also very convenient for watering multiple African violets at once. However, capillary matting also has its fair share of disadvantages. It requires regular monitoring to ensure the mat stays wet and the reservoir is filled. There can be a risk of salt and mineral buildup in the soil over time as the excess salts are not flushed out. Additionally, if not properly maintained, the water in the reservoir can become stagnant and manifest disease-causing organisms. Therefore, it’s important to regularly replace the water and clean the reservoir and matting system.

Ceramic African Violet Self-Watering Pots: How to Use

African Violets

Ceramic self-watering pots for African violets combine functionality with aesthetics. These pots come with a built-in reservoir at the bottom. To use these pots, first fill the reservoir with water. The soil in the pot will absorb water from the reservoir as needed, utilizing wick action to keep the soil consistently moist. It’s important to monitor the water level in the reservoir and refill it when it gets low. 

Advantages and Disadvantages of Using Ceramic Self-Watering Pots

The advantages of using ceramic self-watering pots for African violets are numerous. Firstly, they provide a consistent supply of water to the plant, reducing the risk of overwatering and underwatering. Secondly, they add visual appeal to your collection. These pots come in various designs, colors, and styles that can complement your decor. Thirdly, they offer great convenience. With a sufficiently large built-in reservoir, you can leave your plant unattended for several days without needing a refill, making them great for busy plant enthusiasts or those who travel frequently.

However, there are also some disadvantages to using ceramic self-watering pots. These pots can be more expensive than traditional pots, adding to your overall expenses. Additionally, like wicking pots and capillary matting, they also risk salt and mineral build-up in the soil over time, as the water is not flushed out of the soil regularly. This means you’ll need to pay extra attention to the soil quality. Lastly, because the water reservoir is built into the pot, it can be challenging to check the soil moisture levels without a moisture meter. Therefore, it’s important to regularly monitor your African violets for signs of overwatering or underwatering to ensure their health and vitality.

The inner pots will require periodic cleaning, if you notice the water is not absorbing from the out pot and your soil is dry then it might be time to clean. I have a few of these and I do it yearly when I repot to maintain and keep them clean. I clean the inner pot, then fill with 50/50 solution of white vinegar and water and let sit for 2-3 hours. Rinse thoroughly and repot your violet, this opens up the pores in the ceramic inner liner that can collect minerals and salt over time and the inner pot quits absorbing water.

Preferred Types of Water for African Violets 

When it comes to watering African violets, the type of water used can significantly impact the health of your plants. The most recommended type of water is rainwater. Rainwater is naturally soft and free from minerals that can build up in the soil, making it the ideal choice. 

If rainwater is not accessible, distilled or reverse osmosis water are excellent alternatives. Both types have undergone a purification process to remove minerals and other impurities, replicating the purity of rainwater. 

Tap water often contains chlorine and other chemicals that can harm the delicate roots of African violets. However, if tap water is your only option, it’s advisable to let it sit out for 24 hours before use. This allows the chlorine to evaporate, making the water safer for your plants. 

Lastly, avoid using softened water, as the sodium ions used in the softening process can harm African violets. Always ensure the water is at room temperature before watering to prevent shocking the plants. It’s important to remember that the wrong water type can lead to problems such as salt build-up in the soil and harm the overall health of your African violets.

Happy AV Gardening!

In summary, watering African violets properly is key to keeping them healthy and thriving. Whether you prefer watering from the top, bottom, capillary matting, or self-watering pots, always make sure to use the right type of water and avoid overwatering or underwatering. Each method has its own set of pros and cons, so choose the one that suits your lifestyle, budget, and plant’s needs. With the right watering technique and care, your African violets will reward you with stunning blooms all year round!

Please be sure to check out my Gardening Blog Post Page for more tips on all types of gardening. Including Seed Saving, Seed Starting, Orchids, Water Gardening, Coldframe Gardening, Indoor Bulb Gardening, Hydroponics, Container Gardening, Mums, Herbs, African Violets, planting Bulbs, Flower Gardening, Vegetable and Fruit Gardening, Indoor Houseplants of all kinds, Cactus, Succulents, Hanging plants, Deer resistant plants and even Bird, Bee, Butterfly and Hummingbird Gardens!

African Violet Light Requirements

african violet light requirements

African violets are a beautiful and popular houseplant that can be easily grown with the right care. Having the right light source is one of the most important factors for their growth. As they require a specific amount of light to thrive and bloom. However, with so many different types of light sources available. And it can be challenging to know which one is best for your African violets. In this post, we will identify the advantages and disadvantages of each type of light source. And then you can make an informed decision on the best African Violet light requirements for your AVs.

Also keep in mind not all African Violet varieties perform the same way in the same conditions. Different varieties have different genetic light requirements. Plants with darker leaves need more intense light than plants with lighter leaves. However there can be exceptions to that rule. 

Therefore your best option is to watch your Violets for signs they are receiving too little or too much light. African Violets receiving too little light will bloom sparsely. Their leaves will develop long stems, reaching upwards for light and the leaves will become thin and weak. Violets receiving too much light with have tight distorted leaf growth and will shows signs of leaf bleaching. Light green foliage will change to a pale yellow or near white color. While darker green foliage with change to a coppery brown with brittle leaf stems. Flower are usually smaller and some plants have leaves that pull down from the light source, hugging the sides of the pot.

African Violet Light Requirements – Natural Light

The most natural light source for African violets is sunlight. They thrive in a bright, sunny location. But they do not tolerate direct, intense sunlight. Direct sunlight can often cause the plant’s leaves to become scorched. Therefore, it’s best to provide filtered or indirect sunlight. Place the plant in an east, west or north-facing windowsill to provide good filtered light. However, keep in mind that the sun’s strength and angles change throughout the year. And you might have to rotate your plant regularly to keep it growing healthily. 

Tips for Growing in Natural Window Light

When growing African Violets in natural window light, there are a few important rules to keep in mind.

  1. Avoid Direct Sunlight – As mentioned earlier, African Violets do not tolerate direct sunlight well. Too much sun can cause their leaves to scorch, so it’s best to keep them in a spot that receives filtered or indirect sunlight.
  2. Choose the Right Window – Not all windows are created equal when it comes to providing the ideal light for your African Violets. East, west, or north-facing windows are generally the best options as they provide good filtered light. South-facing windows often get too much direct sunlight.
  3. Rotate the Plant Regularly – As the sun’s strength and angles change throughout the year, you will need to adjust your plant’s positioning. Regular rotation can ensure your plant gets even light exposure, promoting balanced growth.
  4. Use Sheer Curtains or Blinds – Even in the best window, there may be times when the sun is too strong. Consider using sheer curtains or blinds to help regulate the light intensity. These can be opened and closed as needed to provide your plants with the optimal amount of light.

Remember, African Violets are sensitive to their environment. The key to successfully growing them in natural window light is paying attention to their needs and adjusting their care accordingly.

African Violet Light Requirements – Fluorescent Lights

Fluorescent lights are a popular and economical light source for African Violets, especially those without the right window. Or those who want to grow on a larger scale. They are energy-efficient, produce only a small amount of heat. And they do not emit UV radiation that can damage the plant’s foliage. They are also available in full-spectrum grow-lights, which imitate natural sunlight. The only disadvantage of fluorescent lights is that they need to be placed directly above or close to the plant, so the plant gets adequate light. This means that you may need to purchase a lighting fixture to hold the bulbs and to adjust the height of the light source so that the plant gets the right intensity of light.

Tips for Growing under Fluorescent Lights

When growing African Violets under fluorescent lights, there are some key rules to follow to ensure the health and vibrancy of your plants.

  1. Distance – The distance between the African Violet and the fluorescent light source is crucial. Lights should be placed 10-12 inches above the plant. As this is the perfect distance to provide the necessary light concentration without causing leaf burn. 
  2. Duration – African Violets need about 10 to 12 hours of light each day. Therefore, if you’re using fluorescent lights, make sure to turn the lights off at night to mimic the natural day-night cycle. 
  3. Type of Bulb – Use full-spectrum or grow-light bulbs as they replicate the spectrum of natural sunlight most closely. This will provide your African Violets with a balanced light spectrum, promoting healthy growth and blooming.
  4. Rotation – Rotate your plants every few weeks to ensure all sides of the plants receive equal light exposure. This will promote even growth. Without rotation, plants tend to lean toward the light source, leading to uneven development.

Remember, if you observe any signs of distress in your African Violets such as leaf bleaching or weak growth. Then adjust the light intensity, distance, duration, or rotation accordingly. Consistent observation and care are the keys to successfully growing African Violets under fluorescent light.

African Violets Light Requirements – LED Grow Lights

LED (Light Emitting Diode) lights are a contemporary and energy-efficient lighting solution. Are available in full spectrum grow-lights. Consume very little energy and have a long lifespan. They also do not generate much heat and are safe to use around plants. LED lights are more expensive than fluorescent bulbs, but they consume less energy, and replacing them is less frequent. The LED lights are a good investment if you plan to grow a lot of violets. And they can also be set up so that you can control the amount of light they emit.

I have LED grow lights on a shelf in my kitchen that gets no sunlight so I can enjoy my violets while in the kitchen. I also have a LED grow light on a shelf in my entertainment center for my mini AV’s. The fox garden grow lights are the ones I use and they have an automatic timer, so they come on each morning at 7am and off at 7pm each night and my violets thrive and bloom consistently!

African Violet grow light

Tips for Growing under LED Grow Lights

  1. Distance – Similar to fluorescent lights, the LED light source should be properly distanced from the plant. It is generally recommended to keep the light about 12-16 inches above the plant. However, different LED lights have different intensities, so adjust the distance according to your specific light’s output. 
  2. Duration – The rule of 10 to 12 hours of light per day applies to LED lights as well. Make sure to turn the lights off for several hours each day to mimic the plant’s natural day-night cycle. Many LED lights come with built-in timers, making this easier to manage. 
  3. Type of Bulb – Opt for full-spectrum LED lights. These offer a balance of cool and warm light that replicates the natural solar spectrum, providing your African Violets with the light quality they need for photosynthesis. 
  4. Rotation – Just as with fluorescent lights, rotate your plants every so often to ensure all parts of the plants receive equal light exposure. 
  5. Adjustment – Keep a close eye on your violets for any signs of distress. LED lights can be quite intense, and their height or intensity may need to be adjusted accordingly. 

Remember, consistent monitoring and care are essential for successful growth of African Violets under LED lighting. The flexible control offered by LED lights enables you to provide the perfect lighting conditions for your violets to flourish.

Happy Gardening!

Choosing the right light source for your African violets is essential for their growth and health. Each type of light source has its advantages and disadvantages. The type of light you choose will depend on your gardening needs. You can keep your African violets healthy and happy by providing them with the right amount of light, and they’ll reward you with their beautiful blooms and foliage. Remember to check the amount of natural light available in your home and consider the cost, energy-efficiency and amount of light provided before purchasing the light source. With the information provided in this post, you’re better equipped to choose the right light source for your African Violets.

Please be sure to check out my Gardening Blog Post Page for more tips on all types of gardening. Including Seed Saving, Seed Starting, Orchids, Water Gardening, Coldframe Gardening, Indoor Bulb Gardening, Hydroponics, Container Gardening, Mums, Herbs, African Violets, planting Bulbs, Flower Gardening, Vegetable and Fruit Gardening, Indoor Houseplants of all kinds, Cactus, Succulents, Hanging plants, Deer resistant plants and even Bird, Bee, Butterfly and Hummingbird Gardens!