
Calendula, also known as pot marigold, is a cheerful and versatile flower that not only brightens up your garden but also offers herbal and culinary benefits. One of the best parts about growing calendula is that you can save seeds from your own plants year after year. Seed saving allows you to enjoy continuous blooms without buying new seed packets, and it also helps you grow plants that adapt perfectly to your garden conditions. Learning how to save calendula seeds is simple, cost-effective, and rewarding.
In this post, you will learn everything you need to know about calendula seed saving—from identifying mature seeds to harvesting, cleaning, and storing them for the next planting season.
Why Save Calendula Seeds?
Saving calendula seeds is more than just a way to save money. When you collect seeds from healthy plants in your garden, you create a cycle of resilience. Your plants will slowly adapt to your soil, climate, and growing practices. Over time, the flowers you grow will be stronger and better suited to your garden.
Calendula seeds are also easy to harvest compared to many other flowers. The seed heads are large, distinctive, and ready to collect without complicated cleaning or processing. By saving your own calendula seeds, you also ensure you have a steady supply for reseeding flower beds, container gardens, or sharing with friends.
When to Harvest Calendula Seeds
Timing is crucial when it comes to calendula seed saving. If you collect seeds too early, they may not be fully developed and will not germinate well. On the other hand, if you wait too long, the seeds may fall to the ground and self-sow before you can gather them.
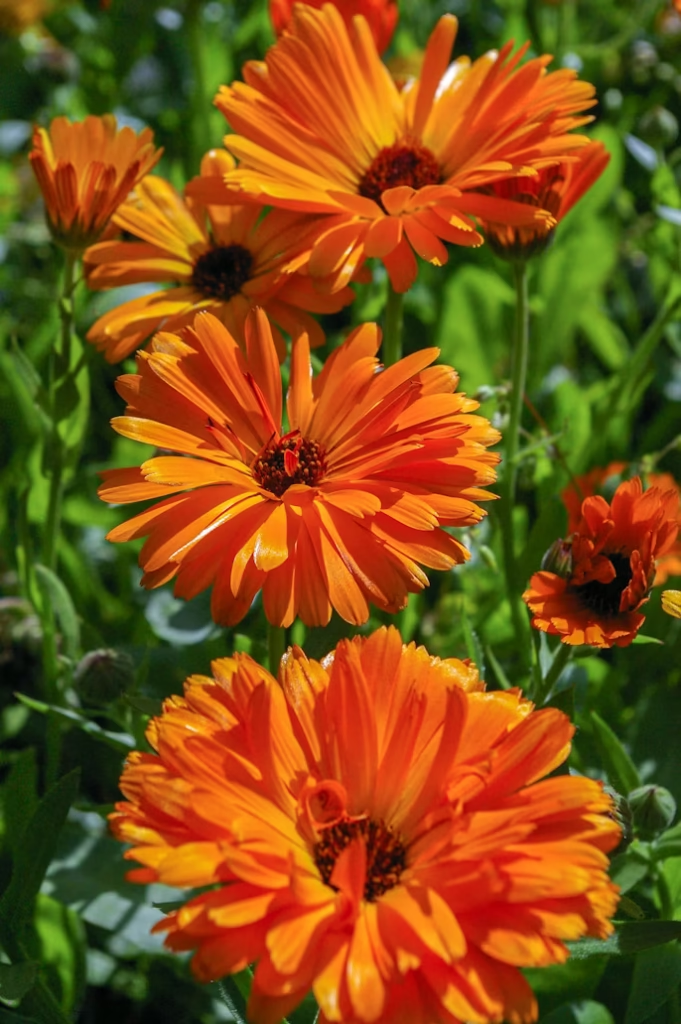
Calendula flowers produce seeds about four to six weeks after blooming. You will know the seeds are mature when the flower head dries up and the petals have fallen away. The seed head will turn brown, and the seeds will appear curled, ridged, and hard to the touch. Mature calendula seeds range in color from tan to dark brown and have a crescent moon shape.
How to Harvest Calendula Seeds
Once you spot dry seed heads, it’s time to harvest. Choose a dry day with no rain or dew, as moisture can cause mold during storage. Bring a small bowl, paper bag, or basket to collect the seed heads.
Gently pinch the dried seed heads off the plant with your fingers or use small scissors to snip them. Place them into your container as you work your way around the garden. It is best to harvest several heads at once to ensure you get enough seeds for future planting.
After gathering, spread the seed heads out on a paper towel or tray in a dry, well-ventilated place. Allow them to sit for about a week to finish drying. This step ensures the seeds do not retain moisture, which can lead to mold during storage.
Cleaning and Preparing Calendula Seeds
Once your calendula seed heads are completely dry, separate the seeds from the chaff. You can do this by gently rubbing the seed heads between your fingers to release the curled seeds. Remove any leftover flower debris, petals, or stems, leaving only the clean seeds.
This process not only makes the seeds easier to store but also helps prevent mold or pest problems. At this stage, take a moment to look over your seeds and remove any that appear shriveled, cracked, or discolored. Healthy calendula seeds are firm, ridged, and curved into their signature crescent shape.
Storing Calendula Seeds Properly
Proper storage is key to keeping calendula seeds viable until planting time. The main enemies of seed storage are light, heat, and moisture. To keep your seeds safe, place them in seed saving envelopes. Label the envelope with the plant name and the date of harvest so you remember what you saved and when.
Store the envelopes in an airtight container such as a glass jar or plastic storage box. Keep the container in a cool, dark, and dry place such as a basement, pantry, or closet. If you live in a humid climate, you can add a silica gel packet to absorb excess moisture.
When stored correctly, calendula seeds remain viable for up to five years, although the highest germination rates usually occur within the first two years.
How to Replant Saved Calendula Seeds
Saving calendula seeds is only the first step—you’ll also want to replant them in the next growing season. Calendula seeds can be sown directly into the garden or started indoors.
If sowing directly, plant the seeds in early spring once the soil can be worked. Scatter the seeds over well-prepared soil and lightly cover them with about ¼ inch of soil. Water gently and keep the soil moist until seedlings appear.
Calendula also grows well in containers, so you can sprinkle saved seeds in pots filled with fresh potting mix. Whether in garden beds or containers, space seedlings 8 to 12 inches apart for healthy growth.
Because calendula grows quickly, you can enjoy flowers as soon as six to eight weeks after planting. For continuous blooms, save seeds again each season and replant in succession throughout spring and summer.
Tips for Successful Calendula Seed Saving
To make the most of your seed-saving efforts, follow these practical tips:
- Select the healthiest plants: Always harvest seeds from strong plants that show vigorous growth, abundant blooms, and resistance to pests. This ensures the next generation is just as healthy.
- Leave some flowers for pollinators: Allowing blooms to stay on the plant helps bees and other beneficial insects while giving seeds time to mature.
- Harvest in stages: Not all calendula flowers set seeds at the same time. Check your plants regularly and harvest seed heads as they ripen.
- Keep seeds organized: If you grow more than one variety of calendula, label your envelopes clearly to avoid confusion.
By following these tips, you will create a strong seed bank for years of colorful and useful calendula blooms.
Common Mistakes to Avoid When Saving Calendula Seeds
Seed saving is simple, but a few common mistakes can reduce your success. Avoid these pitfalls for better results:
- Harvesting too early: Immature seeds will not sprout. Wait until seed heads are dry and brown.
- Storing seeds wet: Moisture is the number one cause of mold and rot. Always dry seeds thoroughly before storage.
- Forgetting to label seeds: Without labels, it’s easy to forget which seeds you saved or when they were harvested.
- Leaving seeds exposed: Storing seeds in open containers or in direct sunlight can shorten their lifespan. Always keep them in a cool, dark place.
Avoiding these mistakes helps ensure a high germination rate when you plant your saved seeds.
The Rewards of Calendula Seed Saving
Calendula seed saving offers lasting benefits for your garden. By collecting and storing seeds from your own plants, you not only save money but also create a cycle of growth that keeps your garden vibrant year after year. You’ll enjoy healthier plants, abundant flowers, and the satisfaction of self-reliance in your gardening.
Additionally, saved seeds give you the freedom to experiment with different planting areas, container arrangements, or even share seeds with other gardeners. The cycle of harvesting and replanting makes calendula a truly sustainable and enjoyable flower to grow.
Final Thoughts
Calendula is one of the easiest flowers for home gardeners to save seeds from. By learning how to recognize mature seeds, harvest them at the right time, dry them thoroughly, and store them properly, you can build a seed collection that will last for years. Each season, you can replant and enjoy waves of cheerful orange and yellow blooms while continuing the rewarding cycle of seed saving.
Whether you’re a beginner or an experienced gardener, calendula seed saving is a simple yet powerful way to make your garden more sustainable and self-sufficient. Start with a few seed heads this season, and you’ll soon have an endless supply of calendula seeds ready for planting.
Please be sure to check out my Gardening Blog Post Page for more tips on all types of gardening. Including Seed Saving, Seed Starting, Orchids, Water Gardening, Coldframe Gardening, Indoor Bulb Gardening, Hydroponics, Container Gardening, Mums, Herbs, African Violets, planting Bulbs, Flower Gardening, Vegetable and Fruit Gardening, Indoor Houseplants of all kinds, Bonsai, Cactus, Succulents, Hanging plants, Deer resistant plants and even Bird, Bee, Butterfly and Hummingbird Gardens!