
Saving heirloom tomato seeds is a rewarding practice that helps preserve unique flavors, vibrant colors, and cherished characteristics from season to season. By harvesting seeds from your favorite heirloom tomatoes, you can ensure that next year’s plants will produce tomatoes with the same qualities. Heirloom varieties bring incredible diversity and flavor to the garden, and saving seeds gives you a reliable and sustainable supply. Here’s how you can harvest, dry, and store heirloom tomato seeds for planting next year.
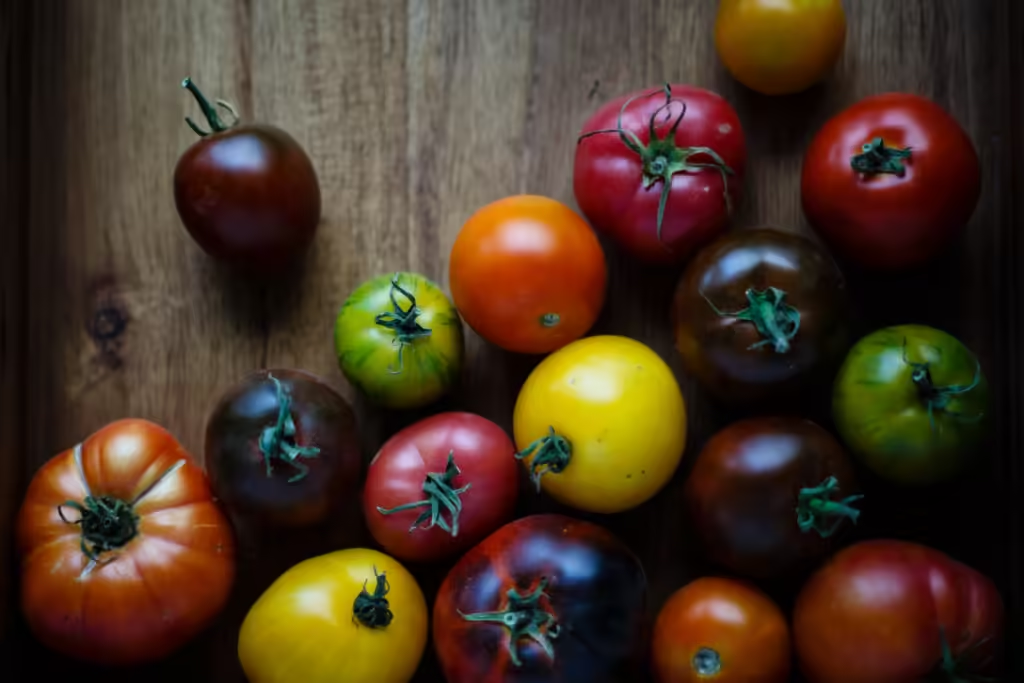
Choosing the Best Tomatoes for Seed Saving
Selecting the right tomatoes is a crucial first step for successful seed saving. When you choose an heirloom tomato variety, you’re opting for plants that are open-pollinated, meaning their seeds will produce offspring with the same characteristics as the parent plant. To ensure you get the best seeds, select tomatoes from healthy, vigorous plants with good fruit size, shape, and flavor. The goal is to preserve the most desirable traits, so focus on tomatoes with the qualities you want to see in next year’s harvest.
Allow tomatoes to fully ripen on the vine for the best seed quality. A tomato that has reached peak ripeness will have seeds with maximum maturity and viability. Look for deep, even coloring and firm, plump flesh. By choosing well-ripened, high-quality tomatoes, you’re setting up your seed-saving process for success and helping ensure a healthy crop in the coming season.
Harvesting Seeds from Heirloom Tomatoes
After choosing the best tomatoes, it’s time to harvest the seeds. Slice the tomato open to access the pulp and seeds. Heirloom tomato seeds are surrounded by a gel-like coating, which prevents them from sprouting inside the fruit. To successfully save these seeds, you’ll need to remove this coating through a fermentation process. Fermentation not only removes the gel but also kills off any potential pathogens, which can improve germination rates.
Scoop out the seeds and pulp and place them in a clean bowl or jar. Add a small amount of water to the container to help facilitate fermentation. Over the next couple of days, this mixture will ferment naturally. You may notice bubbles or a slight odor as the fermentation progresses; this is normal and indicates that the process is working. Stir the mixture occasionally to break up the pulp and release the seeds.
Benefits of Fermenting Tomato Seeds
Fermentation plays an important role in preparing tomato seeds for long-term storage. The gel around each seed contains compounds that inhibit germination, which is beneficial while the seeds are inside the tomato. However, once you’ve harvested them, removing this gel increases germination rates and helps prevent mold growth during storage. Fermented seeds also tend to germinate more uniformly, producing healthier plants overall.
When the fermentation process is complete, rinse the seeds thoroughly to remove any remaining residue. Pour the mixture through a fine-mesh strainer, discarding any floating seeds or bits of pulp. The viable seeds should settle at the bottom, and this careful rinsing will ensure that they are clean and ready for drying. By completing the fermentation process, you set your heirloom tomato seeds up for better germination success in the spring.
Drying Heirloom Tomato Seeds
Properly drying your tomato seeds is essential for long-term storage. After rinsing, spread the seeds out in a single layer on a paper towel, coffee filter, or a non-stick surface. It’s best to avoid using regular paper towels, as the seeds may stick to the fibers, making them harder to remove once dried. Arrange the seeds in a warm, well-ventilated area out of direct sunlight, which can reduce their viability. Ensuring good airflow around the seeds helps them dry evenly and prevents mold from forming.
Allow the seeds to dry completely, which usually takes around one to two weeks. During this time, check on them occasionally to make sure they’re drying uniformly. Dried seeds should feel hard to the touch and should not stick together. Once the seeds are completely dry, they’re ready for storage. Proper drying is crucial because any remaining moisture can lead to mold growth during storage, reducing the likelihood of successful germination next season.
Storing Heirloom Tomato Seeds for Longevity
Once your tomato seeds have dried, they’re ready for storage. Storing seeds correctly is crucial for keeping them viable until planting season. Place the dried seeds in airtight containers like small glass jars or I really like these seed packets, you can label each one with the variety and the date. This ensures you know exactly what you have and can keep track of each tomato type.
Store seeds in a cool, dark place, like a refrigerator or a dry pantry, where temperatures remain consistent. Temperature fluctuations and humidity can reduce seed viability, so stable storage conditions help ensure that your seeds remain usable when it’s time to plant them.
For extra protection against moisture, consider adding a silica gel packet to your storage container. This small addition helps absorb any residual humidity, ensuring your seeds remain dry and free from mold.
Why Save Heirloom Tomato Seeds?
Saving seeds from heirloom tomatoes not only provides a consistent source of seeds but also helps preserve unique plant varieties. Heirlooms often offer better flavor, color, and nutritional qualities compared to commercially bred tomatoes, and many gardeners prize them for these characteristics. By saving seeds from your favorite heirlooms, you’re contributing to biodiversity and maintaining genetic resources that might otherwise be lost.
Enjoy Seed Saving
With each growing season, your heirloom tomatoes will adapt more closely to your garden, resulting in stronger, healthier plants that deliver delicious, homegrown tomatoes. By following these steps for harvesting, drying, and storing heirloom tomato seeds, you’ll create a sustainable cycle that supports your garden and preserves heirloom varieties for future generations. So, save those seeds, and enjoy the bounty of your garden year after year.
Please be sure to check out my Gardening Blog Post Page for more tips on all types of gardening. Including Seed Saving, Seed Starting, Orchids, Water Gardening, Coldframe Gardening, Indoor Bulb Gardening, Hydroponics, Container Gardening, Mums, Herbs, African Violets, planting Bulbs, Flower Gardening, Vegetable and Fruit Gardening, Indoor Houseplants of all kinds, Cactus, Succulents, Hanging plants, Deer resistant plants and even Bird, Bee, Butterfly and Hummingbird Gardens!