
Saving coneflower seeds lets you enjoy these hardy, beautiful blooms year after year, often without needing to buy new seeds. By harvesting, drying, and storing seeds correctly, you can create a collection of coneflower seeds ready for next season’s planting. Not only does this save money, but it also ensures you get plants well-suited to your garden’s unique environment. In this post, you’ll learn all about harvesting, drying, and storing coneflower seeds, so you can expand your garden and enjoy these lovely flowers for seasons to come.
Harvesting Coneflower Seeds
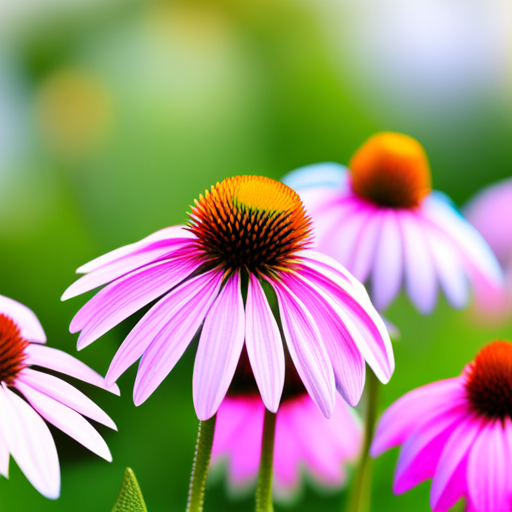
Harvesting coneflower seeds begins with timing and observing the plant carefully. Coneflowers bloom in late spring to early fall, and the flowers need to dry out on the plant before the seeds are ready to harvest. Wait until late in the growing season when the coneflower heads have fully matured and turned brown. This change signals that the seeds are ready. It’s tempting to pluck the flowers while they’re still colorful, but patience pays off as mature seeds have a better chance of sprouting successfully next season.
To harvest the seeds, choose a dry day. Rain or dew can affect the quality of the seeds, so waiting for a dry period is essential. As you inspect the brown, withered flower heads, gently cut them off the plant using clean, sharp scissors or garden shears. Be sure to leave a few flowers behind for the bees, butterflies, and other beneficial pollinators that rely on coneflowers for late-season nectar. Having pollinators in your garden supports a balanced ecosystem, which benefits your entire garden.
Once you have gathered the flower heads, bring them indoors to remove the seeds. Sit at a table with a paper bag, container, or a clean paper towel for catching the seeds. With a gentle twist of the dried flower head, the seeds will start to loosen and fall. Coneflower seeds look like small, dark grains with a slight tapering shape, often with tiny bristles. Removing the seeds from the flower head may leave bits of chaff and other plant material mixed in, but you can separate them later to ensure only healthy seeds remain.
Drying Coneflower Seeds
Drying is an important step that helps prevent mold and ensures the seeds remain viable for next year. To dry coneflower seeds properly, spread them out in a single layer on a clean surface such as a paper towel, newspaper, or a mesh screen. Choose an area indoors where they’ll be safe from moisture and direct sunlight. Air drying works best for coneflower seeds, as exposure to excessive heat or sunlight can reduce their quality and hinder germination.
As you lay out the seeds, make sure they don’t overlap. Good air circulation around each seed helps them dry evenly. Depending on the humidity in your area, drying can take between one to two weeks. If the air is more humid, allow extra drying time to ensure all moisture evaporates completely. This will prevent issues when storing the seeds, as moisture left in the seeds can lead to mold growth, ruining your harvest.
You’ll know the seeds are fully dry when they feel hard and slightly brittle to the touch. A simple test involves trying to break one of the seeds with your fingernail. If it feels firm and doesn’t bend or dent easily, the seeds are ready for storage. Proper drying also keeps them from clumping together in storage, which helps with easy planting next season.
Storing Coneflower Seeds for Next Season
Once your coneflower seeds have dried, they’re ready for storage. Storing seeds correctly is crucial for keeping them viable until planting season. Place the dried seeds in airtight containers like small glass jars or I really like these seed packets, you can label each one with the variety and the date. This ensures you know exactly what you have and can keep track of each coneflower color.
Store seeds in a cool, dark place, like a refrigerator or a dry pantry, where temperatures remain consistent. Temperature fluctuations and humidity can reduce seed viability, so stable storage conditions help ensure that your seeds remain usable when it’s time to plant them.
For extra protection against moisture, consider adding a silica gel packet to your storage container. This small addition helps absorb any residual humidity, ensuring your seeds remain dry and free from mold.
Planting Your Saved Coneflower Seeds Next Year
When spring arrives, your stored coneflower seeds are ready to be planted. The best time to start them depends on your local climate. In cooler regions, consider sowing seeds indoors several weeks before the last frost date, which gives the seedlings a head start. For warmer climates, direct sowing outdoors after the last frost date works just as well.
To ensure a good start, plant your coneflower seeds in well-draining soil enriched with compost. Choose a sunny spot in your garden, as coneflowers thrive in full sun and grow best in a sunny location. Space the seeds at least a foot apart to allow room for each plant to grow. With some patience and care, your stored seeds will sprout into vibrant plants, filling your garden with their stunning blooms and attracting pollinators all season long.
Happy Seed Saving!
Saving coneflower seeds is a rewarding way to expand your garden sustainably. By following these steps for harvesting, drying, and storing, you can grow healthy plants every year and enjoy the unique beauty coneflowers bring to your outdoor space. This simple practice lets you connect with the plant’s full life cycle, turning a single growing season into many more, with each bloom serving as a reminder of your successful seed-saving efforts.
Please be sure to check out my Gardening Blog Post Page for more tips on all types of gardening. Including Seed Saving, Seed Starting, Orchids, Water Gardening, Coldframe Gardening, Indoor Bulb Gardening, Hydroponics, Container Gardening, Mums, Herbs, African Violets, planting Bulbs, Flower Gardening, Vegetable and Fruit Gardening, Indoor Houseplants of all kinds, Cactus, Succulents, Hanging plants, Deer resistant plants and even Bird, Bee, Butterfly and Hummingbird Gardens!