
Saving butternut squash seeds is a fantastic way to keep your garden going year after year. By following a few simple steps, you can harvest, dry, and store seeds from your squash that will remain viable until planting season next year. This process is budget-friendly and lets you grow a variety you already know and love. Here’s a guide on how to harvest, dry, and store butternut squash seeds, so they’re ready for planting next year.
Harvesting Butternut Squash Seeds
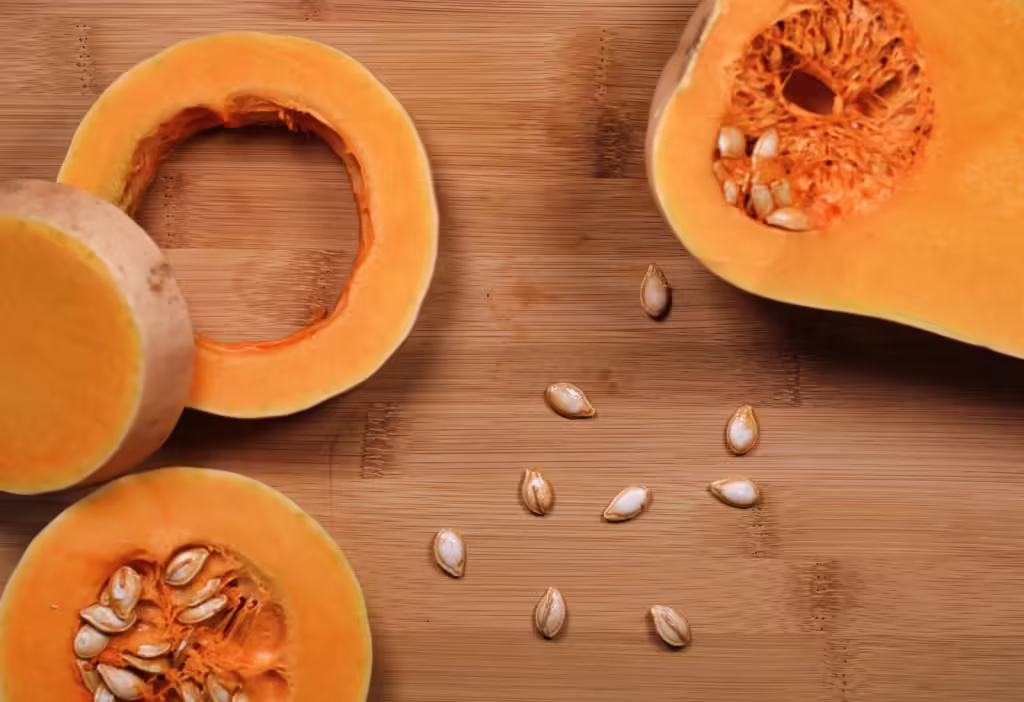
Start by selecting a fully ripe butternut squash. Ripe squash produce seeds with the best chance of sprouting and growing healthy plants. A ripe butternut squash has a hard, tan-colored skin and a smooth texture. Check the skin by pressing a fingernail against it—if it resists and feels firm, the squash is ready to harvest for its seeds.
Cut the butternut squash open carefully with a sharp knife, slicing it lengthwise to expose the seeds inside. As you cut, take care not to damage the seeds, as broken seeds are unlikely to germinate. Once you’ve cut the squash in half, you’ll find the seeds nestled in the cavity. Scoop out the seeds and pulp with a spoon or your hands.
Next, separate the seeds from the pulp. This step can take a bit of patience, but it’s worth it to ensure clean, viable seeds. Place the seeds in a colander or bowl of water, which helps loosen the pulp and makes it easier to remove. As you work, rub the seeds gently to dislodge any remaining squash flesh.
Choosing the Best Seeds
Once you’ve removed most of the pulp, lay the seeds on a paper towel or cloth and sort through them. Selecting high-quality seeds makes a big difference in the health and productivity of your plants next year. Look for seeds that are plump, firm, and evenly shaped. Discard any seeds that appear flat, shriveled, or damaged.
You don’t need to keep every seed you harvest. Butternut squash produce a large number of seeds, so save only the best ones. Plan to keep one or two seeds for each planting spot in your garden, plus a few extras in case some seeds don’t sprout. Once you’ve chosen your seeds, rinse them once more to ensure they’re as clean as possible before drying.
Drying Butternut Squash Seeds
Drying the seeds thoroughly prevents mold growth and keeps the seeds viable until planting season. Spread the seeds out on a clean, dry paper towel, cloth, or baking sheet lined with parchment paper. Make sure the seeds aren’t touching, as this helps them dry evenly. Find a location with good airflow, such as a windowsill or countertop, but avoid direct sunlight, as it can damage the seeds.
Leave the seeds to dry for about one to two weeks. Turn them every few days to ensure all sides dry completely. You’ll know the seeds are fully dry when they feel hard and crisp. Properly dried seeds will store well and stay viable for longer, so be sure they’re thoroughly dried before moving on to storage.
Storing Butternut Squash Seeds
Once the seeds are completely dry, it’s time to store them in a way that keeps them viable for the next several months. Place the dried seeds in a paper envelope or small paper bag. Write the date and type of squash on the envelope to keep track of the variety and harvest time. Paper works well because it allows any residual moisture to escape, preventing mold growth. Avoid storing seeds in plastic bags, which can trap moisture and lead to mold issues.
Store the envelope in a cool, dark, and dry place. A basement, closet, or cabinet works well for seed storage, as long as the temperature stays consistently cool, around 50-60°F. Keeping the seeds away from light, moisture, and heat ensures they remain dormant and ready to sprout when the planting season arrives.
If you want extra protection, place the paper envelope inside an airtight container or glass jar. Adding a small silica gel packet can help absorb any lingering moisture and further protect the seeds. With this setup, your seeds will be well-protected and ready to grow when you need them.
Planting Your Butternut Squash Seeds Next Season
When it’s time to plant your seeds in the spring, consider testing their viability first. Place a few seeds on a damp paper towel, fold it, and seal it in a plastic bag. Keep the bag in a warm spot, checking for sprouting after about a week. If most of the seeds sprout, you’re good to go for planting.
To plant your seeds, choose a sunny area in your garden with well-draining soil. Butternut squash plants need space, so plan for about 3-5 feet of room per plant. Dig small holes about an inch deep and place one or two seeds in each hole, covering them lightly with soil. Water the area gently to start the seeds off well.
As the seedlings grow, thin them to one plant per spot to ensure each plant has enough room and resources. Water the plants regularly, especially during hot and dry periods, and keep an eye out for pests. With proper care, your saved butternut squash seeds will grow into a productive crop by fall.
For more in depth post on growing butternut squash just click here.
Tips for Saving Butternut Squash Seeds
- Avoid Hybrid Seeds: If you want to save seeds that grow true to the parent plant, choose heirloom or open-pollinated butternut squash varieties. Hybrid seeds may not produce plants that resemble the original squash.
- Label Clearly: Mark your saved seeds with the variety name and harvest date to avoid any mix-ups and to help you track seed viability over time.
- Consider Companion Planting: Butternut squash grow well alongside certain plants, like corn and beans. Companion planting can improve pollination and reduce pest problems.
- Saving Seeds from Other Squash Varieties: If you grow other types of squash, be mindful of cross-pollination, as squash plants in the same species can cross-pollinate. If you’re saving seeds from multiple squash varieties, plant them far apart to keep the seeds true to type.
Benefits of Saving Butternut Squash Seeds
Saving your own butternut squash seeds offers numerous benefits beyond the savings. You’ll have a direct connection to your plants, knowing the care you’ve put into them from one season to the next. Plus, you can select seeds from plants that performed well in your specific garden conditions, creating a more resilient crop over time.
Saving seeds also supports biodiversity and reduces reliance on commercial seed sources. By saving seeds from your garden, you help preserve heirloom varieties and contribute to a more sustainable gardening practice. Whether you’re an experienced gardener or just starting, seed-saving adds a meaningful dimension to your gardening journey.
With these simple steps, you’ll have butternut squash seeds that are well-prepared for storage and planting. By harvesting, drying, and storing your seeds correctly, you set yourself up for a successful planting season next year.
Please be sure to check out my Gardening Blog Post Page for more tips on all types of gardening. Including Seed Starting, Orchids, Water Gardening, Coldframe Gardening, Indoor Bulb Gardening, Hydroponics, Container Gardening, Mums, Herbs, African Violets, planting Bulbs, Flower Gardening, Vegetable and Fruit Gardening, Indoor Houseplants of all kinds, Cactus, Succulents, Hanging plants, Deer resistant plants and even Bird, Bee, Butterfly and Hummingbird Gardens!