
Are you a vegetable lover who wants to grow their own produce? If yes, then kale is a great option to start with. Not only is it a nutrient-packed plant, but it is also easy to grow, and requires minimal maintenance. Whether you are an experienced gardener or a newbie, growing kale is an excellent way to harvest fresh and healthy greens in your backyard. Today, we bring you a complete guide on how to plant and grow kale, covering everything from soil preparation, planting, and harvesting tips.
Preparing the Soil
Before you introduce kale seedlings to your garden, the key to a successful kale crop lies in soil preparation. Kale prefers a well-draining soil rich in organic matter. Begin by choosing a sunny spot, as kale thrives with at least 6 hours of sunlight a day. Clear the area of weeds, rocks, and debris, then work the soil with a garden fork or a tiller to about 12 to 15 inches deep to promote good root development. Mix in a generous layer of well-rotted compost or aged manure to enrich the soil with essential nutrients. Lastly, ensure the soil pH is between 6.0 and 7.0, as this is the ideal range for growing kale. A pH test can determine if any adjustments need to be made, such as adding lime to increase the pH or sulfur to decrease it. You can use this soil meter to test moisture levels along with monitoring nutrients in your soil and the pH levels.
Sunlight Requirements
Kale is a bit of a sun worshipper and responds best to plenty of sunlight. For optimal growth, aim to plant where the kale will receive a minimum of 6 hours of direct sunlight daily. The ideal condition is a spot that enjoys full sun exposure, although kale can tolerate partial shade. Remember, plants grown in too much shade tend to be less robust and more prone to pests and diseases. Therefore, ensuring adequate sunlight can lead to healthier plants and a more bountiful harvest.
Planting Kale
Once your soil is fully prepared and you’ve found the perfect sunny spot, it’s time to plant your kale. You can start kale from seeds or seedlings. If you’re starting from seeds, plant them about 1/4 to 1/2 inch deep into well-moistened soil. Space the seeds approximately 3 inches apart in rows, with each row spaced 12 to 18 inches apart to allow for growth and airflow. For those opting for seedlings, transplant young plants to the garden when they have 3 to 4 true leaves. Plant them at the same depth they were growing at in their containers. Water the plants thoroughly after planting and maintain consistent soil moisture throughout the growing season. Mulching around your kale can help retain soil moisture and regulate temperature, as well as suppress weeds that can compete with your plants. Keep in mind that kale planted in cooler temperatures will produce sweet-tasting leaves, as the cold environment enhances the sugar content in the plant.
Watering and Nutrition
Water is vital for kale’s growth, particularly in the germination and early seedling stages. Aim to keep the soil consistently moist but not waterlogged. Often, 1 to 1.5 inches of water per week, whether from rainfall or manual watering, is sufficient. Water the plants early in the day so the foliage has time to dry out, reducing the risk of fungal diseases.
Along with proper watering, nourishing your kale plants is crucial. An application of organic fertilizer can promote healthy, leafy growth. Opt for a balanced liquid fertilizer or a slow-release granular type with equal parts nitrogen, phosphorus, and potassium. Apply according to the product’s recommendations, typically once every 4-6 weeks. This regular feeding schedule, combined with organic compost, will ensure your kale gets the essential nutrients it needs to thrive.
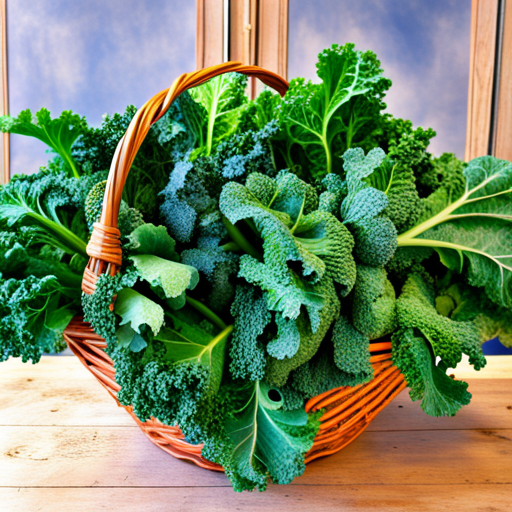
How and When to Harvest Kale
Kale is ready for harvest when the leaves are the size of your hand, typically 55 to 65 days after planting for most varieties. Begin harvesting the outermost leaves first, working your way inward over time so the plant continues to grow and produce. Make sure to cut the leaves off with a sharp knife or scissors about one inch above the stem to encourage continued growth and prevent damage to the plant’s center.
Harvesting kale in the morning will yield the most tender and flavorful leaves since the plants are fully hydrated from the cooler night air. It’s also beneficial to harvest before the leaves become too old and tough, which can negatively impact flavor. Moreover, if you continue to harvest regularly, kale plants can continue to produce well into late fall or even through mild winters in some areas. Remember, a light frost can sweeten the leaves, so don’t hurry to harvest the entire plant before the temperature drops. Instead, use this natural occurrence to your advantage for a tastier crop.
Happy Gardening!
Growing kale in your backyard is easy and rewarding. By following these simple tips on how to plant and grow kale, you can enjoy nutrient-rich kale all year round. Remember, kale grows best in fertile, well-draining soil, requires regular watering and feeding, and needs protecting from pests and diseases. Start planting kale today, and enjoy the fresh taste and nutritional benefits of this wonderful vegetable.
Please be sure to check out my Gardening Blog Post Page for more tips on all types of gardening. Including Seed Starting, Orchids, Water Gardening, Coldframe Gardening, Indoor Bulb Gardening, Hydroponics, Container Gardening, Mums, Herbs, African Violets, planting Bulbs, Flower Gardening, Vegetable and Fruit Gardening, Indoor Houseplants of all kinds, Cactus, Succulents, Hanging plants, Deer resistant plants and even Bird, Bee, Butterfly and Hummingbird Gardens!