
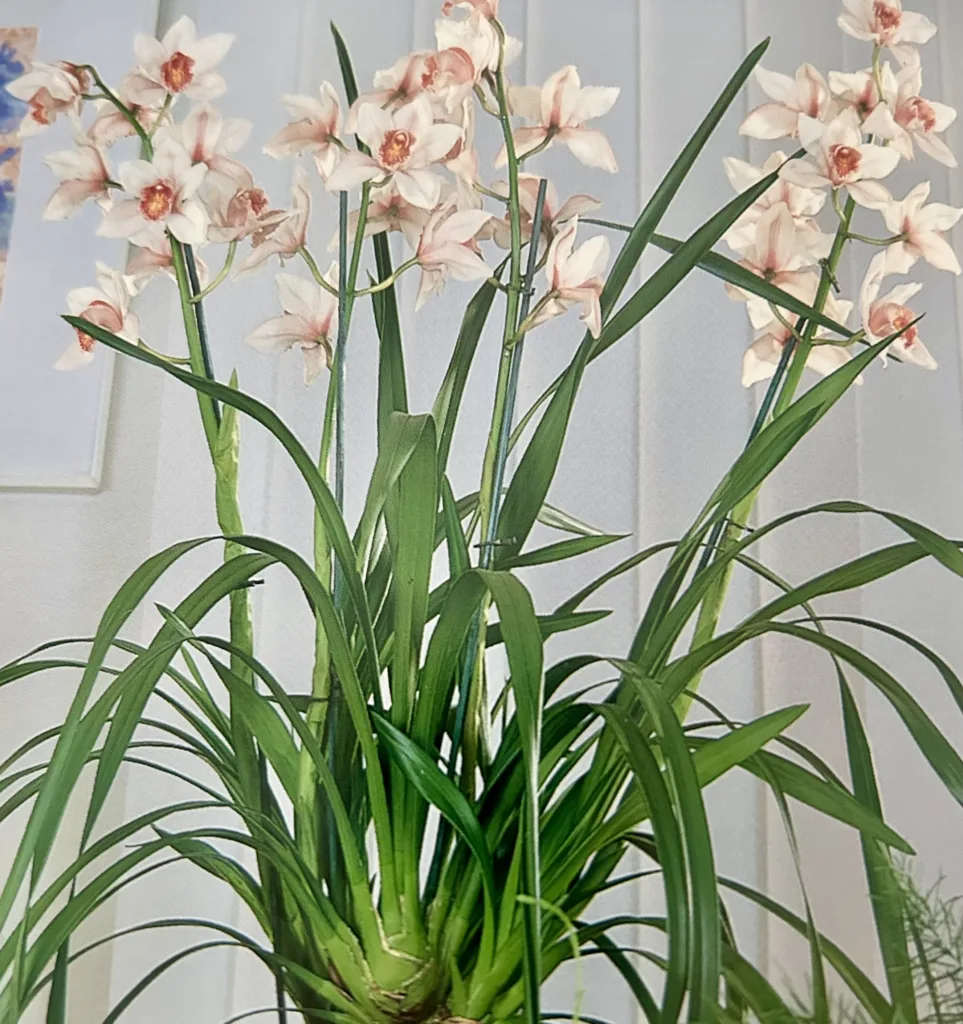
Cymbidium Orchids, are renowned for their vibrant colors and striking flower spikes, which can carry up to 15 or more flowers. They bloom during the winter and early spring, bringing a welcome splash of color during the colder months. Originating from the cool climate regions of Asia and Australia, Cymbidium Orchids are typically terrestrial, meaning they naturally grow in the ground rather than on tree trunks or rocks. These orchids have strappy leaves and a sympodial growth habit, forming new pseudobulbs along the rhizome each growing season. Each pseudobulb can produce new blooms year after year, making Cymbidium Orchids a long-lasting addition to your garden. In this blog, we will discuss everything you need to know about how to grow Cymbidium Orchids, including the soil, pot, light, humidity, water, and fertilizer requirements.
Best Pot Type for Cymbidium Orchids
When it comes to selecting a pot for your Cymbidium Orchids, choose a container that will accommodate the size and growth pattern of the orchid. A pot that is too small may restrict the root development, while a pot that is too large may cause the soil to remain overly wet, leading to root rot. A perfect pot for a Cymbidium Orchid is a medium-sized pot with adequate drainage holes. Clay or terracotta pots are often recommended because they allow the roots to breathe and provide a well-draining environment. These pots also have the added benefit of being heavier, which can prevent larger, top-heavy orchids from tipping over. Remember to repot your Cymbidium Orchid once every two to three years for optimal health and growth.
Growing Medium for Cymbidium Orchids
Cymbidium Orchids require a well-draining growing medium to thrive. A mixture of bark, perlite, and peat moss is commonly used, providing excellent drainage while also retaining enough moisture to keep the roots hydrated. Bark is particularly beneficial as it mimics the orchid’s natural environment and allows for adequate air circulation around the roots. Perlite helps to improve drainage and prevent water-logging, while peat moss retains moisture and provides some nutrients. Orchid-specific potting mixes are also available on the market, which often contain a blend of these elements. Always ensure that the growing medium is fresh and free from disease when repotting your orchid. Changing the potting mix every two to three years during repotting will help to maintain the health and vigor of your Cymbidium Orchid.
Light and Humidity Requirements for Cymbidium Orchids
Cymbidium Orchids prefer bright, indirect light. Too much direct sunlight can scorch the leaves, while too little light can inhibit blooming. Therefore, a location near an east or west-facing window would be ideal. For those growing orchids indoors or in areas with less natural light, grow lights can be an effective solution. Fluorescent grow lights or LED lights with a balanced spectrum are commonly used. These lights should be placed 12-18 inches above the orchids, providing 10-12 hours of light per day.
As for humidity, Cymbidium Orchids thrive in a humid environment, ideally around 40-60%. If you live in a dry region, consider placing a humidity tray under your orchid or using a room humidifier to maintain the desired humidity level. Regular misting can also help, but avoid wetting the flowers as this can lead to disease. Always remember, good air circulation is crucial to prevent humidity-related problems such as fungal and bacterial diseases. Use a fan set on low or simply open a window, keeping an eye on temperature, as these orchids prefer cooler conditions.
Water and Fertilizer Requirements for Cymbidium Orchids
Cymbidium Orchids require ample water, especially during their active growth phase in the spring and summer. The key is to water thoroughly, ensuring the growing medium is completely saturated, and then wait until the top inch of the soil becomes dry before watering again. Over-watering can lead to root rot, so it’s essential to avoid keeping the potting mix constantly wet. In the cooler months, reduce the watering frequency as the orchids enter their rest period.
Fertilization is another crucial aspect of Cymbidium Orchid care. Feed them with a balanced orchid fertilizer every two weeks during the active growth phase. In the fall, to encourage blooming, switch to a high-potassium fertilizer. Always remember to water your orchids before fertilizing to avoid root burn. During the winter months, you can reduce the fertilization to once a month. Following these watering and fertilizing guidelines will help your Cymbidium Orchids to flourish, ensuring a spectacular display of blossoms year after year.
Post-Blooming Care for Cymbidium Orchids
After the Cymbidium Orchids have finished blooming, a slight change in care routine is necessary to ensure their continued health and subsequent bloom cycles. Firstly, remove the spent flower spikes to divert the energy back into the plant. Use sterilized shears or a sharp knife to cut the spike close to the base without damaging the pseudobulb. This is also the perfect time to repot the orchid if it is outgrowing its container or if the potting mix is breaking down, typically every two to three years.
Post-bloom is also the time to start a reduced watering schedule. Wait until the top inch of the potting mix is dry before rewatering. Overwatering at this stage can lead to root rot. During this rest period, reduce the frequency of fertilization to once a month using a balanced orchid fertilizer.
Remember to maintain the light, temperature, and humidity requirements as before. Gradually acclimate your orchid to a brighter location if it was previously in a darker spot during blooming. This will aid in the photosynthesis process, helping your orchid to build up reserves for the next blooming cycle.
Continuing to care for your Cymbidium Orchids even after they have finished blooming will help them to remain healthy and vibrant, ready for the next blooming cycle. Each stage of the orchid’s life cycle is crucial, and understanding its requirements will ensure a beautiful display of blossoms year after year.
Propagating Cymbidium Orchids
Propagation of Cymbidium Orchids is often done through division, which is best performed in the spring after the plant has finished blooming. To divide your orchid, carefully remove it from the pot and gently shake off any loose potting mix. Using sterilized garden shears, cut through the rhizome, ensuring each division has at least three to four pseudobulbs. Each pseudobulb is a future growth point and will contribute to the plant’s success.
After division, repot each section into its new pot filled with fresh orchid potting mix. Ensure the pseudobulbs are sitting at the top of the potting mix, slightly above the surface. Water thoroughly, then allow the top inch of the potting mix to dry out before watering again.
Remember to place the newly potted orchids in a location with bright, indirect light and maintain the required humidity levels. The care for these new plants will follow the same routine as for established Cymbidium Orchids. With careful attention and proper care, these new plants will mature and start blooming in their own time, expanding your beautiful Cymbidium Orchid collection.
Happy Orchid Gardening!
Caring for and propagating Cymbidium Dancing Boat Orchids may seem overwhelming at first, but once you have learned the basics, this stunning plant can be a joy to grow. Remember to provide well-draining soil, bright but indirect light, high humidity, infrequent but deep watering, and regular fertilization to keep your plant healthy and thriving. If you decide to propagate your plant, do so through division rather than water propagation. With these simple tips, you’ll be enjoying the beauty of Cymbidium Dancing Boat Orchids in no time.
Please be sure to check out my Gardening Blog Post Page for more tips on all types of gardening. Including Seed Saving, Seed Starting, Orchids, Water Gardening, Coldframe Gardening, Indoor Bulb Gardening, Hydroponics, Container Gardening, Mums, Herbs, African Violets, planting Bulbs, Flower Gardening, Vegetable and Fruit Gardening, Indoor Houseplants of all kinds, Cactus, Succulents, Hanging plants, Deer resistant plants and even Bird, Bee, Butterfly and Hummingbird Gardens!