
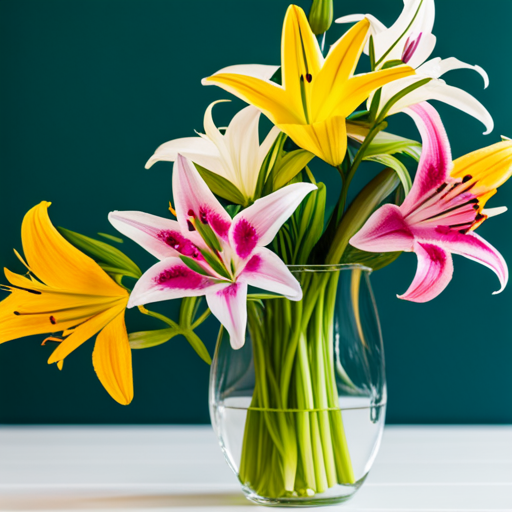
Day Lilies are beloved for their gorgeous blooms, vibrant colors, and pleasant fragrance. Whether you’re an experienced gardener or just starting off, growing Day Lilies can be a delightful and rewarding experience. However, like any other plant, Day Lilies have specific needs and requirements that must be met if they are to thrive and flourish. In this blog post, we’ll explore some essential tips and tricks for how to grow Day Lilies, including soil type, planting depth, water, light, and fertilizer needs. I had a cousin who grew hundreds of different types of Day Lilies and every time he came to our home he brought me 20-30 bulbs. I had multiple flower beds with every color of Day Lily you could imagine-this is when we lived in Indiana. We moved to Florida 15 years ago and I frequently remember with fondness my lily beds!
Zone Type for Day Lilies
Before you plant your Day Lilies, it’s essential to understand the zone type they thrive in. Lilies are generally hardy and adaptable, but they prefer zones 3 to 8 in the United States Department of Agriculture’s Plant Hardiness Zone Map. This map provides a guide to the average annual extreme minimum temperatures at a given location.
In these zones, Day Lillies can handle the seasonal temperature fluctuations and will bloom beautifully during the warm months. They need a cold, dormant period in winter for optimal growth, which is why they thrive best in these specific zones. If you live outside these zones, don’t be discouraged. With a little extra care and attention, lilies can still grow and flourish. Keep in mind that you may need to overwinter the lily bulbs indoors if your area experiences extreme winters or intense heat during summer. Remember, understanding your zone type is the first step to successful lily gardening.
Preparing Your Soil for Day Lilies
The next step in successful lily gardening is soil preparation. Lillies prefer well-draining soil. Heavy clay or sandy soil is not ideal for these plants as it either retains too much water or not enough, both can be detrimental to lily growth.
To prepare your soil, begin by turning it over with a garden fork or tiller to a depth of about 12 inches. This helps to loosen the soil, improving drainage and making it easier for the lily roots to penetrate.
Next, check your soil’s pH. Lilies prefer a slightly acidic to neutral pH, between 6.0 and 7.0. If your soil is too acidic or alkaline, you can adjust it by adding lime (to raise pH) or elemental sulfur (to lower pH).
Lastly, enrich your soil with organic matter, like compost or well-rotted manure. This not only improves soil structure and drainage but also provides essential nutrients for the lilies. Spread a 2- to 3-inch layer of organic matter over your soil and work it in thoroughly.
In conclusion, preparing your soil appropriately is a crucial step in ensuring your lilies will grow healthy and produce their characteristic vibrant, fragrant blooms.
How Deep to Plant Day Lily Bulbs
When it comes to planting lily bulbs, depth is crucial. As a general rule, lily bulbs should be planted at a depth of approximately three times their height. For most bulbs, this usually equates to a depth of about 6 to 8 inches below the soil surface.
Start by digging a hole to the required depth. Place the bulb in the hole with the pointy end facing up. This is the end from which the stem will grow. If you’re unsure which end is which, look for the remnants of last year’s stem or, in the case of a new bulb, plant it on its side – the stem will find its own way up.
Once the bulb is in place, cover it with soil and firm the soil gently with your hand to remove any air pockets. Do not compact the soil too much; lilies prefer a light, well-drained soil that allows their roots to spread and grow.
Remember, the proper planting depth is essential to provide the bulbs with the right conditions to germinate and grow. Bulbs planted too shallowly may not root properly and can be more susceptible to cold damage. On the other hand, bulbs planted too deeply may struggle to emerge from the soil and flower. So, ensure you plant your lily bulbs at the appropriate depth to help them thrive and produce their beautiful, fragrant blooms.
Water Needs for Day Lilies
Lillies need consistent, but not excessive watering. Water your lilies thoroughly immediately after planting, and then keep the soil moderately moist during their growing season. Overwatering can lead to bulb rot, so it’s important to avoid waterlogged soil. In dryer climates or seasons, you may need to water more frequently.
Light Requirements for Day Lilies
Lillies thrive in full sun to partial shade. They need at least 6 hours of direct sunlight each day for optimal growth and bloom. However, in hotter climates, lilies appreciate some afternoon shade to protect them from intense, midday sun. Lilies planted in too much shade may become spindly and produce fewer, smaller blooms.
Fertilizer Needs for Day Lilies
Fertilizing lilies can help provide the nutrients they need for lush growth and vibrant blooms. Use a balanced, slow-release fertilizer at planting time, and then fertilize again when the lilies begin to break the ground in spring. Avoid high-nitrogen fertilizers as they can promote leaf growth at the expense of blooms. Always follow the manufacturer’s instructions for application rates.
By ensuring the right balance of water, light, and nutrients, you can help your lilies grow healthy and strong, producing abundant, fragrant blooms that bring beauty to your garden year after year.
Best Time of Year to Plant Day Lilies
Timing is, without a doubt, a crucial factor when it comes to planting lilies. Generally, the best time to plant lily bulbs is in the early spring or fall.
If you’re planting in the spring, ensure to do so as soon as the threat of frost has passed. This gives the bulbs plenty of time to establish roots before the hot summer weather arrives. It’s also important to remember that lilies planted in the spring may not bloom until the following year.
On the other hand, if you choose to plant in the fall, do so about six weeks before the first expected frost. This allows the bulbs to establish themselves just enough before they go dormant for the winter. Come spring, these fall-planted bulbs will be ready to burst into life and should produce blooms in the same year.
Regardless of when you choose to plant, remember to give your lilies the best start by preparing the soil appropriately, planting at the correct depth, and providing them with the care they need to thrive. Once successfully established, lilies can provide you with exquisite blooms for many seasons to come.
How to Divide Day Lily Bulbs
Dividing lily bulbs is a simple but crucial task that can help ensure the health and longevity of your lilies. It’s a process that helps promote more vigorous growth and bloom by preventing overcrowding, which can lead to reduced vitality and disease. The best time to divide lilies is in early spring or late fall, after the foliage has died back but before the ground has frozen.
Start by carefully digging around the clump of lilies with a garden fork or spade, trying not to harm the bulbs. Lift the bulbs out of the ground and gently shake off any excess soil.
Next, identify and separate the bulbs that are attached to the mother bulb. These are typically smaller and attached to the base of the larger bulb. Gently twist or pull them apart, making sure to keep as many roots intact as possible.
If the bulbs are too tightly connected, you can use a clean, sharp knife to separate them. Make sure to sterilize the knife before and after use to prevent the spread of disease.
Once you have separated the bulbs, check them for any signs of disease or damage. Healthy bulbs should be firm and free of blemishes, while diseased or damaged bulbs should be discarded.
Now you’re ready to replant the bulbs in prepared soil. Follow the same planting instructions as before, ensuring the bulbs are at the correct depth and spaced appropriately for their size.
After planting, water the bulbs thoroughly and apply a thin layer of mulch to help conserve moisture and regulate soil temperature.
By dividing your lily bulbs, you’re not only promoting healthier plants, but you’re also creating more plants that can be moved to other areas of your garden or shared with fellow gardeners. With proper care, your divided lilies should continue to reward you with their stunning, fragrant blooms for many years to come.
Happy Gardening!
Growing Day Lilies can be a fun and rewarding experience, but it does require some knowledge and skill. By following these essential tips and tricks, you can ensure that your lilies receive the correct soil type, planting depth, water, light, and fertilizer needs. With a little bit of patience and care, your lilies will reward you with stunning blooms year after year.

Please be sure to check out my Gardening Blog Post Page for more tips on all types of gardening. Including Seed Saving, Seed Starting, Orchids, Water Gardening, Coldframe Gardening, Indoor Bulb Gardening, Hydroponics, Container Gardening, Mums, Herbs, African Violets, planting Bulbs, Flower Gardening, Vegetable and Fruit Gardening, Indoor Houseplants of all kinds, Cactus, Succulents, Hanging plants, Deer resistant plants and even Bird, Bee, Butterfly and Hummingbird Gardens!