
Starting squash seeds indoors allows gardeners to get a head start on the growing season, ensuring strong plants and early harvests. Squash plants grow quickly, so timing, preparation, and care are essential. With the right techniques, you can successfully grow squash seedlings that thrive when transplanted outdoors.
Types of Squash Seeds to Start Indoors
Several varieties of squash can be started indoors. Summer squashes, such as zucchini, yellow squash, and pattypan, grow quickly and produce tender fruits. Winter squashes, like butternut, acorn, spaghetti, and pumpkins, take longer to mature but store well for months. Specialty squash, including delicata, kabocha, and hubbard, add unique flavors and appearances to your garden. Choosing the right type depends on your gardening goals and available space.
When to Start Squash Seeds Indoors by Zone
Timing depends on your USDA hardiness zone. For most zones, start seeds indoors 3-4 weeks before the last expected frost date. In zones 3-5, this means planting in early to mid-April. Zones 6-7 can start in late March or early April. Warmer zones, like 8-10, may only need to start seeds indoors in early March or rely on direct outdoor sowing. Check your frost dates to plan properly.
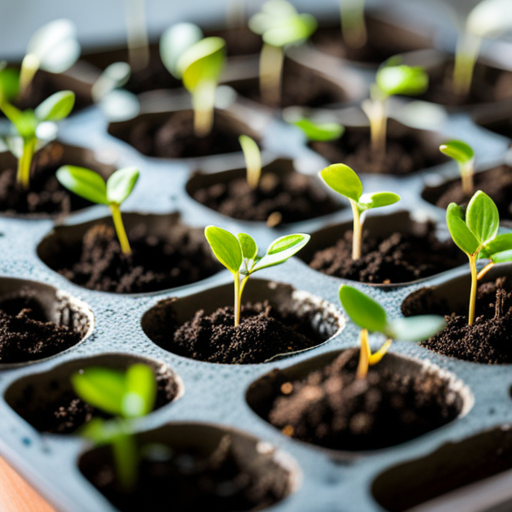
Preparing Trays and Soil for Planting
To start squash seeds, use seed-starting trays or biodegradable pots. Squash seedlings grow quickly and dislike root disturbance, so larger cells or peat pots work best. Fill trays with a light, well-draining seed-starting mix. Avoid garden soil, which can compact and prevent proper drainage. Pre-moisten the soil before planting to create the ideal environment for germination.
Planting Squash Seeds
Plant each seed about 1 inch deep. Place one or two seeds per cell or pot to ensure germination. After planting, gently cover the seeds with soil and lightly press down. Water the trays thoroughly, but avoid overwatering to prevent rot. Cover the trays with a plastic dome or wrap to retain moisture during germination.
Providing Warmth for Germination
Squash seeds need warmth to germinate. Using a heat mat under the trays keeps the soil temperature between 70-85°F. This is not necessary although it does speed up germination. Most seeds sprout within 7-10 days under these conditions. Remove the plastic cover as soon as seedlings emerge to improve airflow and reduce the risk of fungal diseases.
Lighting Needs for Squash Seedlings
Once seeds sprout, move the trays under grow lights. Position the lights 2-3 inches above the seedlings and keep them on for 14-16 hours daily. Adjust the light height as the plants grow to prevent stretching. Rotate the trays occasionally to promote even growth. Squash seedlings require consistent light to develop strong stems and healthy leaves.
Fertilizing Squash Seedlings
When seedlings develop their first true leaves, begin fertilizing. Use a diluted liquid fertilizer, such as a balanced 10-10-10 or fish emulsion, once a week. Avoid over-fertilizing, which can lead to weak growth. Gradually increase feeding as plants grow larger and prepare for transplanting.
Hardening Off Squash Seedlings
Before planting outdoors, harden off seedlings to help them adjust to outdoor conditions. Start about 7-10 days before transplanting. Place seedlings outside in a sheltered area for 1-2 hours on the first day. Gradually increase their time outdoors each day, exposing them to more sunlight and wind. Bring them inside at night, especially if temperatures drop below 50°F.
When and How to Transplant Squash Outdoors
Transplant squash seedlings outdoors after the danger of frost has passed and soil temperatures reach at least 60°F. For most zones, this occurs in late spring. Space plants 24-36 inches apart in rows or mounds to allow room for vines to spread. Prepare planting holes with compost or organic matter to improve soil fertility and drainage.
Carefully remove seedlings from their pots, keeping the root ball intact. Plant them at the same depth as in their trays and water thoroughly to reduce transplant shock. Adding mulch around plants helps retain moisture and prevent weeds.
Final Tips for Growing Squash Successfully
Squash plants thrive with consistent watering, about 1-1.5 inches per week. Using soaker hoses or drip irrigation helps keep the soil moist without wetting the leaves, reducing the risk of mildew. Monitor for pests like squash bugs and cucumber beetles, and address problems quickly.
Starting squash seeds indoors provides gardeners with strong, healthy plants ready to produce abundant harvests. By following these steps, you can enjoy homegrown squash throughout the summer and fall.
Please be sure to check out my Gardening Blog Post Page for more tips on all types of gardening. Including Seed Saving, Seed Starting, Orchids, Water Gardening, Coldframe Gardening, Indoor Bulb Gardening, Hydroponics, Container Gardening, Mums, Herbs, African Violets, planting Bulbs, Flower Gardening, Vegetable and Fruit Gardening, Indoor Houseplants of all kinds, Cactus, Succulents, Hanging plants, Deer resistant plants and even Bird, Bee, Butterfly and Hummingbird Gardens!