
Dead nettle, contrary to its morbid-sounding name, is a versatile addition to any gardener’. This hardy perennial, also known by its scientific name Lamium, is renowned for its attractive foliage, low maintenance requirements, and ease of cultivation. Whether you’re a seasoned green thumb or a beginner looking to green up your space, this post will walk you through each step of how to grow dead nettle.
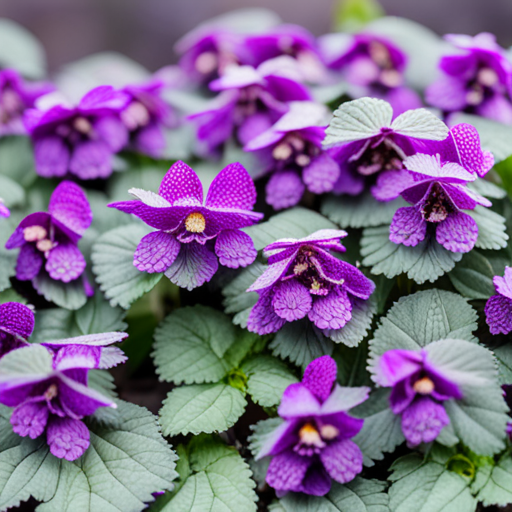
Dead nettle is a member of the mint family, renowned for its square stems – a characteristic feature of all plants in the Lamiaceae family. It boasts a variety of cultivars, each offering a unique blend of color, from variegated greens and whites to striking silver and bronze tones. This plant, native to Europe and Western Asia, thrives in most zones within the United States.
Light Requirements for Dead Nettle
A crucial aspect of cultivating dead nettle successfully is understanding its light requirements. Dead nettle is remarkably adaptable and can thrive in a range of light conditions, but it flourishes best in partial to full shade. This makes it an excellent choice for garden spots that don’t receive constant sunlight. In areas with cooler climates, dead nettle can tolerate more sun, but in warmer regions, protection from the afternoon sun is essential to prevent scorching its leaves. Balancing the right amount of light will ensure your dead nettle displays its vibrant foliage and blooms to their fullest potential.
Soil Preparation for Dead Nettle
Preparing the right soil environment is key to growing a healthy dead nettle. Ideally, dead nettle prefers well-draining soil rich in organic matter. Before planting, it’s beneficial to work compost or aged manure into the soil to improve its fertility and structure. This plant tolerates a wide range of soil pH but thrives best in slightly acidic to neutral soils, with a pH level between 6.0 and 7.0. If your garden soil is heavy clay or too sandy, incorporating organic material can help achieve the balance dead nettle needs to flourish. Ensuring the soil is well-aerated and moist will support robust growth and vibrant blooms.
Planting Dead Nettle
Once you have prepared the soil appropriately for dead nettle, the next step is planting. Dead nettle can be grown from both seeds and plant divisions, making it versatile in its propagation methods. If you’re starting with seeds, it’s best to sow them indoors in late winter to early spring, using a seed starting mix. Keep the soil moist but not waterlogged, and provide plenty of indirect sunlight until the seedlings are strong enough to transplant outdoors. This usually occurs after the risk of frost has passed and the seedlings are a few inches tall.
For those opting for plant divisions, the process involves separating a larger plant into smaller segments, each with its own roots, and replanting them. This method is ideal for the spring or fall. Ensure each division is planted at the same depth as it was originally growing and space them approximately 12 to 18 inches apart to allow for spread. Water the newly planted dead nettle thoroughly and maintain consistent moisture levels as the plants establish themselves. Mulching around the plants can help retain soil moisture and reduce weed competition, creating an ideal environment for your dead nettle to thrive.
Water and Fertilizer Requirements for Dead Nettle
Keeping your dead nettle hydrated without overwatering is crucial for its health and growth. This plant prefers soil that remains consistently moist but well-drained. During dry spells or in warmer climates, regular watering may be necessary to maintain the right moisture level. However, it’s important to allow the soil to somewhat dry out between watering sessions to prevent root rot, a common issue in overly saturated conditions.
When it comes to feeding your dead nettle, less is often more. This perennial benefits from a light application of a balanced, slow-release fertilizer in the spring as new growth appears. Over-fertilizing can lead to excessive foliage with fewer blooms, so it’s best to err on the side of caution. Additionally, enriching the soil with compost or a top dressing of well-aged manure yearly provides the nutrients dead nettle needs to flourish without the risk of burning the plant with chemical fertilizers.
How and When to Divide Dead Nettle
Dividing dead nettle is a simple and effective way to manage the spread of this hardy perennial and rejuvenate older plants. The best time to divide dead nettle is in the early spring or fall, when the weather is cool and the plant is not in peak bloom. This timing helps reduce stress on the plant and encourages quick recovery.
To divide dead nettle, start by watering your plant thoroughly a day before you plan to divide it. This will ensure that the plant is hydrated and easier to work with. Using a spade or garden fork, gently lift the entire plant out of the ground, being careful to keep as much of the root system intact as possible.
Once the plant is out, use a sharp knife or spade to divide the root ball into sections. Each section should have a good amount of roots and several shoots. Be decisive with your cuts to minimize damage and ensure quick recovery.
Replant the divisions as soon as possible, placing them at the same soil depth they were growing at originally. Space the divisions 12 to 18 inches apart to allow ample room for growth. Water the newly planted divisions thoroughly and keep the soil moist but not waterlogged as they establish themselves. Applying a layer of mulch can help retain moisture and suppress weeds.
Dividing your dead nettle not only helps to keep your garden tidy but also invigorates the plants, encouraging more vigorous growth and blooming.
Overwintering Dead Nettle
Successfully overwintering dead nettle ensures it thrives year after year, even in colder climates. Dead nettle is a hardy perennial that can withstand frost and minor freezes without much damage. However, taking a few proactive steps can help ensure its survival and vigor through the winter months. First, reduce watering as the temperature begins to drop in the fall, allowing the plant to harden off and prepare for dormancy. Mulching around the base of the plants with a thick layer of organic material such as straw or leaf mold will help insulate the roots against extreme cold temperatures.
Additionally, if you’re in a region with harsh winters, consider covering your dead nettle with a frost blanket or burlap on particularly cold nights to provide extra protection. In spring, once the threat of frost has passed, remove any dead foliage to make way for new growth. These simple steps can significantly enhance your dead nettle’s health and longevity, ensuring a robust return each year.
Happy Gardening!
Dead nettle is a treasure trove for gardeners, offering year-round interest with its unique blooms and colorful foliage. By understanding its needs and the care it requires, you’ll be on your way to creating a garden filled with this remarkable plant. Whether you choose to grow it in borders, containers, or as ground cover, the beauty and resilience of dead nettle will be a source of enjoyment and satisfaction for years to come.
Please be sure to check out my Gardening Blog Post Page for more tips on all types of gardening. Including Seed Starting, Orchids, Water Gardening, Coldframe Gardening, Indoor Bulb Gardening, Hydroponics, Container Gardening, Mums, Herbs, African Violets, planting Bulbs, Flower Gardening, Vegetable and Fruit Gardening, Indoor Houseplants of all kinds, Cactus, Succulents, Hanging plants, Deer resistant plants and even Bird, Bee, Butterfly and Hummingbird Gardens!