
Hydrangeas are some of the most popular and beloved flowering plants out there. Their amazing blooms are absolutely spectacular and a crowd favorite in gardens all around the world. But, as popular as they are, many people still struggle with successfully growing them. In this post, we will be discussing some tips that will give you tips on how to grow a healthy and beautiful hydrangea. We’ll be covering important aspects like soil type, water, light, and fertilizer – so grab your gardening gloves and let’s get started!
Zone Type for Hydrangeas
Understanding the correct zone for planting hydrangeas is crucial for their successful growth. Hydrangeas thrive in USDA hardiness zones 3 through 9. These zones encompass a wide range of climates, from the cooler regions of the north to the warmer southern areas. However, it’s important to note that not all hydrangea species are suited to all zones. For instance, Panicle and Smooth hydrangeas are more cold-hardy and can tolerate zones 3 and 4, while Bigleaf and Oakleaf varieties prefer the warmer climates of zones 5 through 9. Always check the specific requirements of the hydrangea variety you have chosen to ensure it matches your local climate and conditions.
How to Plant Hydrangeas
Planting hydrangeas starts with choosing the right location. Hydrangeas thrive in well-drained soil, but they also need plenty of moisture. A spot with morning sun and afternoon shade is often perfect. You’ll want to dig a hole that is as deep as the root ball and twice as wide. Place the hydrangea in the hole, making sure the top of the root ball is level with or slightly above the ground.
Fill in around the root ball with soil, firming gently as you go. Hydrangeas do well in slightly acidic soil, so you may want to add a bit of peat moss or compost to the planting hole to help bolster acidity. Once planted, water the hydrangea thoroughly. For the first week or so after planting, you may need to water daily to ensure that the roots establish well. After that, water as needed, aiming for about 1 inch of water per week.
Preparing the Soil for Hydrangeas
The soil where hydrangeas grow can greatly influence their health and blooming. Hydrangeas prefer rich, well-drained, moist soil. Start by testing the soil’s pH level. Hydrangeas usually thrive in slightly acidic soil, with a pH level between 5.0 and 6.0. If your soil is too alkaline, you can lower the pH by adding sulfur or peat moss. If it’s too acidic, you can raise the pH by incorporating lime.
Next, ensure your soil is well-draining to prevent waterlogged conditions that can lead to root rot. If your soil is heavy clay, consider adding compost or other organic material to improve drainage. Similarly, if your soil is too sandy and dries out quickly, adding compost can help retain moisture. This soil meter can measure pH levels, nutrient levels and moisture content.
Lastly, enrich the soil with a slow-release granular fertilizer or organic compost. This will provide the nutrients that hydrangeas need to grow and bloom. Remember to mix the amendments well with the existing soil for better root penetration. Always water thoroughly after applying any soil amendments to help them distribute evenly throughout the soil.
How Much Sun do Hydrangeas Need?
The amount of sunlight hydrangeas require can vary depending on the specific variety, but generally, they need full sun in the morning, with some afternoon shade to protect from the hot midday sun. Typically, hydrangeas need about 3-6 hours of sun each day. Varieties such as the Panicle and Smooth hydrangeas can tolerate full sun, while varieties like the Bigleaf and Oakleaf hydrangeas prefer partial shade. However, no hydrangea will thrive if it’s planted in deep shade, as this can cause weak growth and reduced flowering. Use a sun calculator or observe your garden through the day to find the best spot in your garden that meets these criteria. By understanding the light needs of your specific hydrangea, you can choose the perfect spot for planting and ensure your hydrangeas are set up for success.
How to Water and Fertilize your Hydrangeas
When it comes to watering hydrangeas, consistency is key. These plants thrive in consistently moist soil. However, avoid overwatering as this can lead to root rot. A good rule of thumb is to water hydrangeas once a week or more frequently during hot, dry periods. Make sure the water goes deep into the soil to encourage the roots to grow downwards.
As for fertilizing, hydrangeas don’t require much. Over-fertilizing can lead to more leaves and fewer blooms. Instead, a slow-release granular fertilizer applied once in spring and once in late summer will suffice for most hydrangeas. Try to use a fertilizer high in phosphorus (the middle number in fertilizer ratios) to promote blooming.
However, always keep in mind that the specific watering and fertilizing needs may vary depending on the particular variety of hydrangea you are growing. Always refer to the care instructions provided for your specific hydrangea variety. Regularly monitor your hydrangeas’ health and adjust your care routine as necessary to ensure they thrive.
How to Grow Hydrangeas from Cuttings
Starting hydrangeas from cuttings is a cost-effective way to grow your garden. To start, choose a healthy hydrangea bush and cut a 4-6 inch stem from a non-flowering shoot early in the morning. Remove the lower leaves, leaving only the top two. Also, cut larger leaves back by half to limit water loss.
Next, dip the end of the cutting into a rooting hormone powder and tap off any excess. This step is optional but can encourage faster root formation. Then, plant the cutting into a pot filled with a mix of perlite and peat moss or a well-draining potting mix, ensuring the leaf nodes are beneath the soil surface.
Keep the cutting hydrated by misting the leaves daily and keeping the soil consistently moist but not waterlogged. Covering the cutting with a plastic bag can create a mini greenhouse effect, keeping humidity levels high. Place the pot in a location that gets indirect sunlight, as direct sunlight can dry out the cutting.
Keep an eye on your cutting for signs of growth. Roots should start to form after a few weeks, but it may take longer in some cases. Once the cutting has developed a robust root system, it can be transplanted to a larger pot or directly in your garden. Remember to gradually introduce your new hydrangea to its permanent location to avoid shocking it. Be patient, as hydrangeas can take a year or two to bloom after being started from cuttings.
Growing hydrangeas from cuttings is a rewarding process that allows you to multiply your hydrangeas without a significant investment. With patience and care, you can fill your garden with these spectacular bloomers.
How Big Do Hydrangeas Get?
Hydrangeas are renowned for their large, vibrant blooms, but the size of the plant itself can vary significantly depending on the variety. The most common hydrangeas can grow anywhere from 3-6 feet in height. The Bigleaf hydrangeas, popular for their large flower heads, typically reach a height of 9 feet. Smooth hydrangeas, known for their round, white flowers, are more compact, usually growing to about 2-4 feet tall. Climbing hydrangeas, as the name suggests, can reach significant heights, extending up to 45 feet under ideal growing conditions.
The spread of these plants also varies. Most hydrangeas have a bushy growth habit and can spread as wide as they are tall, particularly if they are well cared for and given plenty of space to grow.
It’s important to consider the mature size of the hydrangea when planting, to ensure it has enough space to grow and thrive. Remember, hydrangeas don’t only grow upward; they also need room to expand outward. Always consider the variety’s expected mature size when planning your garden layout. This will help ensure that your hydrangeas have the space they need to flourish and show off their stunning blooms to their best advantage.
How to Care for Hydrangeas in a Pot
Caring for hydrangeas in a pot involves several key steps to ensure their health and vibrancy.
- Choosing the Right Pot: The pot should be large enough to accommodate the hydrangea’s root ball and offer space for growth. A pot with a minimum diameter of 12-16 inches would be suitable for most varieties. Ensure the pot has sufficient drainage holes to prevent waterlogging.
- Potting Mix: Use a well-draining potting mix, preferably with organic matter. This will aid in maintaining moisture while preventing waterlogging.
- Watering: Hydrangeas in pots need regular watering, as they dry out faster than those in the ground. Water the plant when the top inch of soil feels dry, ensuring the water drains out from the bottom of the pot.
- Feeding: Potted hydrangeas may require more frequent fertilizing. Use a slow-release granular fertilizer, high in phosphorus to promote blooming, every two months during the growing season.
- Sunlight & Placement: Position the pot where it can receive morning sun and afternoon shade. If your hydrangeas are in a sunnier location, they may need extra watering to prevent wilting.
- Winter Care: Overwintering hydrangeas in a pot can be a challenge in colder zones, as they are more vulnerable to freezing temperatures. Consider relocating the pot to a sheltered location or wrapping it with burlap to provide some insulation against the cold.
Remember, hydrangeas in pots require a bit more attention and care, but with the right conditions and regular monitoring, your potted hydrangeas can thrive and produce stunning blooms.
Different Types of Hydrangeas and their Features
There are several types of hydrangeas each with unique features that set them apart.
- Bigleaf Hydrangeas (Hydrangea macrophylla): These are the most popular hydrangeas, known for their large flower heads. They boast a diverse range of colors from vibrant blues, pinks, and purples to softer pastels, depending on the acidity of the soil.
- Smooth Hydrangeas (Hydrangea arborescens): Recognized by their round, white flowers, smooth hydrangeas are more compact but pack a punch with their stunning snowball-like blooms.
- Climbing Hydrangeas (Hydrangea anomala subsp. petiolaris): This type of hydrangea is a true climber, it can reach significant heights, extending up to 15 meters under ideal growing conditions. They produce beautiful lacecap flowers and have the added advantage of being tolerant to colder climates.
- Oakleaf Hydrangeas (Hydrangea quercifolia): Named for their striking, oak leaf-shaped foliage, these hydrangeas offer year-round interest. Their flowers are cone-shaped, starting off white, then turning a beautiful shade of pink as they age. In autumn, the foliage turns a stunning crimson color.
- Paniculate Hydrangeas (Hydrangea paniculata): Known for their cone-shaped flower clusters, paniculate hydrangeas are hardy and can tolerate a variety of soil conditions. They typically bloom in white, with the flowers gradually turning a pinkish hue as they mature.
Remember, the choice of hydrangea type will largely depend on your specific garden needs and climatic conditions. Each type brings its own beauty and character to your garden, offering endless possibilities for landscape designs.
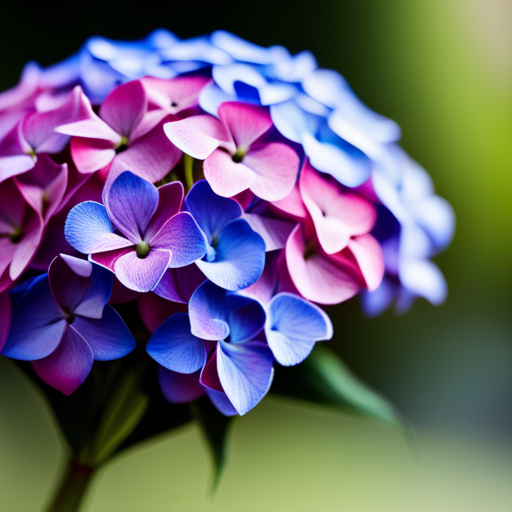
Changing the Color of Hydrangeas by Adjusting Soil pH
The color change in hydrangeas is primarily influenced by the acidity or alkalinity of the soil in which they are planted. This is due to a group of pigments in the flowers called anthocyanins, which can change color based on the pH level of the soil.
- To Turn Hydrangeas Blue: If you want your hydrangeas to turn blue, you will need to make your soil more acidic. This can be achieved by adding soil amendments like sulfur, peat moss, or aluminum sulfate. Mix these materials into your soil, following the label directions for the appropriate amounts. These amendments increase the acidity of the soil, which in turn makes the flowers blue.
- To Turn Hydrangeas Pink: To make your hydrangeas bloom in pink, the soil needs to be more alkaline. You can do this by adding garden lime to your soil. The amount of lime you’ll need to add will depend on how alkaline you want your soil to be, so it’s always best to check the label for instructions.
- To Turn Hydrangeas Purple: If you’re aiming for purple flowers, aim for a soil pH that is somewhere in between acidic and alkaline. You may need to experiment with adding small amounts of lime or sulfur to achieve the right balance.
Remember, changing the pH of your soil is a gradual process and requires patience. Always test your soil’s pH before making any amendments to know how much to add. And keep in mind, not all hydrangeas change color – some varieties, like the white ones, will remain their original color regardless of soil pH.
Happy Gardening!
Growing hydrangeas takes time, patience, and effort. Understanding the four fundamentals: soil type, water, light and fertilizer, is essential in ensuring your hydrangea thrives. If you use the guidelines above, planting healthy and beautiful hydrangeas is achievable. Remember to provide fertile soil to promote root growth, water regularly to keep the soil moist, give them ample sunlight but protect them from harsh rays, and finally, fertilize to promote healthy growth and flower production. By following these tips, you will be well on your way to having beautiful and thriving hydrangeas in your garden.
Please be sure to check out my Gardening Blog Post Page for more tips on all types of gardening. Including Seed Saving, Seed Starting, Orchids, Water Gardening, Coldframe Gardening, Indoor Bulb Gardening, Hydroponics, Container Gardening, Mums, Herbs, African Violets, planting Bulbs, Flower Gardening, Vegetable and Fruit Gardening, Indoor Houseplants of all kinds, Cactus, Succulents, Hanging plants, Deer resistant plants and even Bird, Bee, Butterfly and Hummingbird Gardens!