
Potatoes are a versatile and beloved staple of many diets around the world. With a little patience, effort, and the right technique, you can transform your garden into a vibrant potato patch. Whether you’re an experienced gardener or just starting, this post will walk you through everything you need to know about how to plant potatoes.
Before you plunge your hand into the dirt, it’s essential to understand the potatoes themselves. Potatoes are a cool-season crop, meaning they prefer moderate temperatures and plenty of water. Planting potatoes can be done in a variety of climates, but they should generally be grown when the soil temperature is between 60-70°F (15-21°C). It’s important to choose the right variety for your local climate and your taste preference, whether you prefer russets, reds, or fingerlings.
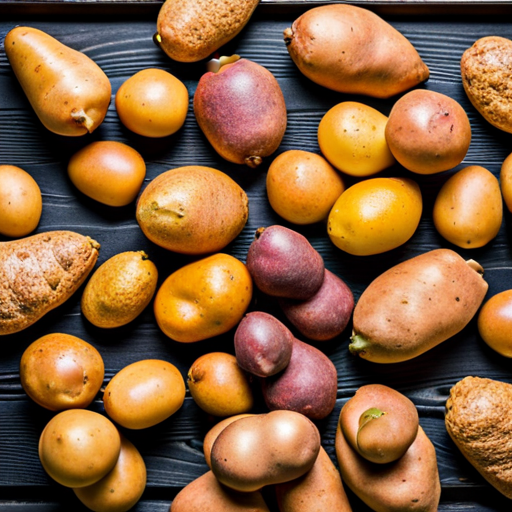
Different Types of Potatoes and Their Features
When it comes to selecting potato varieties, the choices can be overwhelming, but understanding the characteristics of each can help tailor your decision.
- Russet Potatoes: Often used for baking and frying, russets are large, starchy potatoes with rough, brown skin and fluffy flesh.
- Red Potatoes: These waxy potatoes hold their shape well after cooking, making them ideal for potato salads, soups, and stews.
- Yellow Potatoes: Their creamy texture and buttery flavor make them perfect for mashing or roasting.
- White Potatoes: Similar to red potatoes in texture, they have a subtler flavor and are a versatile choice for various culinary uses.
- Fingerling Potatoes: They are small, elongated, and come in various colors. With a waxy texture, fingerlings are great for roasting and salad dishes.
- Purple/Blue Potatoes: Rich in antioxidants and with a nuttier flavor than their counterparts, these potatoes add a colorful twist to any dish.
Each type brings its unique taste and texture to the table, and your choice will depend on the intended use in the kitchen and personal taste preferences.
Selecting the Right Location
Potatoes thrive in full sun and well-drained, nutrient-rich soil. Choose a spot in your garden that receives at least six hours of direct sunlight each day and where water does not pool after a heavy rain. The soil should be loose and airy, as compacted soil can inhibit tuber growth. To test the drainage of your soil, dig a hole about 1 foot deep, fill it with water, and check back in a few hours. If the water has not drained, consider building a raised bed or adding organic matter to improve drainage.
Preparing the Soil
Preparing the soil is a crucial step in creating a conducive environment for potato growth. Begin by turning the soil to a depth of at least 12 inches using a spade or tiller. This aerates the soil, allowing roots to penetrate deeply and water to soak in efficiently. Next, mix in a generous amount of well-rotted compost or aged manure to supply nutrients that potatoes need to thrive. If your soil is clay-heavy, incorporate coarse sand or organic material to improve its structure and drainage. Perform a soil test to determine the pH level, aiming for a slightly acidic pH between 5.0 and 6.0. Amend the soil accordingly if your pH is outside this range. After these amendments, rake the soil to create a smooth, level surface, breaking up any large clods and removing rocks and debris that could obstruct tuber development.
Planting your Potatoes
To begin planting your potatoes, you’ll first need to prepare your seed potatoes. It’s recommended to use certified seed potatoes to avoid disease, which can be purchased from a reputable garden supplier. Each seed potato should have at least two or three ‘eyes’ or growth points. If your seed potatoes are large, you can cut them into smaller pieces, making sure each piece has at least one eye. After cutting, let the pieces dry for a few days to form a protective callus over the cuts, which helps prevent rot.
When your seed potatoes are ready, dig trenches in your prepared soil about 3 to 4 inches deep and 12 inches apart. Plant the seed potatoes eye-side up, spaced about 12 inches apart within the trenches. Cover with approximately 3 inches of soil, leaving some of the trench exposed. As the potato plants grow, continue to add soil around the bases to support the stems and encourage more prolific tuber development, a process known as “hilling”. Remember to water the trenches well after planting, and continue to provide regular moisture without over-saturating the soil.
Maintaining Your Potato Plants
Maintaining your potato plants is critical for a healthy and abundant harvest. After planting, ensure the soil remains moist but not waterlogged, as consistent moisture is key to uniform tuber growth. Water your potatoes deeply once a week, providing 1-2 inches of water each time, and more frequently during dry spells. Mulching with straw or other organic materials can help retain moisture, suppress weeds, and keep the soil cool.
Monitor your plants for pests such as potato beetles or aphids, and use organic or recommended controls if necessary. As the plants grow, “hill” them by pulling up soil around the stems every few weeks to protect new tubers from sunlight, which can turn them green and toxic. Stop hilling when the foliage becomes too dense. Fertilize the plants with a low-nitrogen, high-potassium fertilizer to encourage tuber development over leaf growth.
Finally, be on the lookout for signs of disease, such as wilting or discolored leaves, and act quickly to remove infected plants to prevent spread. With proper care, your potatoes will mature in about 90-120 days, depending on the variety. When the foliage begins to yellow and die back, cease watering to allow the tubers to cure for a few days before harvest.
Harvesting Your Bounty
Harvesting your potatoes at the right time is crucial for enjoying their full flavor and storability. Begin to harvest potatoes once the tops of the vines have died back, signaling that the tubers have reached maturity. Use a garden fork to gently lift the potatoes to avoid damaging them. Start digging a few inches away from the stems to prevent piercing the tubers.
Once harvested, allow the potatoes to sit in a dry, cool place for a few hours to dry out the skin, a process known as curing. This step hardens the skin and helps to extend the shelf life of your homegrown potatoes. After curing, store the potatoes in a dark, cool, and well-ventilated area to prevent spoilage. Avoid washing the potatoes before storage, as excess moisture can lead to decay. Regularly check your bounty for any signs of rot and use any damaged potatoes first to ensure nothing goes to waste. With these simple steps, you can enjoy your harvest for months to come.
Happy Potato Gardening!
In conclusion, growing potatoes in your home garden can be a rewarding endeavor that yields a bountiful harvest of homegrown tubers with exceptional flavor and variety. By carefully selecting the right location, preparing the soil, planting, maintaining, and finally harvesting at the right time, you can enjoy the fruits of your labor for many meals to come. With patience and care, your garden can provide not only sustenance but also the deep satisfaction that comes from nurturing plants from seed to harvest. Remember, each step plays a crucial role in the health and productivity of your potato crop, ensuring that every bite reflects the love and effort invested in its growth.
Please be sure to check out my Gardening Blog Post Page for more tips on all types of gardening. Including Seed Starting, Orchids, Water Gardening, Coldframe Gardening, Indoor Bulb Gardening, Hydroponics, Container Gardening, Mums, Herbs, African Violets, planting Bulbs, Flower Gardening, Vegetable and Fruit Gardening, Indoor Houseplants of all kinds, Cactus, Succulents, Hanging plants, Deer resistant plants and even Bird, Bee, Butterfly and Hummingbird Gardens!